参考 https://blog.csdn.net/m0_51510236/article/details/132641343
nfs服务器:192.168.18.12
master:192.168.18.11
1、在nfs服务器安装nfs
yum install nfs-utils -y
vim /etc/exports
/data/nfs/data1G *(rw,no_root_squash,no_all_squash,sync)
/data/nfs/data2G *(rw,no_root_squash,no_all_squash,sync)
/data/nfs/data3G *(rw,no_root_squash,no_all_squash,sync)
/data/nfs/data4G *(rw,no_root_squash,no_all_squash,sync)
systemctl start nfs && systemctl enable nfs
exportfs -rv
在别的服务器验证nfs

以下步骤在master操作
2、下载nfs-subdir源码包,github地址 https://github.com/kubernetes-sigs/nfs-subdir-external-provisioner/releases
wget https://github.com/kubernetes-sigs/nfs-subdir-external-provisioner/archive/refs/tags/nfs-subdir-external-provisioner-4.0.18.tar.gz
3、解压
tar -zxvf nfs-subdir-external-provisioner-4.0.18.tar.gz
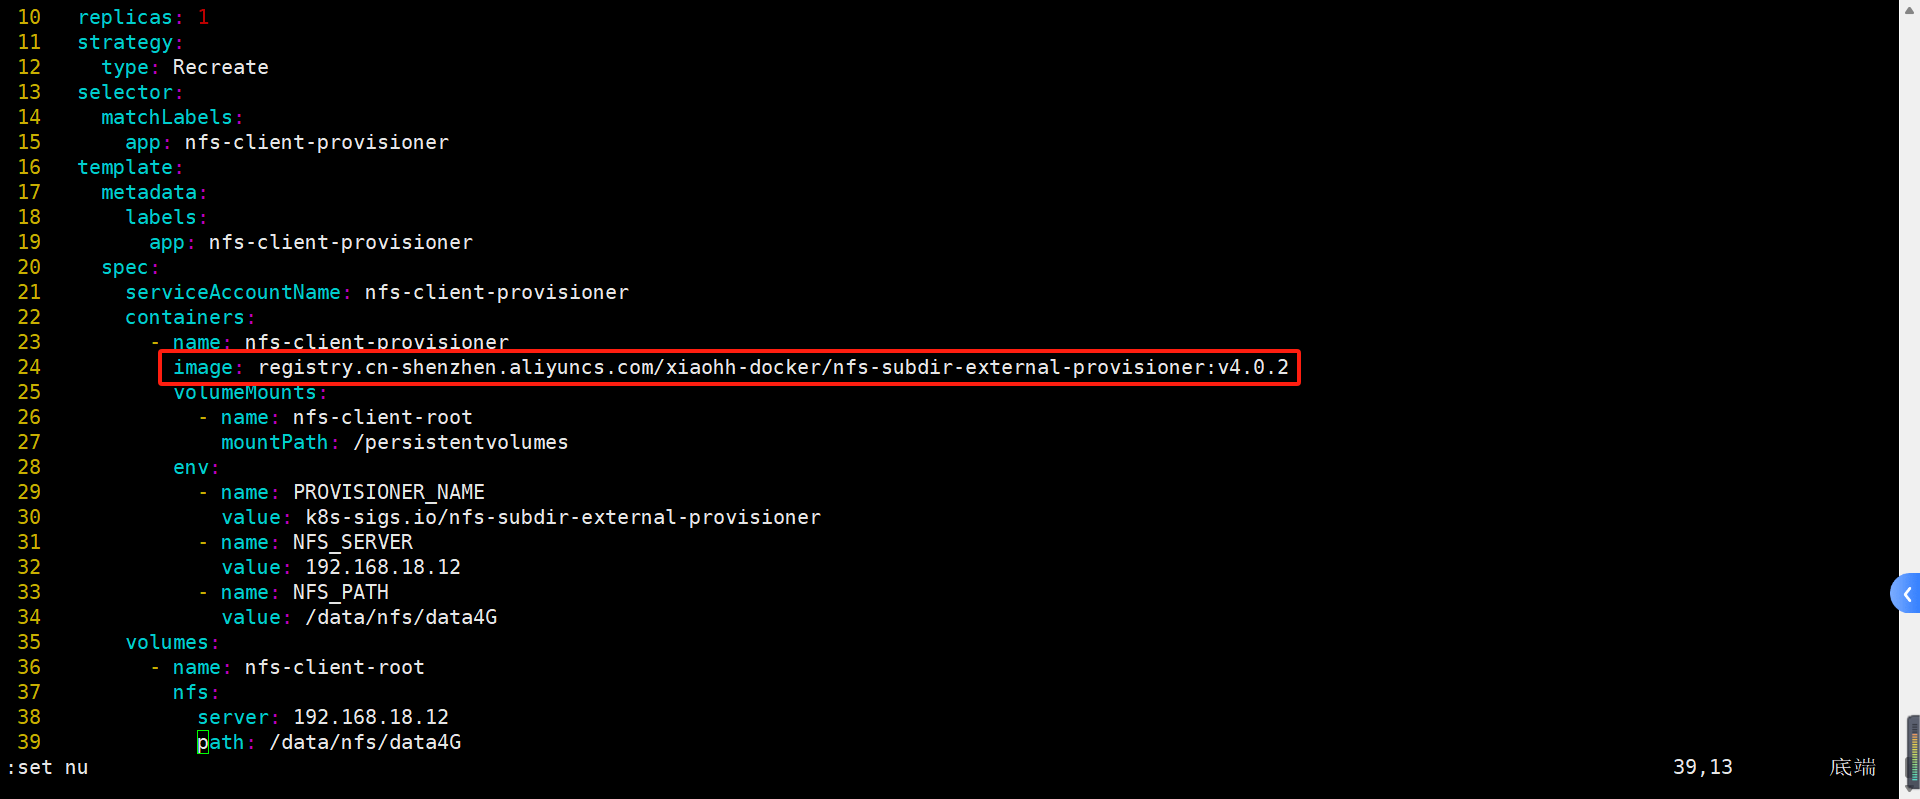
4、需要修改的就是 deployment.yaml ,修改镜像仓库地址为 registry.cn-shenzhen.aliyuncs.com/xiaohh-docker/nfs-subdir-external-provisioner:v4.0.2
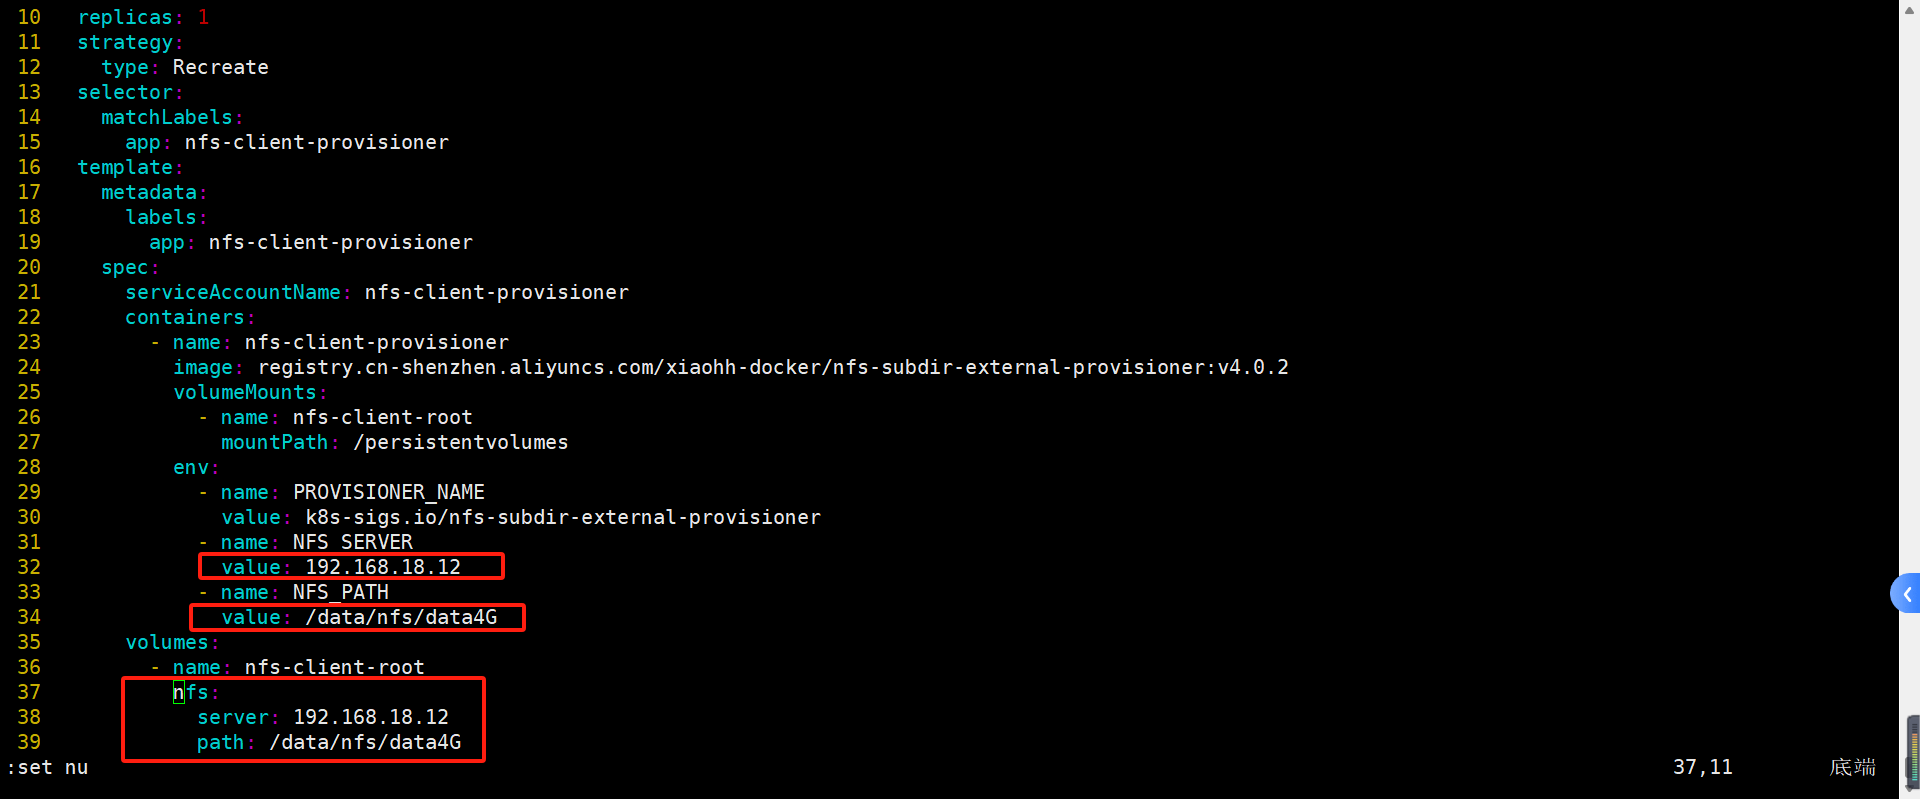
5、修改一下deployment.yaml的nfs服务器地址和nfs服务器内共享的目录:
6、安装动态供给,直接执行 kubectl apply -k . 安装。可以看到生成了nfs-client的pod和storageclass,因为源码目录里的class.yml定义了storageclass,deployment.yaml定义了pod。

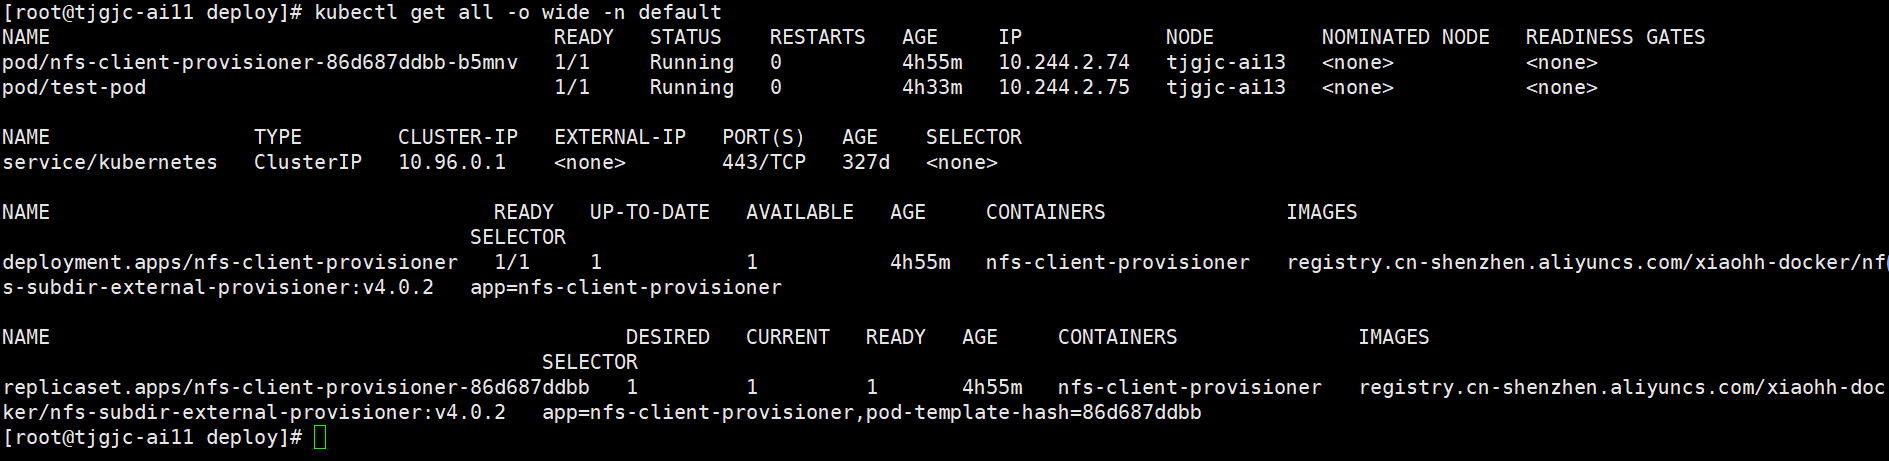
7、可以执行下面这个行命令查看是否部署完成:
8、编写yaml验证nfs动态存储
vim  pod-exam.yaml

---
apiVersion: v1
kind: PersistentVolumeClaim
metadata:
  name: test-claim
spec:
  storageClassName: "nfs-client"
  accessModes:
  - ReadWriteMany
  resources:
    requests:
      storage: 1Gi
---
apiVersion: v1
kind: Pod
metadata:
  name: test-pod
spec:
  containers:
  - name: test-pod
    image:  nginx
    volumeMounts:
    - name: nfs-pvc
      mountPath: "/usr/share/nginx/html"
  volumes:
  - name: nfs-pvc
    persistentVolumeClaim:
      claimName: test-claim
9、运行kubectl apply -f pod-exam.yaml 后到nfs服务器的挂载目录看看,查看pv和pvc


10、进入用到pvc的pod容器里面创建文件,发现nfs挂载目录也有这个文件。验证完成。


声明:本站所有文章,如无特殊说明或标注,均为本站原创发布。任何个人或组织,在未征得本站同意时,禁止复制、盗用、采集、发布本站内容到任何网站、书籍等各类媒体平台。如若本站内容侵犯了原著者的合法权益,可联系我们进行处理。