File
- File对象既可以代表文件,也可以代表文件夹。
- File封装的对象仅仅是一个路径名,这个路径可以是存在也可以是不存在的
路径1: "abc\\a.txt"
绝对路径:
路径1: "C:\\a.txt"
IDEA的相对路径是针对Project来说的
- 构造方法

//1. String路径创建
String str = "D:\\Users\\alienware\\a.txt";
File f1 = new File(str);
System.out.println(f1);

//2. 根据父路径 + 子路径创建
String parent = "D:\\Users\\alienware";
String child = "a.txt";
File f2 = new File(parent, child);
System.out.println(f2);

//3. 根据父File + 子路径创建
File parentFile = new File(parent);
File f3 = new File(parentFile, child);
System.out.println(f3);
但是自行拼接的分隔符\\是windows系统的,File类提供的拼接构造方法会先获取操作系统,根据操作系统选择分隔符
- 文件路径的拼接符:
String str1 = "D:\\Users\\alienware\\a.txt"; // 转义字符
String str2 = "D:\Users\alienware\a.txt"; // 不需要转义
String str3 = String str = "D:" + File.separator+ "Users" + File.separator + "alienware" + File.separator +  "a.txt";
常用方法
获取信息、判断
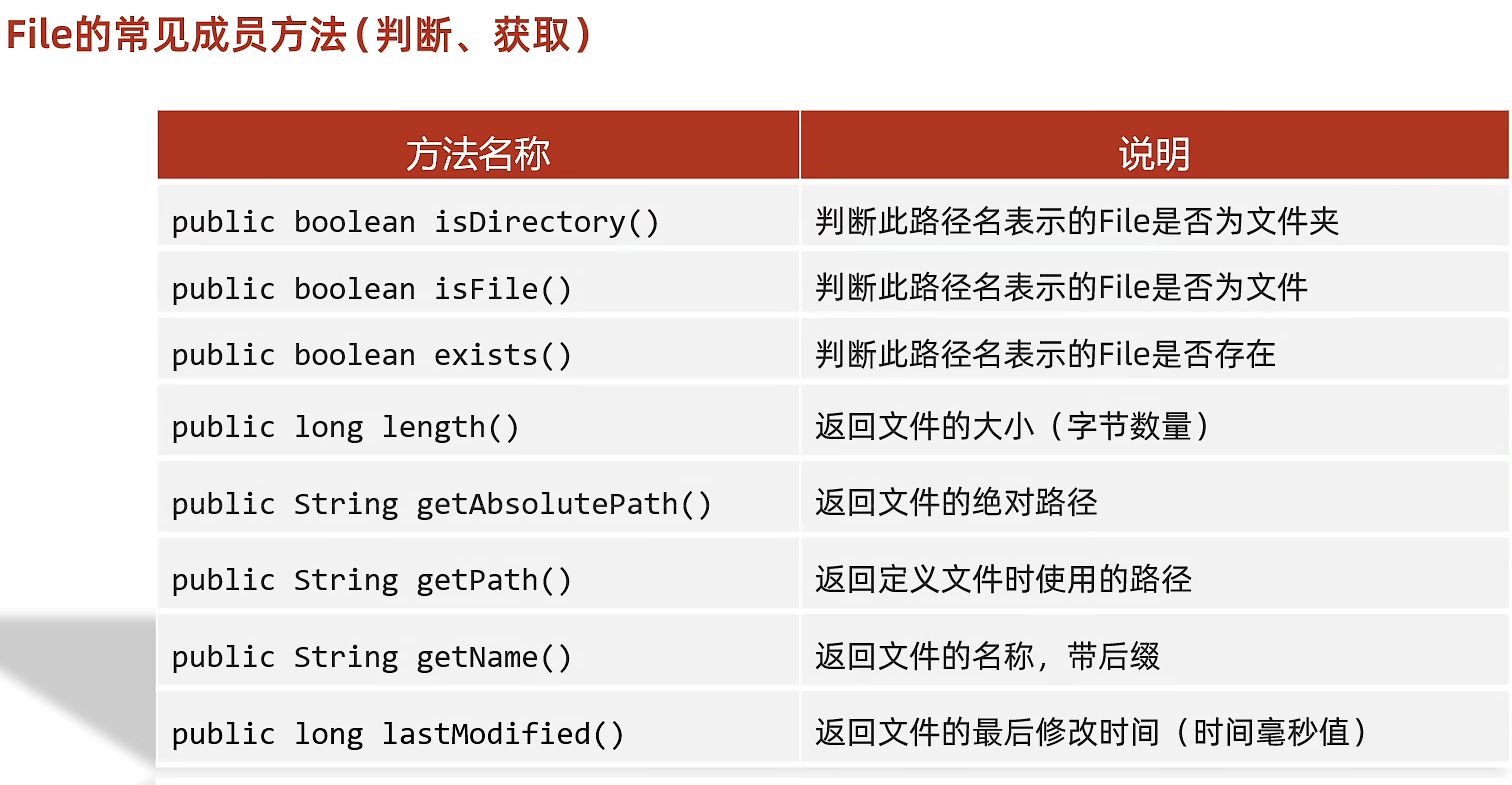
- 是否存在
File类表示的路径可能是存在的,也可能是不存在的,肯定会有判断相关的方法
是否存在?-> 是文件?
-> 是路径?
然后才能获取文件大小/路径(相对、绝对)/名称/修改时间。
String parentStr = "D:\\Users\\alienware";
String notExist = "D:\\Users\\alienwar";
String childStr = "a.txt";
File parentDir = new File(parentStr);
File txt = new File(parentDir, childStr);

System.out.println("parentDir.isDirectory() = " + parentDir.isDirectory()); //true
System.out.println("txt.isFile() = " + txt.isFile());//true

System.out.println("new File(notExist).exists() = " + new File(notExist).exists());//false
- 文件大小:
File videoFile = new File(videoStr);
System.out.println("videoFile.length() = " + videoFile.length() + "bytes");
System.out.println("videoFile.length() / 1024 = " + videoFile.length()/1024 + "kb");
System.out.println("videoFile.length() / 1024 /1024 = " + videoFile.length()/1024/1024 + "mb");
注意:
- 如果路径不存在返回的大小也是0
- 如果是文件夹,即使有内容也是4096。这是文件夹文件本身的大小
计算文件夹的大小需要将所有文件累加在一起
- 获取文件绝对路径、创建File对象时使用的路径、文件名(带后缀)、最后修改时间
//1. 返回文件绝对路径
String str = "D:\\Users\\alienware\\a.txt";
File f1 = new File(str);
System.out.println(f1.getAbsolutePath());

//2. 获取定义文件时的路径
String parent = "D:\\Users\\alienware";
String child = "a.txt";
File parentFile = new File(parent);
File f2 = new File(parentFile, child);
System.out.println(f2.getPath()); //D:\Users\alienware\a.txt

File f3 = new File(parent, child);
System.out.println(f3.getPath()); //D:\Users\alienware\a.txt

//3. 获取文件名,带后缀

//如果文件是文件:
System.out.println(f1.getName()); //a.txt
//如果文件是文件夹:
System.out.println(parentFile.getName()); //alienware

//4. 返回最后修改时间
System.out.println(f3.lastModified()); //1699527367699
System.out.println(new SimpleDateFormat("yyyy-MM-dd mm:HH:ss SSS").format(f3.lastModified())); //2023-11-09 56:18:07 699

//5. 获取父路径

//以String形式获取
System.out.println(f1.getParent()); //String : D:\Users\alienware

//以File形式获取
System.out.println(f1.getParentFile()); //File : D:\Users\alienware
创建、删除

- boolean createNewFile
//1. 创建新文件 createNewFile 返回true成功,false失败

String path = "D:\\Users\\alienware\\ab.txt";
File file = new File(path);
try {
    System.out.println(file.createNewFile() ? "成功" : "失败");
catch (IOException e) {
    e.printStackTrace();
}
- 当前文件存在,不会报错,只会返回false
- 如果File指定的路径中某个目录不存在,抛出异常 IOException: 系统找不到指定的路径
- 可以创建没有后缀名的文件
- boolean mkdir
//2. 创建单级文件夹
String path = "D:\\Users\\alienware\\abcd";
File file = new File(path);

System.out.println(file.mkdir() ? "成功" : "失败");
注意:目录下不能有一个叫abc的目录,同时又存在一个叫abc的无后缀名文件;windows当中路径是唯一的
- boolean mkdirs
//3. 创建多级文件夹
String path = "D:\\Users\\alienware\\aaa\\bbb\\ccc\\ddd";
File file = new File(path);

System.out.println(file.mkdirs() ? "成功" : "失败");
- boolean delete
删除空文件夹、文件
//4. 删除空文件夹、文件
String path = "D:\\Users\\alienware\\aaa\\bbb\\ccc\\ddd";
File file = new File(path);

System.out.println(file.delete() ? "成功" : "失败");
- 删除不走回收站
- 只能删除文件或空文件夹
获取并遍历
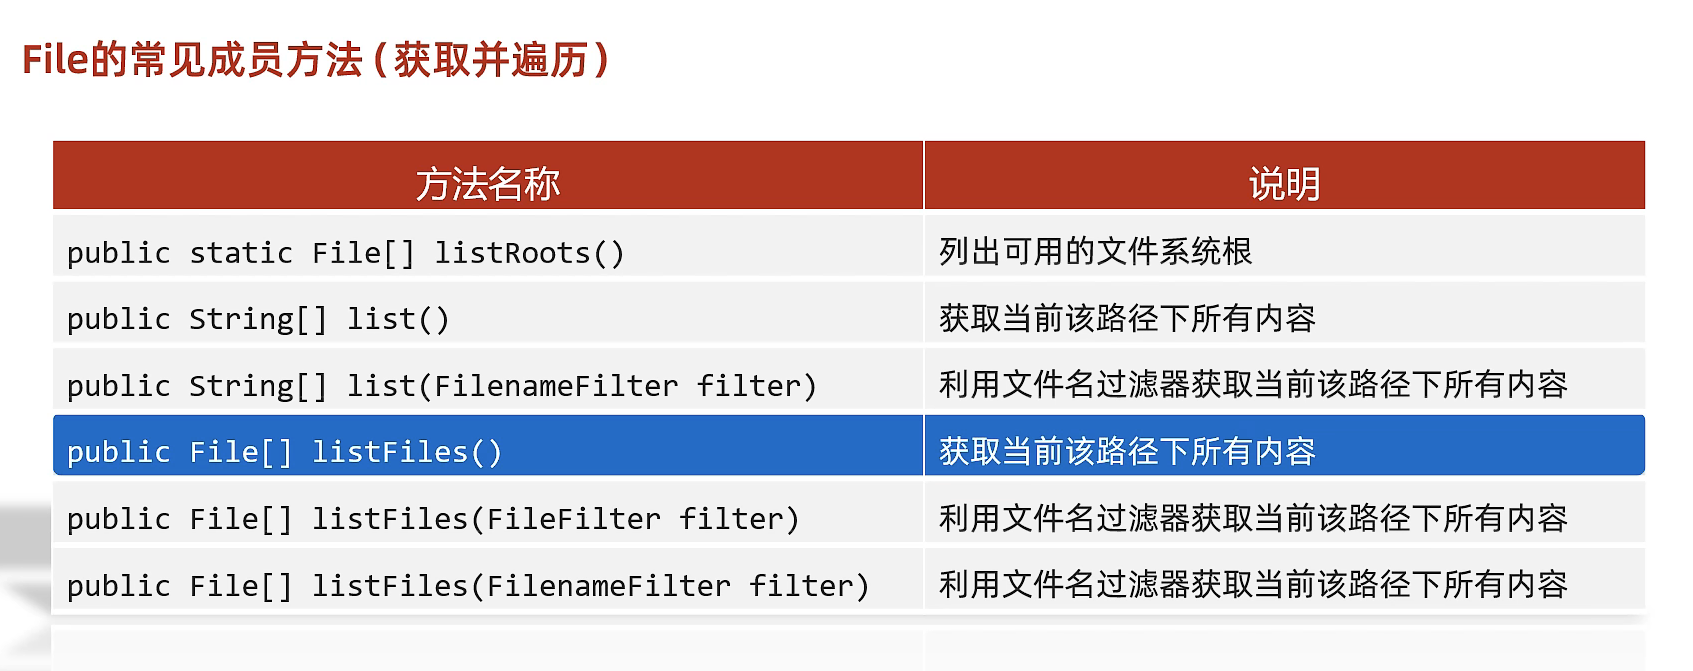
//1. 列出可用的文件系统根
System.out.println(Arrays.toString(File.listRoots())); //[C:\, D:\]

//2. String[] list() 获取当前路径下所有内容
File file = new File("D:\\Users\\alienware");
System.out.println(Arrays.toString(file.list())); //[a.txt, aaa, ab.txt, abc, abcd, abcd.txt]

//3. String[] list(FilenameFilter filter) 获取当前路径下所有内容
System.out.println(Arrays.toString(file.list(((dir, name) -> name.contains(".txt"))))); //[a.txt, ab.txt, abcd.txt]

//4. File[] listFiles() 获取当前路径下的所有内容
File[] files = file.listFiles();
for (File f : files) {
    System.out.println(f.getName() + ".isDirectory() = " + f.isDirectory());
    System.out.println(f.getName() + ".isFile() = " + f.isFile());
}
//5. File[] listFiles(FileFilter filter)
File[] filesWithFileFilter = file.listFiles(((dir, name) -> name.contains(".txt")));
for (File f : filesWithFileFilter) {
    System.out.println(f.getName() + ".isDirectory() = " + f.isDirectory());
    System.out.println(f.getName() + ".isFile() = " + f.isFile());
}

//6. File[] listFiles(FileNameFilter filter)
File[] filesWithNameFilter = file.listFiles(((dir, name) -> name.contains(".txt")));
细节:
- 调用者File表示的路径不存在时,返回null
- 调用者File表示的路径是文件时,返回null
- 当调用者File表示的路径是空文件夹时,返回长度为0的数组
- 当调用者File表示的路径是有内容的文件夹时,将里面所有的文件和文件夹的路径放在File数组中返回(包含隐藏文件)
- 当调用者File表示的路径是需要权限才能访问的文件夹时,返回null
- listFiles获取的是File数组,在打印的时候调用了File的toString方法,会输出文件名 + 后缀名
- list获取的是所有内容的绝对路径字符串数组,打印的就是绝对路径
练习
文件搜索
需求:给定文件名字符串,在给定目录下搜索包含这个字符串的所有文件并展示
/**
 * 文件搜索
 * @param dir 要搜索的目录(文件夹)
 * @param fileName 要搜索的文件名称
 */
private static void searchFile(File dir, String fileName) throws Exception {
    if(dir == null || !dir.exists() || dir.isFile()) {
        return; // 不进行搜索了!条件不符合
    }
    // 1、用户思维和线性思维。
    // 2、提取这个目录下的全部一级文件对象。
    File[] files = dir.listFiles();
    // 3、判断是否有权限拿一级文件对象, 以及当前目录下是否存在一级文件对象,
    if(files != null && files.length > 0) {
        // 4、遍历一级文件对象数组,看是否是自己想要的文件。
        for (File file : files) {
            // 5、判断当前遍历到的一级文件对象是文件还是文件夹。
            if(file.isFile()) {
                // 6、是文件:判断这个文件名是不是我正在找的。
                if(file.getName().contains(fileName)){
                    System.out.println("找到了:" + file.getAbsolutePath());
                    Runtime r = Runtime.getRuntime();
                    r.exec(file.getAbsolutePath());
                }
            }else {
			    // 文件夹:继续递归去当前这个文件夹中继续搜索 fileName
			    searchFile(file, fileName);
            }
        }
    }
}
删除多级文件夹
public static void delete(File f){
    File[] files = f.listFiles();
    for (File file : files) {
        if (file.isFile()){
            file.delete();
        }else {
            delete(file);
        }
    }
    f.delete();
}
统计每种文件个数并打印
public static void count(File f, HashMap<String, Integer> fileTypeMap) {

    for (File file : Objects.requireNonNull(f.listFiles())) {
        if (file.isFile()) {
            String fileName = file.getName();
            System.out.println(fileName);
            String[] split = fileName.split("\\.");
            if (split.length == 0 || split.length == 1) {
                if (!fileName.contains("\\.")) {
                    fileTypeMap.put("无后缀名文件", fileTypeMap.get("无后缀名文件") == null ? 1 : fileTypeMap.get("无后缀名文件") + 1);
                }
            } else {
                fileTypeMap.put("." + split[1], fileTypeMap.get("." + split[1]) == null ? 1 : fileTypeMap.get("." + split[1]) + 1);
            }
        } else {
            if (file.getName().startsWith("\\.")){
                fileTypeMap.put("隐藏文件",fileTypeMap.get("隐藏文件") == null ? 1 : fileTypeMap.get("隐藏文件") + 1);
            } else
                System.out.println(file.isDirectory());
            count(file, fileTypeMap);
        }
    }
更好的做法:宽度优先搜索BFS,队列/栈
A是文件夹,放在队列/栈中,从队列/栈中弹出文件夹cur,统计文件夹cur中的文件个数,将cur下的文件夹放入队列/栈
队列/栈中只放文件夹
public static void countByBFS(File f){
    if (! f.isDirectory() && ! f.isFile()){
        return;
    }
    HashMap<String, Integer> fileTypeMap = new HashMap<>();
    Stack<File> stack = new Stack<>();
    stack.add(f);
    while (!stack.isEmpty()){
        File[] files = stack.pop().listFiles();
        for (File file : files) {
            if (file.isDirectory()){
                stack.push(file);
            }else {
                String[] split = file.getName().split("\\.");
                if (split.length == 2){
                    fileTypeMap.merge("." + split[1],1,Integer::sum);
                }
            }
        }
    }
    System.out.println(fileTypeMap);
}
批量重命名文件
- 当前文件夹下有一批图片文件:
d:\RenameTest\01.Snipaste_2023-11-16_11-24-44.jpg
d:\RenameTest\02.Snipaste_2023-11-16_11-25-06.jpg
d:\RenameTest\03.Snipaste_2023-11-16_11-25-16.jpg
d:\RenameTest\04.Snipaste_2023-11-16_11-25-27.jpg
d:\RenameTest\05.Snipaste_2023-11-16_11-25-38.jpg
要求批量重命名为:
d:\RenameTest\31.Snipaste_2023-11-16_11-24-44.jpg
d:\RenameTest\32.Snipaste_2023-11-16_11-25-06.jpg
d:\RenameTest\33.Snipaste_2023-11-16_11-25-16.jpg
d:\RenameTest\34.Snipaste_2023-11-16_11-25-27.jpg
d:\RenameTest\35.Snipaste_2023-11-16_11-25-38.jpg
/**
 * 对目标文件夹下的内容进行批量编号修改
 * @param srcDir 目标文件夹
 * @param step 修改步长
 * @param separator 编号分隔符
 */
public static void renameFiles(File srcDir,int step,String separator){
    Objects.requireNonNull(srcDir);
    if (!srcDir.exists()){
        return;
    }
    File[] files = srcDir.listFiles();
    for (File file : files) {
        String fileName = file.getName();
        if (!fileName.contains(separator)){
            return;
        }
        String oldValue = fileName.substring(0, fileName.indexOf(separator));
        int newValue = Integer.parseInt(oldValue) + step;
        String newName = (newValue < 10 ? "0" + newValue : newValue)
												        + fileName.substring(fileName.indexOf(separator));
        file.renameTo(new File(srcDir,newName));
    }
}
相对路径获取文件
IDEA中,相对路径默认是相对于当前的工程
System.out.println(System.getProperty("user.dir"));
//D:\Development\Maven_work\MavenSpace\heima_JavaSE_advence\javase_pro_max
字符集
ASCII
更详细的内容在[[011-字符集|字符集详解]]中
计算机中任意的数据都是以二进制的形式来存储的,计算机最小的存储单元是 字节,存储英文字符时一个字节就足够。
ASCII字符集中记录了128个数据:
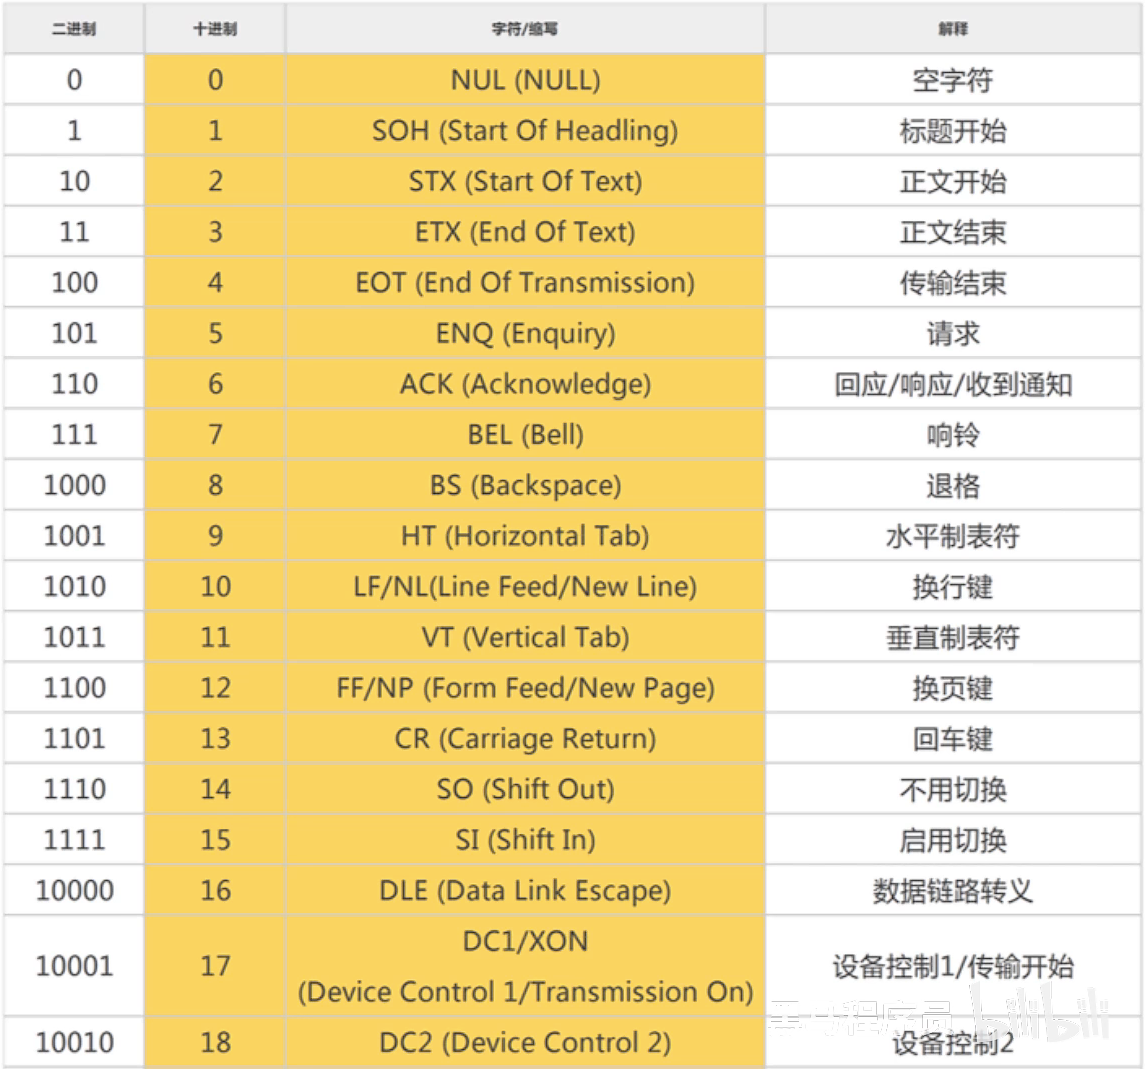
- 存储:当前要存储 a 字符,先查询ASCII将其转换为 97 -> 110 0001,不足一个字节,将其编码补齐为 0110 0001,存入硬盘当中。
- 使用:在使用该数据的时候获取到0110 0001,将其解码为十进制 97,如果赋值给char类型,查询ASCII后得到 a 字符,如果赋值给int类型,结果就是97
GBK
简体中文Windows默认使用的是GBK,但是显示的是ANSI,ANSI是GBK,BIG5(繁体中文)等的统一名称
对于其他语言,又提出了Unicode字符集,国际标准字符集,它将世界各种语言的每一个字符定义为一个唯一的编码,以满足跨语言、跨平台的文本信息转换
对于中文来说,一个字节只能记录 2^8 = 256个汉字,在制定GBK的时候规定了一个汉字使用两个字节存储,可以记录2^16 = 65536个汉字。
对于GBK来说:
- 规则1:汉字使用两个字节存储
- 规则2:高位字节二进制 一定以1开头,转换为十进制后是一个负数;这个规定的原因是要与英文区分开,英文使用一个字节存储,而GBK兼容ASCII,ASCII在英文编码的前面一定要补零,也就是说是以0开头的;中文是两个字节,使用1开头,底层也是这样来区分中英文字符的。
- 如果要存储字符 a ,会先查询GBK将其转换为 97 (GBK完全兼容ASCII,英文使用一个字节存储),不足一个字节,将其编码补齐为 0110 0001。
- 如果要存储汉字 汉 ,查询GBK得到47802,转换为二进制 10111010 10111010 ,编码不需要任何变动,在读取时对 10111010 10111010 进行解码,转为十进制 47802,直接查询GBK
Unicode字符集
由统一码联盟研发,完全兼容ASCII
字符 a 查询Unicode字符集 转换为97 ,在编码时:
- UTF-16编码规则:用2-4个字节存储,Unicode transfer format – 16 ,16表示在这种编码方式中最常用的就是转成16个bit位,a就转换为 00000000 01100001 ,对英文字符不友好
- UTF-32编码规则:固定用32个bit位存储,对英文字符不友好
- UTF-8编码规则:用1-4个字节存储,如果是ASCII,就使用一个字节保存,如果是拉丁文等 就是用2个字节保存,中日韩文字 就使用三个字节表示,其他语言就使用四个字节表示
- 一个字节(ASCII) 0xxx xxxx
- 两个字节:110x xxxx 10xx xxxx
- 三个字节:1110 xxxx 10xx xxxx 10xx xxxx
- 四个字节:1111 0xxx 10xx xxxx 10xx xxxx 10xx xxxx
- 汉 : Unicode查询到 27721 对应 01101100 01001001 转为UTF-8编码 : 将对应数字填补到x的位置
IO概述
-
按照流的方向分类;按照内存作为参照物
- 向内存中去 叫输入流
- 从内存中出 叫输出流
-
按照读取数据方式不同而分类
- 按字节方式读取数据,一次读取一个字节;这种流是万能的,任何类型文件都能读取;
- 按字符方式读取数据,一次读取一个字符;这种流是为了方便读取纯文本文件(.txt .java等可以用记事本打开/编辑的文件);不能读取:图片、声音、视频等(也无法读取 word文件 并非纯文本文件)
字符流使用ISO-8859-1也可以复制文件
假设文本文件: a中国bc张三f
- 如果采用字符流:
第一次读: ‘a’ (占用1字节)
第二次读:’中’ (占用2字节)
字符类实际上是按照创建字符流时指定的解码格式读取的,如果是GBK,先读取文件的所有字节到缓冲区中,然后解码,’a’就按照GBK的解码格式解码一个字节,’中’ 就按照GBK的解码格式解码两个字节
- 如果采用字节流:
第一次读:’a’ (正好占用1字节)
第二次读:'中' 字符的一半
第二次读:'中' 字符的另一半
char在Java中占用两个字节,但是 ‘a’ 在Windows操作系统中占用一个字节
Java中所有的流都在:java.io.* 下;
输入输出流实现的接口
以Stream结尾的都是字节流,以Reader/Writer结尾的都是字符流
-
java.io.InputStream字节输入流 -
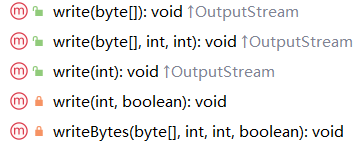
java.io.OutputStream字节输出流 -
java.io.Reader字符输入流 -
java.io.Writer字符输出流
Closeable extends AutoCloseable
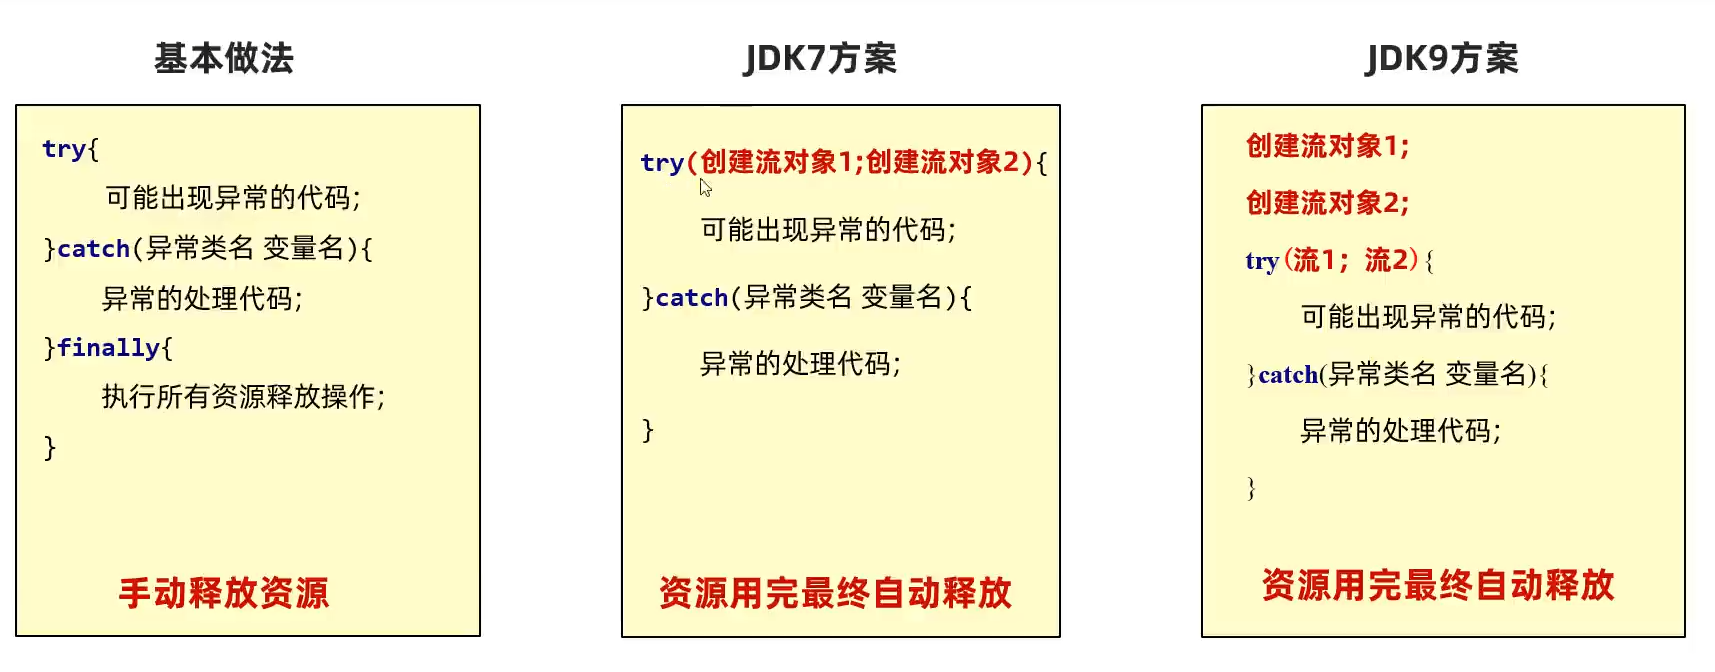
只有实现了AutoCloseable的类才能写在小括号当中,try执行完毕后就可以自动释放资源
这四大类都是抽象类,所有的流都实现了java.io.Closeable 接口,都有close()方法;
流毕竟是一个管道,这个管道是内存和硬盘之间的通道,会占用很多资源,用完一定要关闭。
Closeable接口继承自AutoCloseable,try-with-resources代码块持有的资源会自动关闭
如果不关闭资源,保持输出流会对该资源一直占用,其他人就无法使用了
- JDK7的手动释放
- JDK9的自动释放
Flushable
所有的输出流(OutputStream 字节输出流、Writer 字符输出流)都实现了java.io.Flushable 接口,都是可刷新的;都有flush() 方法;所有输出流在使用完之后都要调用flush()方法进行刷新;这个刷新表示 将缓冲区 中剩余未输出的数据输出完(清空管道)
需要掌握的流
- 本地文件读取
java.io.FileInputStream
java.io.FileOutputStream
java.io.FileReader
java.io.FileWriter
- 转换流:字节流 –>字符流
java.io.InputStreamReader
java.io.OutputStreamWriter
- 缓冲流
java.io.BufferedReader
java.io.BufferedWriter
java.io.BufferedInputStream
java.io.BufferedOutputStream
- 数据流
java.io.DataInputStream
java.io.DataOutputStream
- 标准输出流
java.io.PrintWriter
java.io.PrintStream
- 对象流
java.io.ObjectInputStream
java.io.ObjectOutputStream
数据源
数据源data source,是提供数据的原始媒介。
常见的:数据库、文件、其它程序、内存、网络连接、IO设备等。
数据源分为:源设备、目标设备。
源设备:为程序提供数据,一般对应输入流。
目标设备:程序数据的目的地,一般对应输出流。
为什么要关闭流
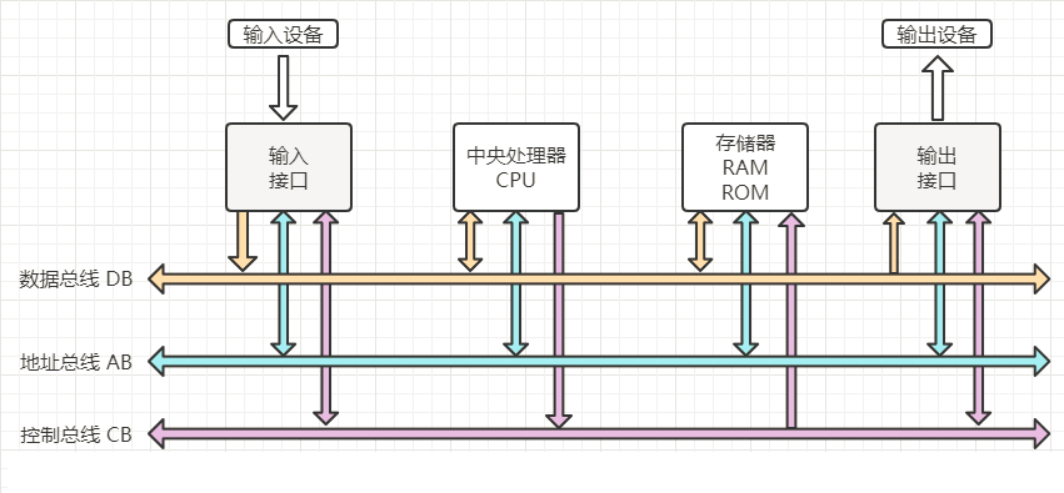
计算机的总线结构
文件读取
字节流
任何文件读取的都是字节数据,read方法将其转换为对应的十进制
FileInputStream
任何类型的文件都可以采用这个流来读;以字节的方式完成输入的操作 硬盘 — > 内存
读取的是字节数据转换为十进制的结果。
FileInputStream fis = null;

try {
    fis = new FileInputStream("d:\\IOTest\\abc.txt");
} catch (FileNotFoundException e) {
    e.printStackTrace();
} finally {
    //关闭流的前提:流不为空
    if (fis != null){
        try {
            fis.close();
        } catch (IOException e) {
            e.printStackTrace();
        }
    }
}
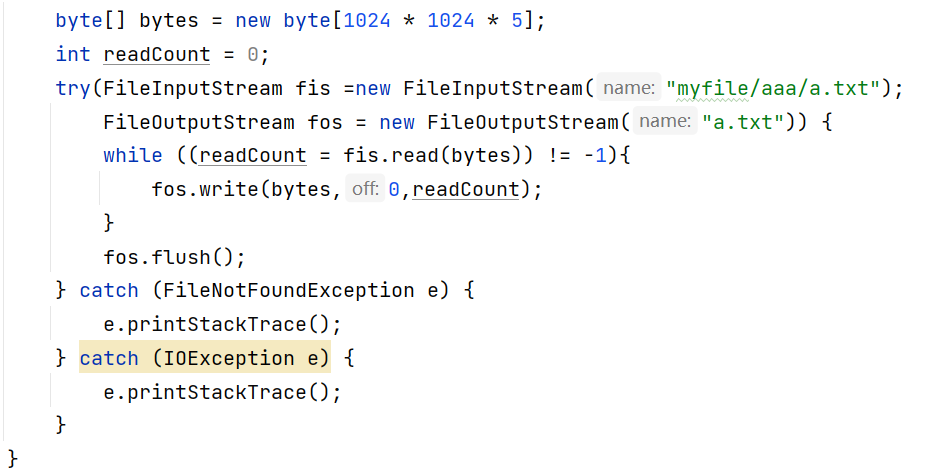
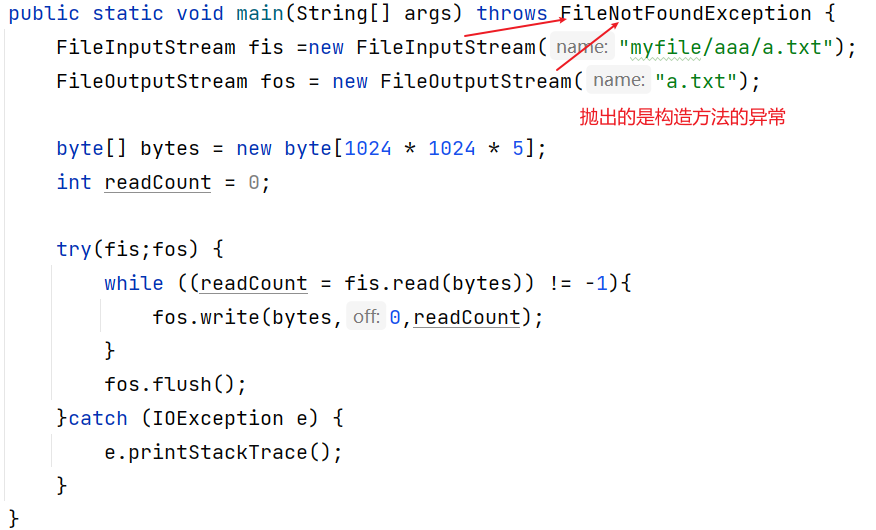
此构造方法会抛出 FileNotFoundException -> IOException -> Exception 属于编译时异常,必须预先处理
String path = "d:\\IOTest\\abc.txt";

try(FileInputStream fis = new FileInputStream(path)) {

} catch (IOException e) {
    e.printStackTrace();
}
新语法
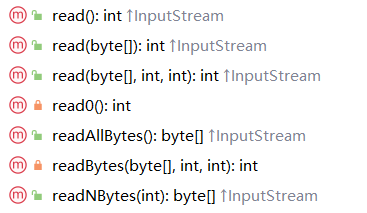
read()
String path = "d:\\IOTest\\abc.txt";

try(FileInputStream fis = new FileInputStream(path)) {
    int read = fis.read();
    System.out.println(read); //97
} catch (IOException e) {
    e.printStackTrace();
}
read方法最开始指向第一个元素;调用之后先读取(返回int类型),然后向下移动一个字节,如果当前不存在元素就返回-1
int readData = fis.read(); //97
System.out.println(readData);
readData = fis.read(); //98
System.out.println(readData);
readData = fis.read(); //99
System.out.println(readData);
readData = fis.read(); //100
System.out.println(readData);
readData = fis.read(); //101
System.out.println(readData);
readData = fis.read(); //102
System.out.println(readData);
readData = fis.read(); //-1
System.out.println(readData);
改为while循环:
try(FileInputStream fis = new FileInputStream(path)) {
    int read = 0;
    while ((read = fis.read()) != -1){
        System.out.print(read);//8410410511532105115329732116101115116321021....
    }
} catch (IOException e) {
    e.printStackTrace();
}
转换为char类型:
System.out.print((char) read);
//This is a test file for java.io.FileInputStream, FileInputStream implements Closeable extends AutoCloseable.
但是这种效率较低,一次只读取一个字节,内存与硬盘交互的太频繁
使用 int read(byte[] b) 方法,将输入流中最多b.length个字节的数据读入一个byte数组
public int read(byte b[]) throws IOException {
    return readBytes(b, 0, b.length);
}
返回值表示读取到的字节数量
/*
* 一次向byte[] b数组中读取b.length个字节,减少内存与硬盘的交互
* */
public class FileInputStreamTest03 {
    public static void main(String[] args) {
        FileInputStream fis = null;

        try {
            fis = new FileInputStream("IO/src/tempFile.txt");

            byte[] b = new byte[4]; //一次最多读取4个字节
            int readCount = fis.read(b);    // 此时b中读取到 abcd
            System.out.println(readCount);  //4

            readCount = fis.read(b);    // 此时b中读取到 ef
            System.out.println(readCount); //2

            for(byte bytes : b){
                System.out.println(bytes);
            }

        } catch (FileNotFoundException e) {
            e.printStackTrace();
        } catch (IOException e) {
            e.printStackTrace();
        } finally {
            if (fis != null){
                try {
                    fis.close();
                } catch (IOException e) {
                    e.printStackTrace();
                }
            }
        }
    }

}
文件内容: abcdef
第一次向byte数组中读取时:
| a | b | c | d |
|---|
第二次调用fis.read(b)方法,此时文件中还有ef没有读取;就会把ab覆盖:
| e | f | c | d |
|---|
此时的返回值是2
转换为char类型:
String path = "d:\\IOTest\\temp.txt";
byte[] bytes = new byte[1024];
int count = 0;
try(FileInputStream fis = new FileInputStream(path)) {
    while ((count = fis.read(bytes)) != -1){
        for (int i = 0; i < count; i++) {
            System.out.print((char) bytes[i]);
        }
    }
} catch (IOException e) {
    e.printStackTrace();
}
转换为字符串类型:
while ((count = fis.read(bytes)) != -1){
    System.out.println(new String(bytes, 0,count));
}
不能将byte数组全部转换为字符串,应该读取多少个就转换多少个
byte[] b = new byte[4]; //一次最多读取4个字节
int readCount = fis.read(b);    // 此时b中读取到 abcd
System.out.println(readCount);  //4
System.out.println(new String(b,0,readCount)); //abcd

readCount = fis.read(b);    // 此时b中读取到 ef
System.out.println(readCount); //2
System.out.println(new String(b,0,readCount)); //ef
在转换时注意,如果是中文,应与源文件的编码方式保持一致。并且字节流一般不读取中文。
提高效率的原因
程序和磁盘通过数据总线DB进行读写数据操作,每次读写一个字节,就要发起一次IO调用,这样会占用系统调用资源,占用DB资源。设置一个byte数组,就类似于设置一个缓冲区Buffer,将所有的数据的write操作都存入缓冲区中,这样不仅能提高程序的执行速度(在程序中不进行IO操作),也减少了对总线资源的占用,这是一体两面的。最终在close或flush的时候会将缓冲区的资源一同提交到数据总线上。
而FileOutputStream的flush方法体是空的,也就是FileOutputStream底层并没有buffer,但是一定要关闭流,减少对总线的占用
int available()
返回流当中剩余没有读到的字节数量,但是该方法建议少用,如果遇到文件数据量很大,容易造成内存溢出。
try(FileInputStream fis = new FileInputStream(path)) {
    b = fis.read();
    System.out.println((char) b); //a
    System.out.println("available:" + fis.available()); //available:2
}
作用在于:可以在开始的时候就获取没有读的字节数量
fis = new FileInputStream("IO/src/tempFile.txt");
System.out.println("总字节数量:" + fis.available());
只需要读一次就可以了:
try(FileInputStream fis = new FileInputStream(path)) {
    byte[] bytes = new byte[fis.available()];
    fis.read(bytes);
    System.out.println(new String(bytes));
} catch (IOException e) {
    e.printStackTrace();
}
long skip()
跳过参数个字节不读
public static void main(String[] args) {
    FileInputStream fis = null;
    try {
        fis = new FileInputStream("IO/tempFile.txt");
        //跳过去三个字节
        fis.skip(3);
        System.out.println((char)(fis.read())); //d

    } catch (FileNotFoundException e) {
        e.printStackTrace();
    } catch (IOException e) {
        throw new RuntimeException(e);
    } finally {

        if (fis != null) {
            try {
                fis.close();
            } catch (IOException e) {
                e.printStackTrace();
            }
        }
    }
}
读取流中的所有内容
- JDK8之前的方式,通过File对象的length方法可以获取该对象的所有长度
FileInputStream is = new FileInputStream("demo.txt");
byte[] bytes = new byte[(int) new File("demo.txt").length()];  //返回值是long类型的
is.read(bytes);
- JDK9的方式:
FileInputStream is = new FileInputStream("demo.txt");
byte[] bytes = new byte[is.available()];   //直接获取流中所有字节个数
is.read(bytes);
- JDK9的方式:
FileInputStream is = new FileInputStream("demo.txt");
byte[] bytes = is.readAllBytes();
FileOutputStream
文件字节输出流

String类型的入参其实被转换为 new File(String)了

write
注意:
-
write方法的参数是整数,这个整数是字节的十进制
-
如果要写出字符串型数字,只能转换为字符串再调用getBytes()方法
测试:
- 如果写入的文件不存在则会创建该文件,但要保证父级路径是存在的
try(FileOutputStream fos = new FileOutputStream("d:\\IOTest\\writeFile.txt");) {
    fos.write(97);  //a
    fos.flush(); //写完一定flush + close,没有flush就可能没有写出数据
} catch (IOException e) {
    e.printStackTrace();
}
- 入参只能是int或者byte[],想写出字符串只能getBytes
try(FileOutputStream fos = new FileOutputStream("d:\\IOTest\\writeFile.txt");) {
    fos.write("this is a test for fos write a txt file".getBytes());
    fos.flush(); //写完一定flush + close,没有flush就可能没有写出数据
} catch (IOException e) {
    e.printStackTrace();
}
注意,在[[011-字符集#编码方法|字符集]]中提到过,getBytes可以指定参数CharSet,用以指定编码的格式
fos.write("这是一段以GBK格式编码的文字".getBytes(Charset.forName("GBK")));
这时文本内容就用GBK进行编码,无法用UTF-8格式打开。
- 入参写出char时无法写出完整的中文char
FileOutputStream bufferTest = new FileOutputStream("bufferTest");
bufferTest.write('刘'); //UTF-16BE 0x5218
//0101 0010 0001 1000

FileInputStream inputStream = new FileInputStream("bufferTest");
int read = inputStream.read(); //24  ->  0001 1000
System.out.println(read);
因为char底层是UTF-16BE编码的,一个汉字对应两个字节,而每次只能写出一个字节
O_APPEND | O_TRUNC
public static void main(String[] args) {
    FileOutputStream fos = null;

    try {
        fos = new FileOutputStream("myFile"); //文件不存在会新建
        byte[] bytes = {97,98,99,100};
        fos.write(bytes); //将byte数组全部写出 abcd
        fos.write(bytes,0,2); //再写出 ab

        String s = "\nhello world";
        fos.write(s.getBytes());

        //最后一定要刷新
        fos.flush();
    } catch (FileNotFoundException e) {
        e.printStackTrace();
    } catch (IOException e) {
        e.printStackTrace();
    } finally {
        if (fos != null) {
            try {
                fos.close();
            } catch (IOException e) {
                e.printStackTrace();
            }
        }
    }
}
fos.write()输出了两次,第一次输出 abcd 、 ab;最后的结果是 : abcdab
但是再执行一次,文件中的内容又变为了 abcdab
- 说明FileOutputStream默认是以TRUNC模式写出内容
fos = new FileOutputStream("myFile");这种方式会将原文件清空 再重新写入,注意是在创建对象时就将原文件清空了
- 如果不想清空原文件内容,就要以APPEND方式写入:
fos = new FileOutputStream("tempFile.txt",true)
FileOutputStream所对应的构造方法:
默认创建时append为false
字节流同时读写同一个文件
注意:
- 如果在一个方法中需要同时读写同一个文件,一定要在读取完毕再进行写入
- 不能将两个流放在同一个try里面关闭:
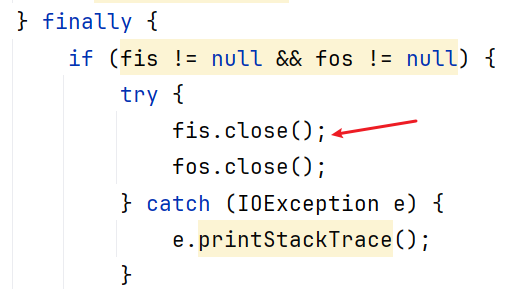
这样关闭是错误的,如果第一个流关闭时出错第二个流无法关闭,正确方式:
//先创建读再创建写
FileInputStream fis = new FileInputStream(path);
//不加true的话在创建完fos对象就将文本内容清空了。
FileOutputStream fos = new FileOutputStream(path,true);

try {
    fis.read();
} catch (IOException e) {
    e.printStackTrace();
} finally {
    if (fis != null) {
        try {
            fis.close();
        } catch (IOException e) {
            e.printStackTrace();
        }
    }
    if (fos != null) {
        try {
            fos.close();
        } catch (IOException e) {
            e.printStackTrace();
        }
    }
}
换行写
在一次输出的结束写入一个换行符就可以了,但是不同操作系统对应的换行符是不一样的:
- windows操作系统:
\r\n回车 换行 - linux:
\n换行 - Mac:
\r换行
Java对Windows的回车换行进行了优化,完整的是\r\n,但是写其中一个\r 或者\n,也能完成换行,Java在底层会进行补全
String warp = "\r\n";
try(FileOutputStream fos = new FileOutputStream("d:\\IOTest\\writeFile.txt");) {
    fos.write("abc".getBytes());
    fos.write(warp.getBytes());
    fos.write("def".getBytes());
    fos.flush();
} catch (IOException e) {
    e.printStackTrace();
}
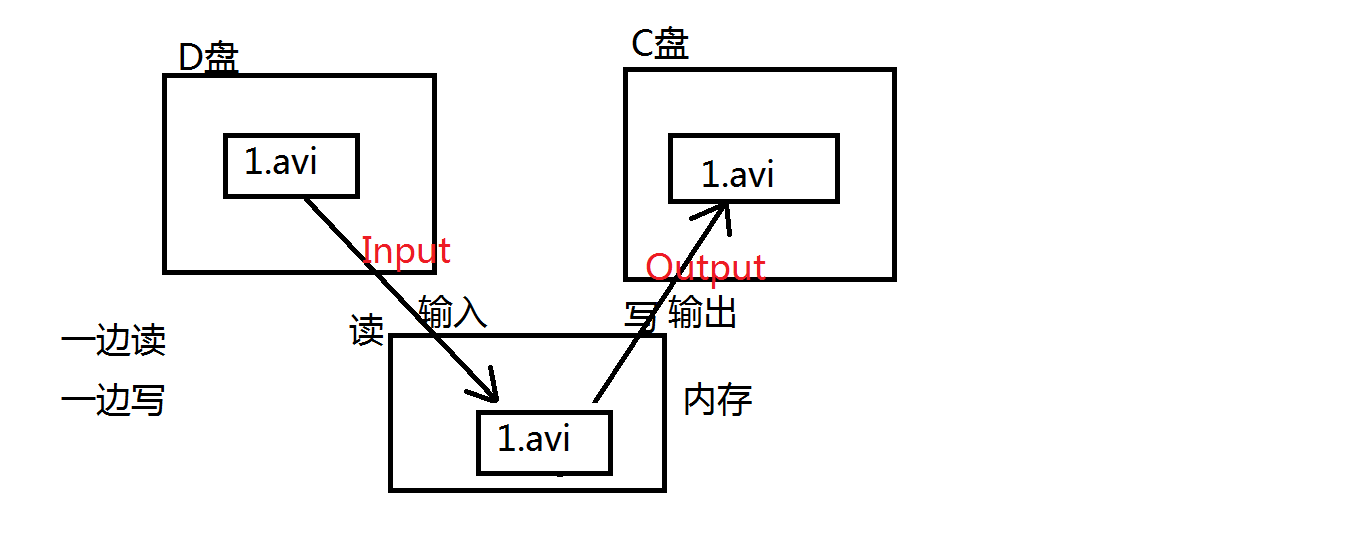
字节流完成文件复制
使用字节流拷贝时文件类型随意
读完再写:效率低
public class FileCopyTest01 {
    public static void main(String[] args) {
        FileOutputStream fos = null;
        FileInputStream fis = null;

        try {
            long begin = System.currentTimeMillis();
            fis = new FileInputStream("D:\\视频\\921.mp4");
            fos = new FileOutputStream("D:\\IOTest\\921_copy.mp4");

            byte[] bytes = new byte[fis.available()];
            fis.read(bytes);

            fos.write(bytes);
            long end = System.currentTimeMillis();

            System.out.println(end - begin);
            fos.flush();
        } catch (FileNotFoundException e) {
            e.printStackTrace();
        } catch (IOException e){
            e.printStackTrace();
        } finally {

            if (fis != null){
                try {
                    fis.close();
                } catch (IOException e) {
                    e.printStackTrace();
                }
            }
            if (fos != null){
                try {
                    fos.close();
                } catch (IOException e) {
                    e.printStackTrace();
                }
            }
        }
    }
}
读时写
public class FileCopyTest02 {
    public static void main(String[] args) {
        FileOutputStream fos = null;
        FileInputStream fis = null;

        try {
            long begin = System.currentTimeMillis();
            fis = new FileInputStream("D:\\视频\\921.mp4");
            fos = new FileOutputStream("D:\\IOTest\\921_copy.mp4");

            byte[] bytes = new byte[1024 * 1024]; // 1MB
            int readCount;

            while ((readCount = fis.read(bytes)) != -1 ){
                fos.write(bytes,0,readCount);
            }
            long end = System.currentTimeMillis();
            System.out.println(end - begin);
            fos.flush();
        } catch (FileNotFoundException e) {
            e.printStackTrace();
        } catch (IOException e){
            e.printStackTrace();
        } finally {

            if (fis != null){
                try {
                    fis.close();
                } catch (IOException e) {
                    e.printStackTrace();
                }
            }
            if (fos != null){
                try {
                    fos.close();
                } catch (IOException e) {
                    e.printStackTrace();
                }
            }
        }
    }
}
测试执行时间大概 350ms
注意:数组的长度最好保持为1024的整数倍,一般为5-10MB,可以将时间提升到280ms左右
字节流的乱码问题
字节流读取中文:
- 使用available创建byte数组,这样一次将文本内容完全读取,只要解码时与原文件的编码格式保持一致就不会出现乱码
- byte数组分段读取文本内容,如果byte数组长度无限制,很可能这一个byte数组中装的是半个汉字的字节
在保证编码格式与原文件解码格式相同的情况下,并且文件中没有任何英文和半角标点(?):
- 如果读取使用GBK/GB2312汉字两字节编码的文本,在读取的时候将byte数组长度设置为2的整数倍,是否就不会出现乱码?
- 对于GB18030编码的文本文件,汉字是2-4变长字节编码,byte数组设置为4的整数倍就不会乱码
使用字节流读取完全中文文件,需要保证:
- 原文件编码
- 数组长度为编码中文长度的整数倍
- 解码
均一致。
总结
-
字节流可以完成任意类型的文件复制。
-
字节流读取中文条件极其苛刻。
字符流
字符流的底层其实就是字节流 + 字符集
- 读取:按照指定的字符集读取字节,一次读取一个字节,如果遇到中文就读取多个字节
- 写出:将内容按照指定的编码方式进行编码,变为字节写入文件。文本里面其实都是二进制数据,适用于纯文本读写。只是打开的时候文本编辑器帮我们进行了解码。
FileInputStream底层是字节数组,FileReader底层是字节数组 + 字符集,读取到的就是字符数组
FileReader
FileReader reader = new FileReader("d:\\IOTest\\temp.txt");
try(reader) {
    char[] chars = new char[4];
    int readCount = 0;
    while ((readCount = reader.read(chars)) != -1){
        System.out.print(new String(chars,0,readCount));
    }
} catch (IOException e) {
    e.printStackTrace();
}
构造方法
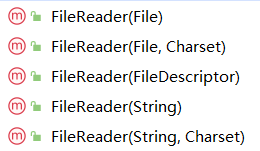
- 可以在创建字符流的时候指定字符集
构造方法:

可以看到底层也创建了一个字节流

FileReader继承自InputStreamReader,这是一个转换流
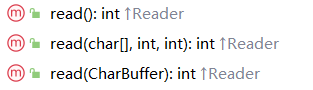
read方法

-
read():按字节进行读取,如果遇到中文就读取多个,并将这个字符的编号返回。
-
read(char[]):将读取数据、解码合并了,将解码之后的字符存入字节数组中
FileWriter
构造方法
指定写出文件名、指定字符集、指定O_TRUNC | O_APPEND
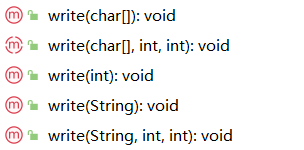
常用方法
int类型:作为字符在指定字符集的编号,把编码之后的数据写到文件中去
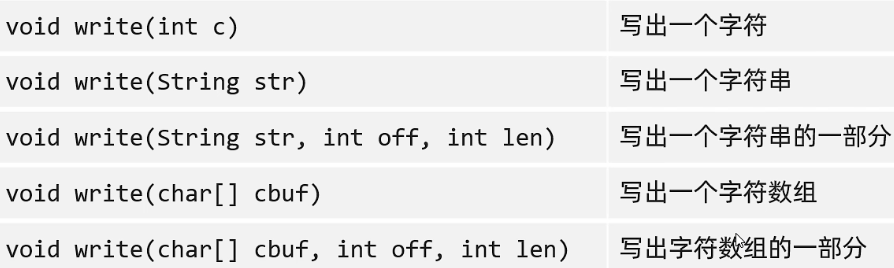
- 可以直接写出字符数组,或者字符数组的一部分
- 可以直接写出字符串,或者字符串的一部分
FileWriter writer = new FileWriter("d:\\IOTest\\testWriter.txt");
char[] c = {'文','件','字','符'};
writer.write(c);
writer.write('\n');
writer.write("\n");
writer.write("i am a java software engineer");
writer.write(c,0,2);
writer.flush();
字符流的缓冲区
FileReader
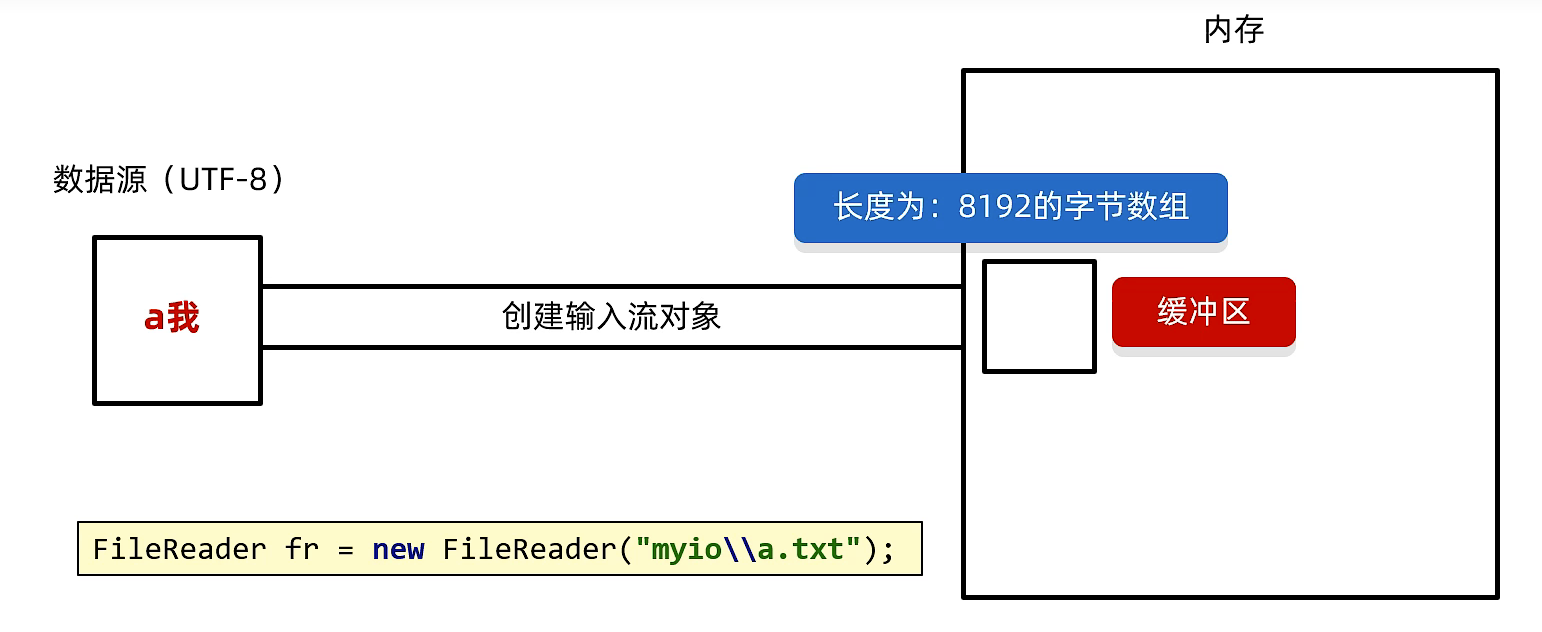
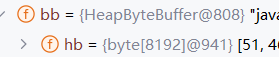
1). 创建FileReader对象
底层:关联文件,并创建缓冲区(长度为8192的字节数组)
2). 读取数据
- 判断缓冲区中是否有数据可读
- 缓冲区没有数据:
- 从文件中读取,装入缓冲区,每次尽可能装满缓冲区
- 文件中没有数据,返回-1
- 缓冲区有数据:从缓冲区读取
空参的read方法:一次读取一个字节,中文就读取多个字节,把字节解码为字符并转为十进制返回
有参的read方法:读字节、解码合并了,将得到的字符放入数组
验证FileReader的缓冲区:
FileReader fr = new FileReader(path, Charset.forName("GBK"));

int b1 = fr.read();
System.out.println(b1);

int b2 = fr.read();
System.out.println(b2);

int b3 = fr.read();
System.out.println(b3);

int b4 = fr.read();
System.out.println(b4);
- 第一次读取之前buffer没有数据:
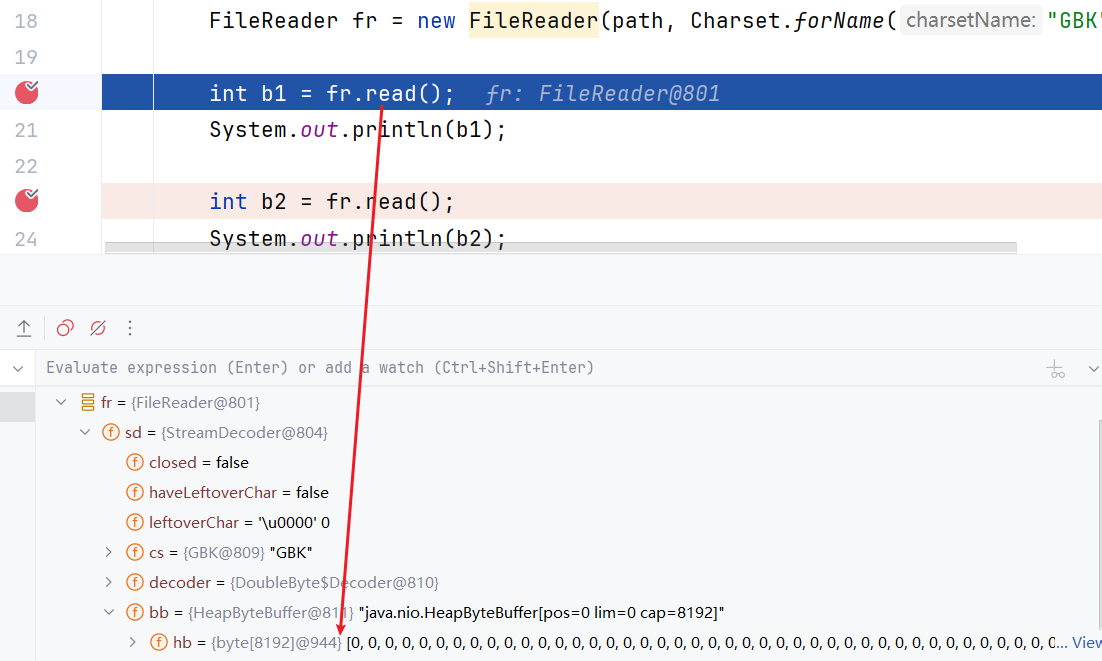
- 第一次读取后,缓冲区没有数据从文件中读取,装满缓冲区:
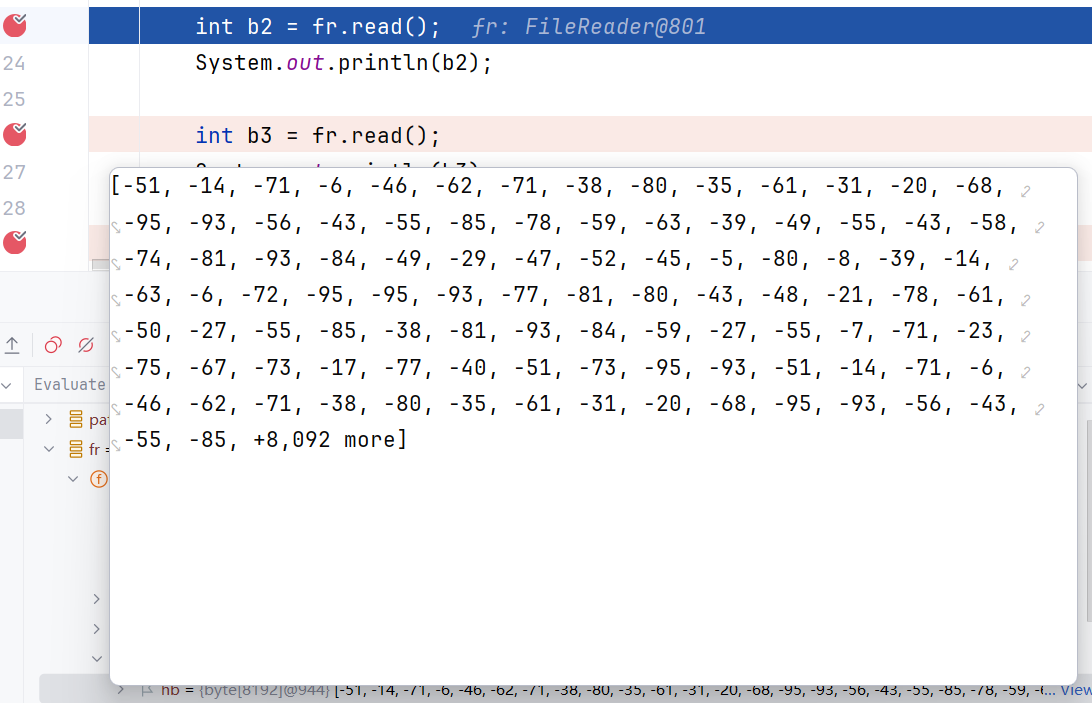
并且可以看到,缓冲区的长度一共是8192
指定使用GBK解码,在读取时会每两个字节转换为一个汉字。
- 最后一次读取:缓冲区没有数据,在文件中查找,文件中也没有数据,返回-1
缓冲区的覆盖问题
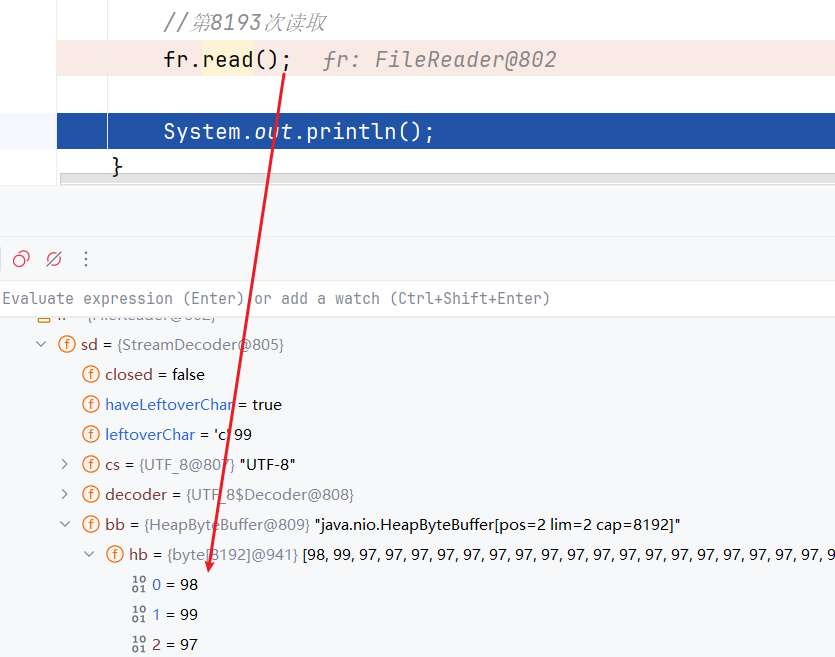
如果文件中超过了8192个字节,前8192个字节读取完毕后继续读取尽可能多的数据,并从0索引开始对缓冲区的数据进行覆盖
验证:准备文件,前面8192个a,后面紧跟bc
aa...aabc
测试:
String path = "d:\\IOTest\\testWriter.txt";
FileReader fr = new FileReader(path);

//前8191次读取
for (int i = 0; i < 8191; i++) {
    fr.read();
}

//第8192次读取
fr.read();

//第8193次读取
fr.read();

System.out.println();
- 第8192次读取:缓冲区中数据已读完
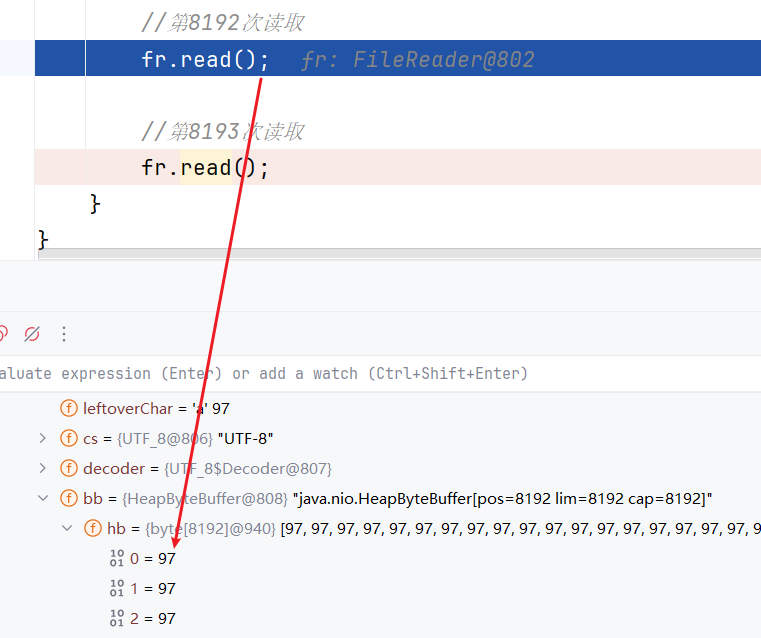
- 第8193次读取:从文件中读取尽可能多的数据到缓冲区中
字符流的同时读写问题
有以下文件:前面8192个a,后面紧跟bc
aa...aabc
同时使用字符流进行读写,注意写操作默认为O_TRUNC
String path = "d:\\IOTest\\testWriter.txt";
FileReader reader = new FileReader(path);
FileWriter writer = new FileWriter(path);

reader.read();
writer.write("def");
问:read方法能读取数据吗?
此时不能读到数据,因为write默认为O_TRUNC,将文件清空。
String path = "d:\\IOTest\\testWriter.txt";
FileReader reader = new FileReader(path);
reader.read();
FileWriter writer = new FileWriter(path);

reader.read();
writer.write("def");
问:read方法能读取到数据吗?
此时是可以读取到数据的,因为在创建writer方法之前进行了一次read,缓冲区中装了8192个a,能读取到8192个a
FileWriter

字节流没有缓冲区,直接写入目的文件;字符流先将内容写入缓冲区,在缓冲区中完成编码。
- 缓冲区装满时,自动将内容写入目的文件
- 缓冲区未满时,调用flush方法手动将文件写入目的文件
- close关流时,自动将文件写入目的文件
flush刷新后,还可以继续向文件中写入数据;close关闭后就断开了通道,无法再向文件中写入数据
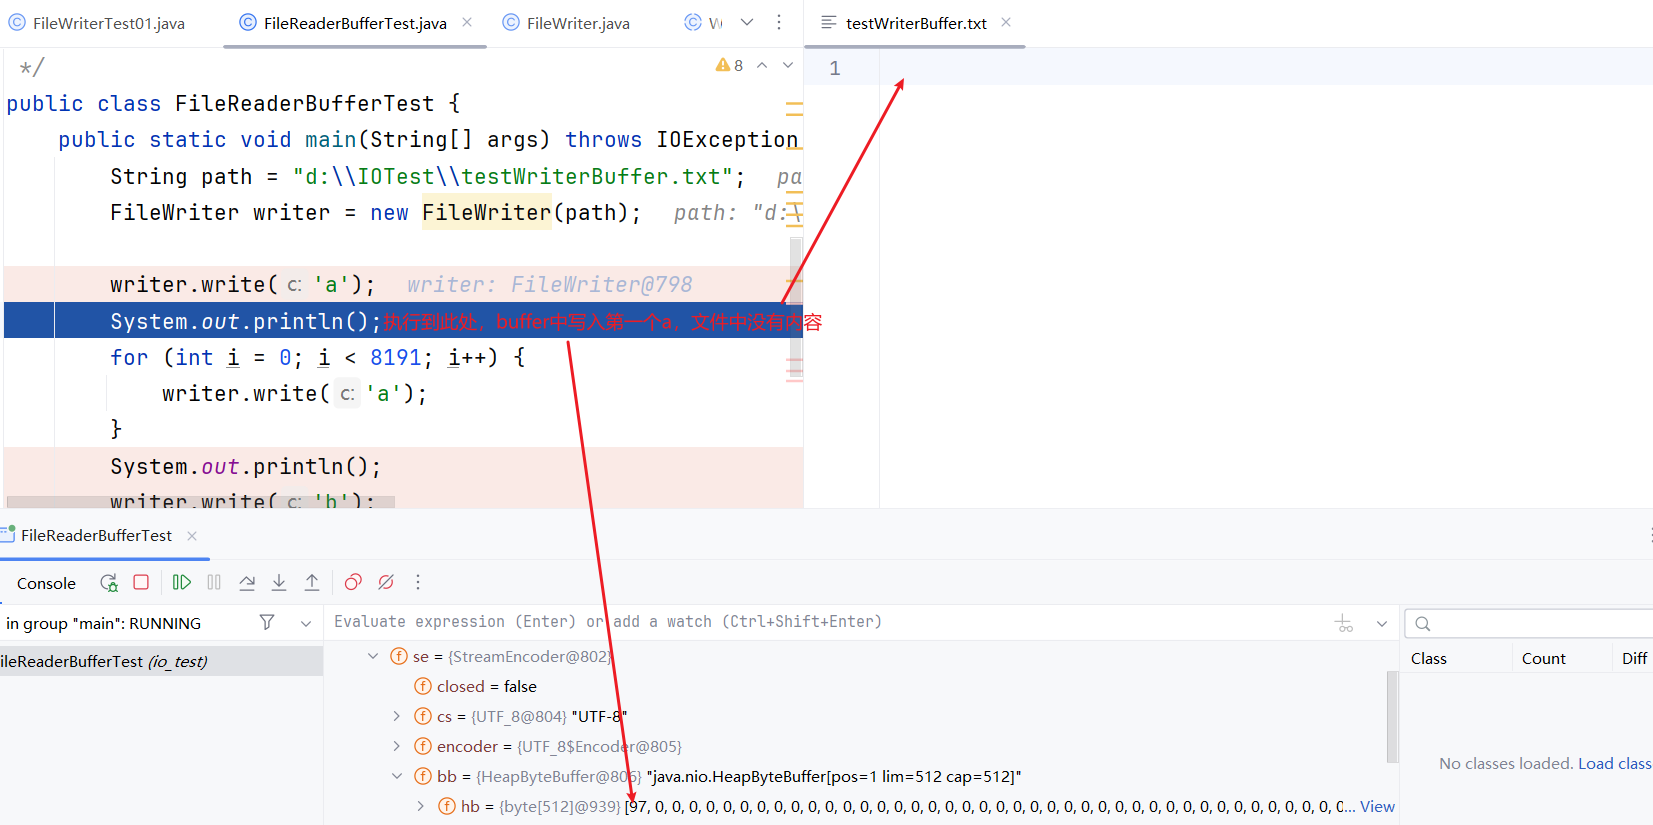
JDK21中,FileWriter的缓冲区大小变为512
测试:
String path = "d:\\IOTest\\testWriterBuffer.txt";
FileWriter writer = new FileWriter(path);

writer.write('a');
System.out.println();
for (int i = 0; i < 511; i++) {
    writer.write(98);
}
System.out.println();
writer.write(99);
writer.write(100);
writer.write(101);
writer.write(102);
System.out.println();
- 写入第一个数据:
- 写入512个数据:
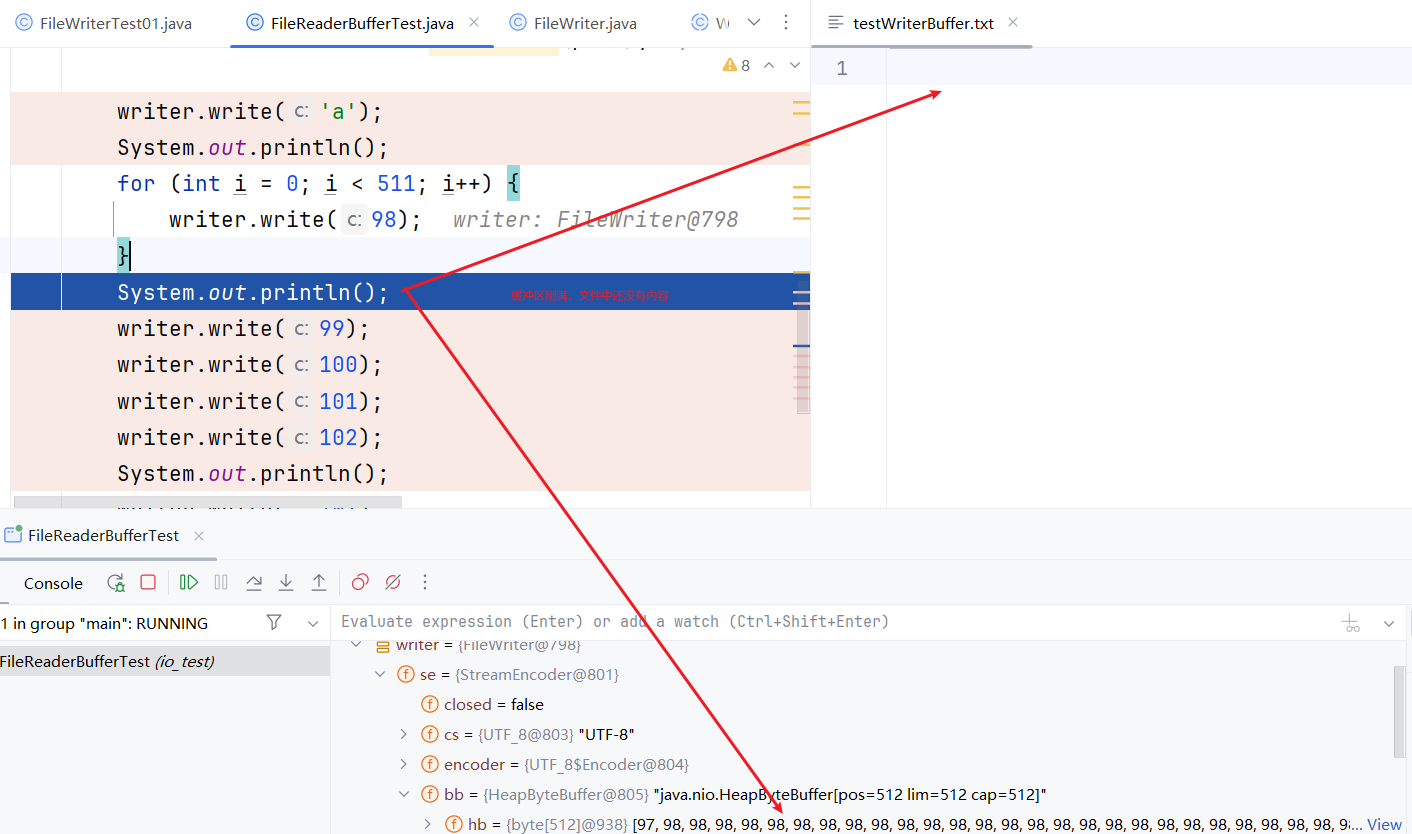
- 写入后续数据:
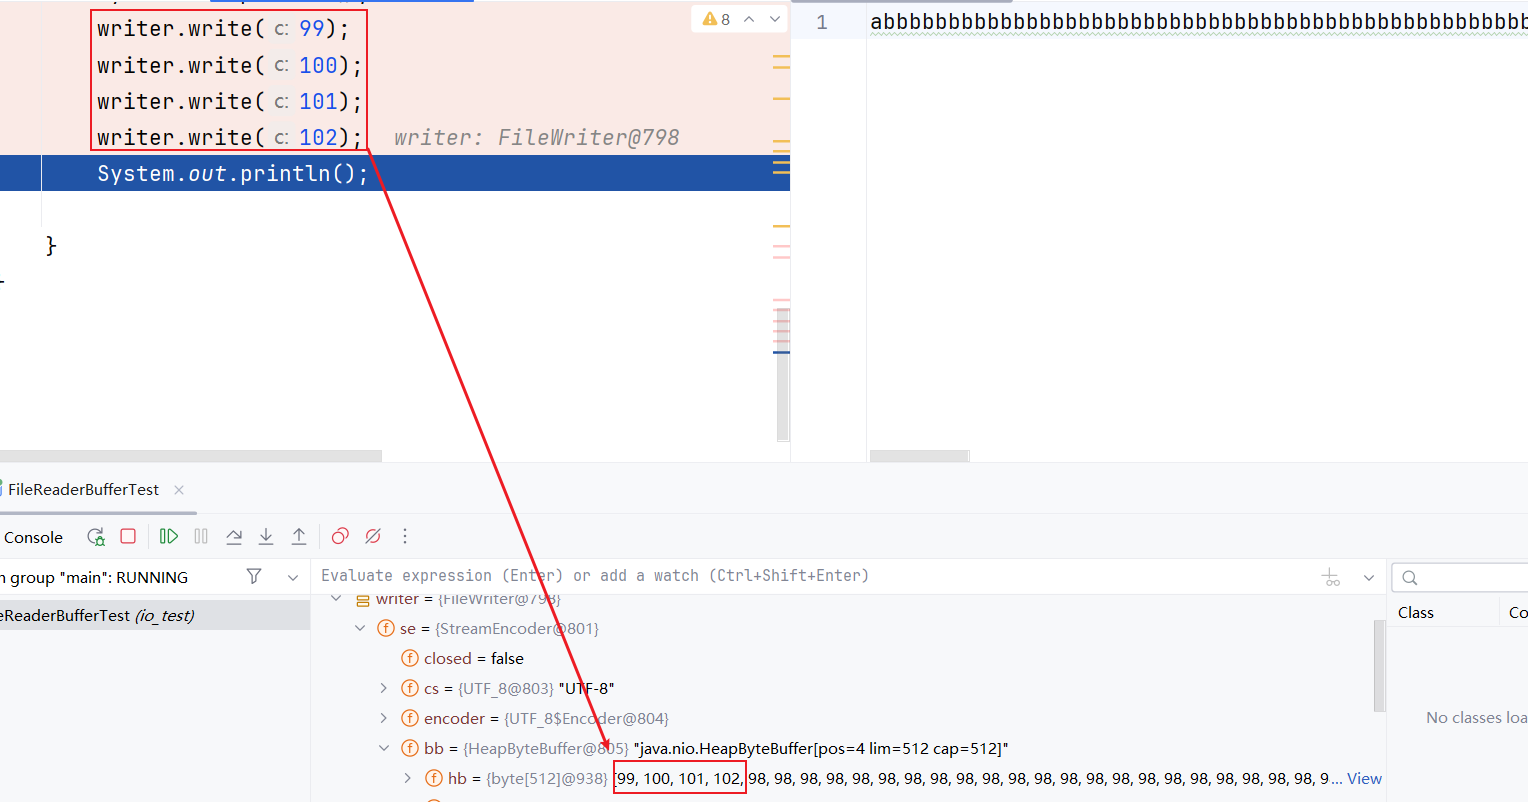
后续数据也是从0开始覆盖缓冲区的
- close方法:在断开连接前检查缓冲区中是否还有数据,如果有数据就将其全部写入
字符流完成文件拷贝
普通文件
一般情况下,字符流只能拷贝普通文本文件,并且要保证:
- 源文件编码格式
- 输入流解码格式
保持一致,并且:
- 输出流编码格式
- 目标文件解码格式
保持一致,这样在读取时不会出现不可逆的乱码,到程序中就变为”内容”了,只需要保证输出流和目标文件的码表一致即可。
重要的不是输入输出流保持一致,而是源文件编码与Reader编码一致,Writer编码与目标文件编码必须一致。
对于普通的文本文件来说:
String inputPath = "d:\\IOTest\\testWriterBuffer.txt";
String copyTo = "d:\\IOTest\\copyOfTestWriterBuffer.txt";
FileReader reader = new FileReader(inputPath,Charset.forName("UTF-8"));
FileWriter writer = new FileWriter(copyTo,Charset.forName("GBK"));
try(reader;writer){
    char[] chars = new char[1024];
    int readCount = 0;
    while ((readCount = reader.read(chars)) != -1){
        writer.write(chars,0,readCount);
    }
}
可以完成文件复制。
但是对于音视频文件、图片等,使用字符流进行拷贝很可能会出现不可逆性错误,因为字符流默认是通过UTF-8(IDEA设置)来解码文件的,如果在解码时遇到一个当前字符集不支持的编号,会被替换为不可逆字符;而在写出时不可逆字符就损坏了源文件的内容,而且一个不可逆字符翻译为多个字节,所以文件一般都会变大。
	//直接拷贝MP4文件
    String inputPath = "d:\\IOTest\\copy.mp4";
    String copyTo = "d:\\IOTest\\copyOfcopy.mp4";
    FileReader reader = new FileReader(inputPath);
    FileWriter writer = new FileWriter(copyTo);
    try(reader;writer){
        char[] chars = new char[1024];
        int readCount = 0;
        while ((readCount = reader.read(chars)) != -1){
            writer.write(chars,0,readCount);
        }
    }
}

并且文件变大
ISO-8859-1:逐字节读取,并且0-255都有编号与之对应。
这就是ISO-8859-1的强大之处,每个字节翻译为编号后都会有与之对应的内容,也就不会出现不可逆字符,在写出时指定用ISO-8859-1编码就能还原原本的内容。
任意文件
String inputPath = "d:\\IOTest\\copy.mp4";
String copyTo = "d:\\IOTest\\copyOfcopy.mp4";
FileReader reader = new FileReader(inputPath,Charset.forName("ISO-8859-1"));
FileWriter writer = new FileWriter(copyTo,Charset.forName("ISO-8859-1"));
try(reader;writer){
    char[] chars = new char[1024];
    int readCount = 0;
    while ((readCount = reader.read(chars)) != -1){
        writer.write(chars,0,readCount);
    }
}

练习:文件夹拷贝
public static void main(String[] args) {
    File srcDir = new File("d:\\IOTest");
    File targetDir = new File("d:\\IOCopyTwo");
    copyDir(srcDir,targetDir);
}
public static void copyDir(File srcFile,File targetFile){
    if (srcFile == null){
        return;
    }
    if (!targetFile.exists()){
        targetFile.mkdir();
    }
    File[] files = srcFile.listFiles();
    for (File file : files) {
        if (file.isFile()){
            //拷贝,创建输入输出流
            File fullNameFile = new File(targetFile,file.getName());
            fileCopy(file,fullNameFile);
        } else if (file.isDirectory()) {
            //1. 递归
            //2. BFS
            copyDir(file, new File(targetFile, file.getName()));
        }
    }
}

private static void fileCopy(File srcFile,File targetFile) {
    try(BufferedInputStream bis = new BufferedInputStream(new FileInputStream(srcFile));
        BufferedOutputStream bos = new BufferedOutputStream(new FileOutputStream(targetFile))) {
        byte[] bytes = new byte[1024 * 1024 * 5];
        int readCount = 0;
        while ((readCount = bis.read(bytes)) != -1){
            bos.write(bytes,0,readCount);
        }
        bos.flush();
    } catch (IOException e) {
        e.printStackTrace();
    }
}
BFS实现:
public static void main(String[] args) {
    File srcDir = new File("d:\\IOTest");
    File targetDir = new File("d:\\IOCopySix");
    copyDir(srcDir,targetDir);
}
public static void copyDir(File srcFile,File targetFile){
    if (srcFile == null){
        return;
    }
    if (!targetFile.exists()){
        targetFile.mkdir();
    }
    Stack<File> stack = new Stack<>();
    stack.push(srcFile);
    while (!stack.isEmpty()){
        File popFile = stack.pop();
        File[] files = popFile.listFiles();
        for (File file : files) {
            if (file.isFile()){
                //拷贝,创建输入输出流
                File fullNameFile = new File(targetFile,file.getName());
                fileCopy(file,fullNameFile);
            } else if (file.isDirectory()) {
                File newDir = new File(targetFile, file.getName());
                newDir.mkdir();
                stack.push(file);
            }
        }
    }
}

private static void fileCopy(File srcFile,File targetFile) {
    try(BufferedInputStream bis = new BufferedInputStream(new FileInputStream(srcFile));
        BufferedOutputStream bos = new BufferedOutputStream(new FileOutputStream(targetFile))) {
        byte[] bytes = new byte[1024 * 1024 * 5];
        int readCount = 0;
        while ((readCount = bis.read(bytes)) != -1){
            bos.write(bytes,0,readCount);
        }
        bos.flush();
    } catch (IOException e) {
        e.printStackTrace();
    }
}
文件加密
文件加密和解密 : $(x \oplus y ) \oplus y == x$,对一个数字连续两次异或同一个数字,得到的还是原来的数字
- 加密原理:对原始文件中的每一个字节进行更改,将更改以后的数据存储到新文件中
- 解密原理:读取加密后的文件,按照加密规则反向操作
byte[] bytes = new byte[1024 * 1024 * 1];
int readCount = 0;
/**
 * 1. 字节流更改
 */

BufferedInputStream bis = new BufferedInputStream(new FileInputStream(inputPath));
BufferedOutputStream bos = new BufferedOutputStream(new FileOutputStream(outputPath));
try(bis;bos){
    while ((readCount = bis.read(bytes)) != -1){
        for (int i = 0; i < readCount; i++) {
            bytes[i] ^= 1001;
        }
        bos.write(bytes,0,readCount);
    }
}catch (Exception e){
    e.printStackTrace();
}
更高阶的加密方案:用ISO-8859-1读取内容,对每个字节进行异或a操作,解密时就需要用ISO读取文件,再次异或a,得到原先得到内容。
练习:文件中数字排序
文件中数据排序: {2-1-4-7-8} 变为 {1-2-4-7-8}
注意:write不能直接写整数
在输出时,可以将数组 Arrays.toString,再使用replace( “, ” , “-”);
注意:本地创建的文件不要带有BOM,BOM可能导致对文件中的内容排序失败
缓冲流
缓冲流自带缓冲数组,不需要在读写时再指定数组了。
java.io.BufferedReader
java.io.BufferedWriter
java.io.BufferedInputStream
java.io.BufferedOutputStream
注意:FileInputStream没有缓冲区;FileReader有缓冲区,在缓冲区中进行解码
缓冲流是高级流,是对基本流做了包装,这种流被称为包装流。

创建缓冲流时需要指定基本流,因为真正进行文件读写的还是基本流,只是在缓冲流的加持下效率更高了。
但是InputStream、Reader等都是抽象类,只能传递子类对象
当流的构造方法需要一个流的时候;通过构造方法被传进来的流被称为 “节点流”;外部负责包装的流被叫做:“包装流” 或者 “处理流”
包装流就是对一个已存在的流的连接和封装,通过所封装的流的提供的方法实现数据读写操作,例如:缓冲流、转换流和对象流等。
BufferedInputStream
- BufferedInputStream底层缓冲区是字节数组,默认长度为8192
public class BufferedInputStream extends FilterInputStream {  //继承自FilterInputStream

    private static final int DEFAULT_BUFFER_SIZE = 8192;
}
构造方法:
//以默认长度8192创建字节缓冲流
public BufferedInputStream(InputStream in) {
    this(in, DEFAULT_BUFFER_SIZE);
}
//以指定长度创建字节缓冲流
public BufferedInputStream(InputStream in, int size) {
    super(in);  //基本流交给父类构造方法
    if (size <= 0) {
        throw new IllegalArgumentException("Buffer size <= 0");
    }
    initialSize = size;
    if (getClass() == BufferedInputStream.class) {
        lock = InternalLock.newLockOrNull();
        buf = EMPTY;
    } else {
        lock = null;
        buf = new byte[size];  //创建缓冲区
    }
}
注意,构造方法传递的基本流对象通过super交给父类构造方法:
public class FilterInputStream extends InputStream {

	protected volatile InputStream in;

	protected FilterInputStream(InputStream in) {
        this.in = in;
    }
也就说明,BufferedInputStream只是对基本流的一种增强
Linux系统一个块的大小就是8192
字节缓冲流提高效率的原因
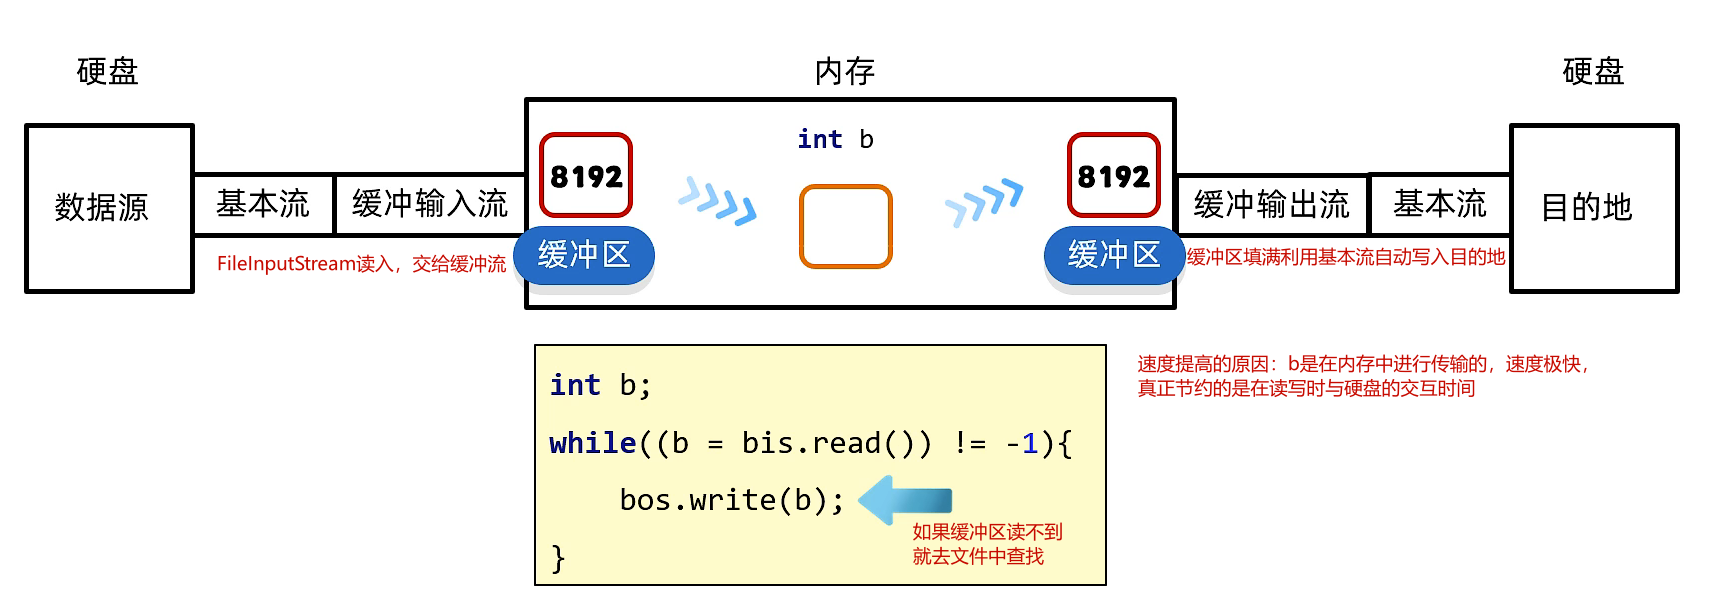
提高效率的原因:
- b的交换是在内存中完成的,速度极快
- 提高的是读写时与硬盘交互的时间
BufferedReader
- 字符缓冲流底层自带了默认长度8192的字符数组缓冲区提高性能,Java中1字符是2字节,也就是16k字节大小的缓冲区
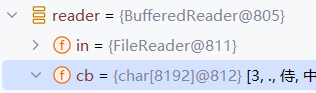
public class BufferedReader extends Reader {
    private Reader in;

    private char[] cb;

    private static final int DEFAULT_CHAR_BUFFER_SIZE = 8192;
}
BufferedInputStream底层是8192的字节数组。
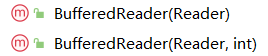
构造方法:

也可以在创建时指定缓冲区数组长度:
- 基本字符流本身就是带有512字节缓冲区数组的,BufferedReader提高效率的原因在于两个特有的成员方法:
特有成员方法:
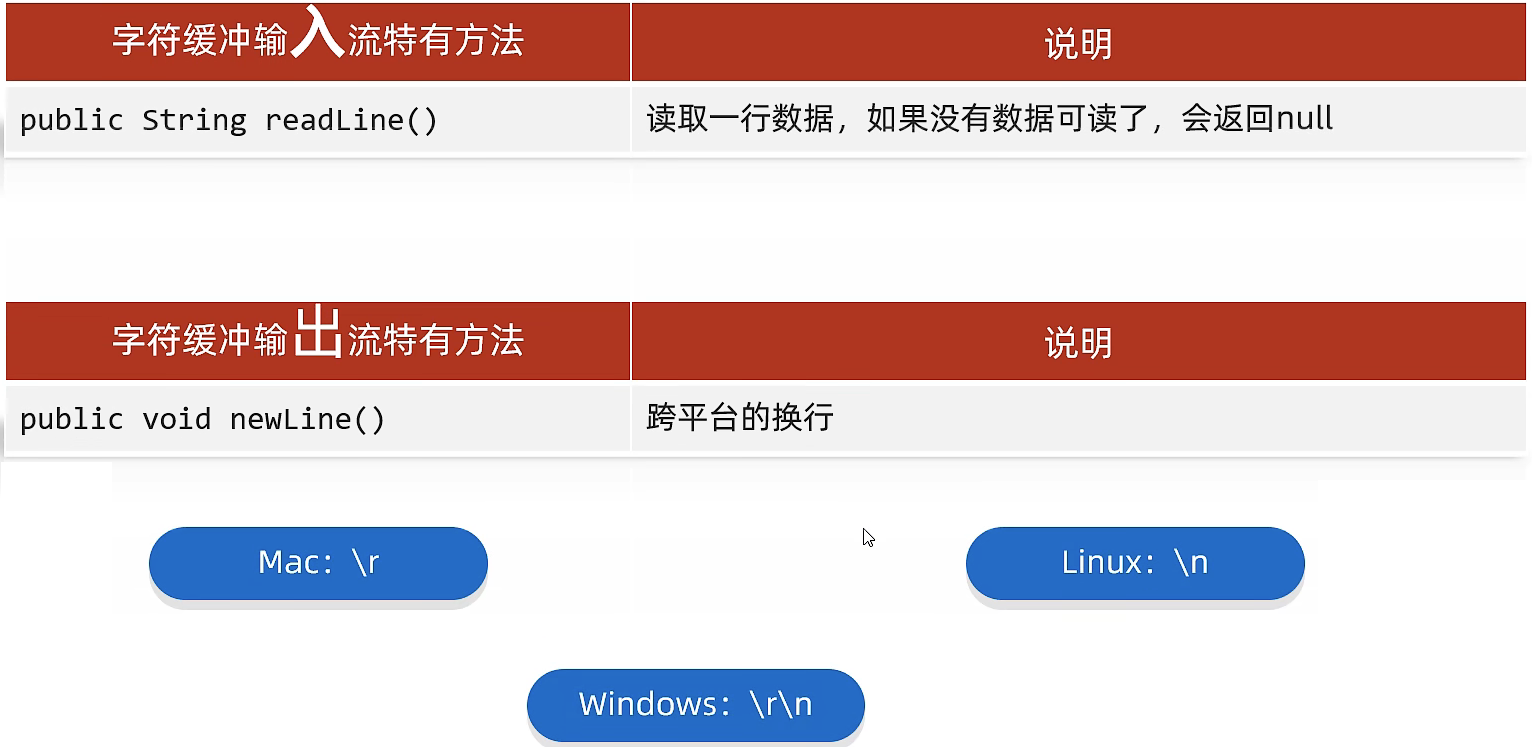
- BufferedReader特有方法:readLine,读取一行数据或null
- BufferedWriter特有方法:newLine,进行跨平台的换行
BufferedReader.readLine()
读取一个文本行(直到遇到换行),不带有换行符
BufferedReader reader = new BufferedReader(new FileReader(path));
String line = null;

try(reader) {
    while ((line = reader.readLine()) != null){
        System.out.println(line);
    }
} catch (IOException e) {
    e.printStackTrace();
}
注意:readLine读取的是不带有换行符的
之前的 FileInputStream 需要指定一个byte数组,向byte数组中读取内容;
而BufferedReader.readLine()可以直接读取一行;返回值:读取到一行的内容(不带有换行符);如果流已经结束就返回空
BufferedWriter
- BufferedReader和BufferedWriter底层缓冲区都是8192的字符数组
缓冲流的关闭
在源码中可以看到,包装流只是对节点流的加持:
public class BufferedReader extends Reader {
    private Reader in;
    }
包装流的close方法:
public void close() throws IOException {
    synchronized (lock) {
        if (in == null)
            return;
        try {
            in.close();
        } finally {
            in = null;
            cb = null;
        }
    }
}
会一同关闭节点流。
文件拷贝的效率对比
采用三种方式进行文件拷贝:
- 字节流 FileInputStream 一次读写8192个byte 耗时 16.253秒
- 字节缓冲流 BuffedInputStream 一次读写1byte 耗时 95.466秒
- 字节缓冲流 BuffedInputStream 一次读写8192个byte 耗时 17.686秒
可以看到,设置缓冲区可以明显提高字节流的效率
练习
- 将出师表恢复顺序
3.侍中、侍郎郭攸之、费祎、董允等,此皆良实,志虑忠纯,是以先帝简拔以遗陛下。愚以为宫中之事,事无大小,悉以咨之,然后施行,必能裨补阙漏,有所广益。
8.愿陛下托臣以讨贼兴复之效,不效,则治臣之罪,以告先帝之灵。若无兴德之言,则责攸之、祎、允等之慢,以彰其咎;陛下亦宜自谋,以咨诹善道,察纳雅言,深追先帝遗诏,臣不胜受恩感激。
4.将军向宠,性行淑均,晓畅军事,试用于昔日,先帝称之曰能,是以众议举宠为督。愚以为营中之事,悉以咨之,必能使行阵和睦,优劣得所。
2.宫中府中,俱为一体,陟罚臧否,不宜异同。若有作奸犯科及为忠善者,宜付有司论其刑赏,以昭陛下平明之理,不宜偏私,使内外异法也。
1.先帝创业未半而中道崩殂,今天下三分,益州疲弊,此诚危急存亡之秋也。然侍卫之臣不懈于内,忠志之士忘身于外者,盖追先帝之殊遇,欲报之于陛下也。诚宜开张圣听,以光先帝遗德,恢弘志士之气,不宜妄自菲薄,引喻失义,以塞忠谏之路也。
9.今当远离,临表涕零,不知所言。
6.臣本布衣,躬耕于南阳,苟全性命于乱世,不求闻达于诸侯。先帝不以臣卑鄙,猥自枉屈,三顾臣于草庐之中,咨臣以当世之事,由是感激,遂许先帝以驱驰。后值倾覆,受任于败军之际,奉命于危难之间,尔来二十有一年矣。
7.先帝知臣谨慎,故临崩寄臣以大事也。受命以来,夙夜忧叹,恐托付不效,以伤先帝之明,故五月渡泸,深入不毛。今南方已定,兵甲已足,当奖率三军,北定中原,庶竭驽钝,攘除奸凶,兴复汉室,还于旧都。此臣所以报先帝而忠陛下之职分也。至于斟酌损益,进尽忠言,则攸之、祎、允之任也。
5.亲贤臣,远小人,此先汉所以兴隆也;亲小人,远贤臣,此后汉所以倾颓也。先帝在时,每与臣论此事,未尝不叹息痛恨于桓、灵也。侍中、尚书、长史、参军,此悉贞良死节之臣,愿陛下亲之信之,则汉室之隆,可计日而待也。
String inputPath = "d:\\IOTest\\chushibiao.txt";
String outputPath = "d:\\IOTest\\chushibiaoCopy.txt";
BufferedReader reader = new BufferedReader(new FileReader(inputPath));
BufferedWriter writer = new BufferedWriter(new FileWriter(outputPath));
String line = null;

{
    try(reader;writer) {
        List<String> article = new ArrayList<>();
        while ((line = reader.readLine()) != null){
            article.add(line);
        }
        /**
         * 1. list.sort
         * 2. Collections.sort
         * 3. list.stream.sort.toList
         * 4. list.stream.collect(Collectors.toCollection())         */
        //1. list.sort
        //article.sort(Comparator.comparingInt(l -> l.charAt(0)));
        //2. Collections.sort
        //Collections.sort(article,Comparator.comparingInt(l -> l.charAt(0)));
        //3. list.stream.sort.toList
        //List<String> list = article.stream().sorted(Comparator.comparingInt(l -> l.charAt(0))).toList();
        //4. list.stream.toCollection(() -> new TreeMap)
        //TreeSet<String> treeSet = article.stream().collect(
        //        Collectors.toCollection(() -> new TreeSet<>(Comparator.comparingInt(l -> l.charAt(0)))));
        article.sort(Comparator.comparingInt(l -> l.charAt(0)));
        for (String s : article) {
            writer.write(s);
            writer.newLine();
        }
    } catch (Exception e) {
        e.printStackTrace();
    }

}
- 编写一个程序,把一个目录里边的所有带.java文件拷贝到另一个目录中,拷贝成功后,把后缀名是.java的文件改为.txt文件。 (注意事项:是先拷贝,拷贝成功后才可以改后缀名的)
public class Result {
    public static void main(String[] args) {
        File srcFile = new File("d:\\Development\\Maven_work\\MavenSpace\\crm\\crm_core");
        File targetFile = new File("d:\\IOTest\\copy2");
        copyAndChangeLastFix(srcFile,targetFile,s -> s.contains(".java"),s -> s.replace(".java",".txt"));

    }

    public static void copyAndChangeLastFix(File srcDir, File targetDir, Predicate<String> predicate, Function<String, String> fixMapper) {
        if (srcDir == null || !srcDir.exists() || srcDir.isFile() || targetDir == null || targetDir.isFile()) {
            return;
        }
        targetDir.mkdirs();
        File[] files = srcDir.listFiles(file -> file.isDirectory() || file.isFile() && predicate.test(file.getName()));
        if (files != null && files.length != 0) {
            for (File file : files) {
                if (file.isFile() && file.getName().endsWith(".java")) {
                    System.out.println("file.getName() = " + file.getName());
                    System.out.println("here");
                    copyFileAndChangeFix(file,new File(targetDir,file.getName()),fixMapper);
                } else {
                    //isDir cd and list
                    copyAndChangeLastFix(file,new File(targetDir,file.getName()),predicate,fixMapper);
                }
            }
        }
    }

    public static void copyFileAndChangeFix(File srcDir, File targetDir, Function<String, String> fixMapper) {
        try (
                BufferedInputStream bis = new BufferedInputStream(new FileInputStream(srcDir));
                BufferedOutputStream bos = new BufferedOutputStream(new FileOutputStream(targetDir));
        ) {
            byte[] bytes = new byte[1024 * 16];
            int len;
            while ((len = bis.read(bytes)) != -1){
                bos.write(bytes,0,len);
            }
            bos.flush();
        } catch (Exception e) {
            e.printStackTrace();
        }
        targetDir.renameTo(new File(fixMapper.apply(targetDir.getAbsolutePath())));
    }
}
- 需求描述:
 // 项目根路径下有个questions.txt文件内容如下:
 5+5
 150-25
 155*155
 2555/5
 // 要求:读取内容计算出结果,将结果写入到results.txt文件中
 5+5=10
思考:如果说读取questions.txt文件的内容,算出计算结果,再写入questions.txt文件,即读和写的操作时针对同一个文件,应该如何操作
public class Result {
    public static void main(String[] args) {
        try (BufferedReader br = new BufferedReader(new FileReader("questions.txt"));
             BufferedWriter bw = new BufferedWriter(new FileWriter("result.txt"))
        ) {
            String line;
            while ((line = br.readLine()) != null) {
                bw.write(getNewLine(line, getResult(line)));
                bw.newLine();
            }
            bw.flush();
        } catch (IOException e) {
            e.printStackTrace();
        }
    }

    public static String getNewLine(String line, int result) {
        return new StringBuilder(line).append("=").append(result).toString();
    }

    public static int getResult(String line) {
        String operatorStr = null;
        int i = 0;
        for ( ; i < line.length(); i++) {
            if (String.valueOf(line.charAt(i)).matches("\\D")) {
                operatorStr = String.valueOf(line.charAt(i));
                break;
            }
        }
        assert operatorStr != null;
        Operator operator = OperatorFactory.getOperator(operatorStr);
        int a = Integer.parseInt(line.substring(0, i));
        int b = Integer.parseInt(line.substring(i + 1));
        return operator.calc(a, b);
    }

}

class OperatorFactory {
    public static Operator getOperator(String operator) {
        return switch (operator) {
            case "*" -> new Mut();
            case "+" -> new Add();
            case "-" -> new Sub();
            case "/" -> new Div();
            default -> throw new IllegalStateException("Unexpected value: " + operator);
        };
    }
}

interface Operator {
    int calc(int a, int b);
}

class Add implements Operator {

    @Override
    public int calc(int a, int b) {
        return a + b;
    }
}

class Sub implements Operator {

    @Override
    public int calc(int a, int b) {
        return a - b;
    }
}

class Mut implements Operator {

    @Override
    public int calc(int a, int b) {
        return a * b;
    }
}

class Div implements Operator {

    @Override
    public int calc(int a, int b) {
        return a / b;
    }
}
总结
- 所有输出方法都不能直接输出整数,如果想要输出整数需要将其转换为字符串或char类型或byte类型
- 在创建输出对象会对原文件清空,随用随开启,不用即关闭
- 输出流对象最后一定要flush或者close
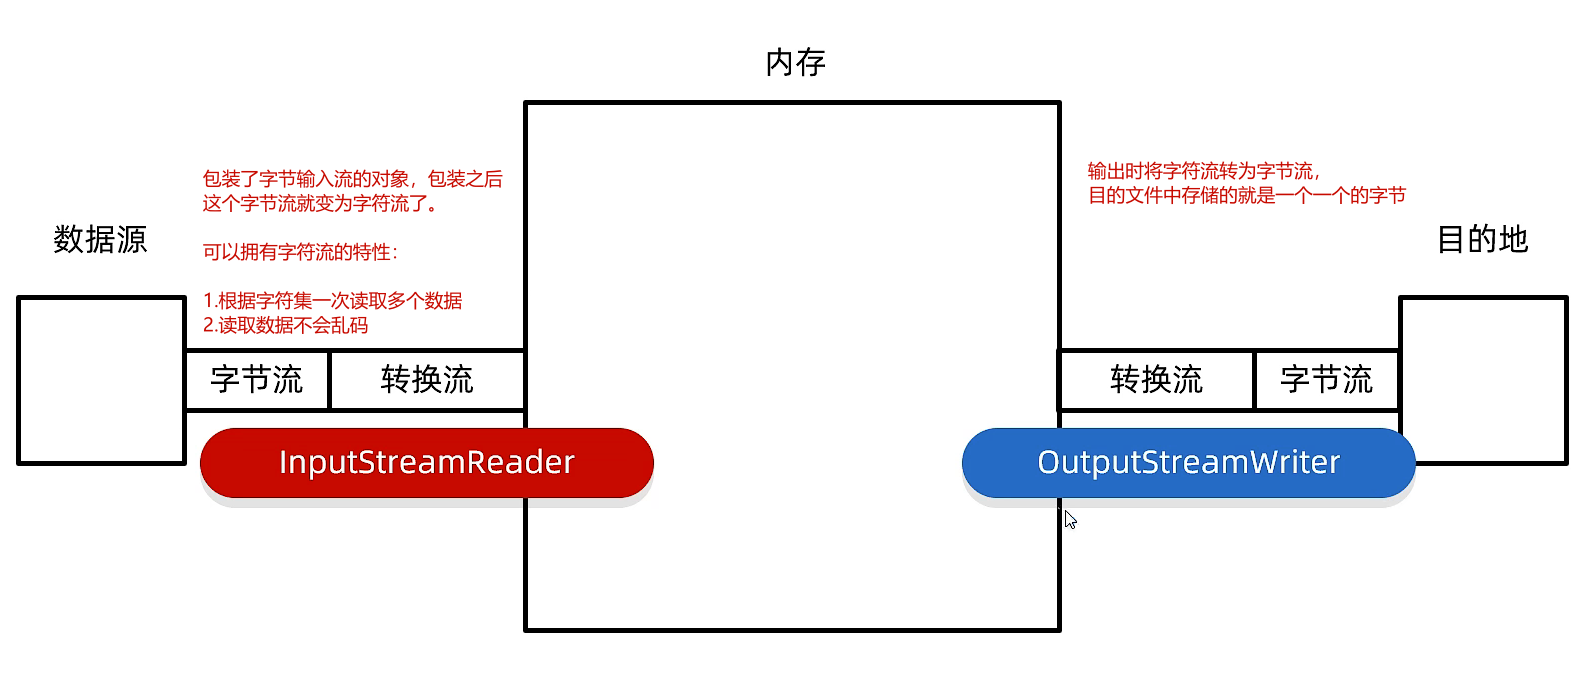
转换流
转换流是属于字符流的,是一种高级流,用来包装基本流;是字符流和字节流之间的桥梁
读取文件还是字节流完成的,经过包装具有了字符流的特性
源或者目的对应的设备是字节流,但是操作的却是文本数据,可以使用转换流作为桥梁。
例如网络请求的数据的都是以字节流传输的,但是中文就需要使用字符流接收
- java.io.InputStreamReader
- java.io.OutputStreamWriter
转换流既然属于字符流,底层也一定会有缓冲区
底层是默认长度为8192的字节缓冲区
构造方法:
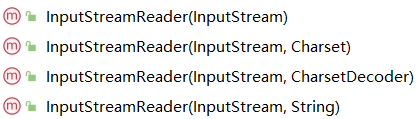
传递节点流,可以传递解码方式Charset
常用方法:
- read
只能读取char数组,或者int类型编号
作用:
- 用来包装字节流,字节流就拥有了字符流的特性:按照字符集读取多个字节,不会乱码
- 输出转换流也不会乱码
OutputStreamWriter
按照指定字符集将字节流转换为字符流。也就是写出数据时指定字符集,其实就类似于FileWriter。
具体作用在PrintStream 标准字节打印流中有所体现,PrintStream可以打印任何类型的数据,其构造方法都会调用这个构造方法:
public PrintStream(OutputStream out, boolean autoFlush, Charset charset) {
    super(out);
    this.autoFlush = autoFlush;
    this.charOut = new OutputStreamWriter(this, charset);
    this.textOut = new BufferedWriter(charOut);
    this.charset = charset;

    // use monitors when PrintStream is sub-classed
    if (getClass() == PrintStream.class) {
        lock = InternalLock.newLockOrNull();
    } else {
        lock = null;
    }
}
将入参字节流转化为charout持有的OutputStreamWriter,再包装为BufferedWriter提高写出效率。
练习
- 模拟BufferedReader的readLine方法:
InputStreamReader isr = new InputStreamReader(new FileInputStream(path));
char[] line = new char[8192 * 3];
char c = ' ';
int read = 0;
try {
    int count = 0;

    while ((read = isr.read()) != -1){
        if ((c = (char) read) != '\n'){
            line[count++] = c;
        }else {
            System.out.println(new String(line,0,count));
            count = 0;
        }
    }
} catch (IOException e) {
    e.printStackTrace();
}
转换文件编码
需求1:读取GBK编码的中文文本,不能乱码
需求2:把一段中文按照GBK的方式写入本地文件
需求3:将本地文件中的GBK文件转换为UTF-8
- 需求1:读取GBK编码的中文文本,不能乱码
//1. 基本字节流 byte设置为2的整数倍,new String指定编码
//   基本字符流 读取
//2. BufferedReader 读取 readLine
//   BufferedInputStream 默认缓冲区8192  2的整数倍即可
//3. InputStreamReader  设置字符集GBK,接收数组char无须保证2的整数倍

InputStreamReader isr = new InputStreamReader(new FileInputStream(path), Charset.forName("GBK"));
char[] chars = new char[8192 * 3];
int readCount = 0;
try {
    while ((readCount = isr.read(chars)) != -1){
        System.out.print(new String(chars,0,readCount));
    }
} catch (Exception e) {
    e.printStackTrace();
}
- 需求3:保证源文件及输入流为GBK,目标文件及输出流为UTF-8即可
读取文件
需求:利用字节流读取文件中的数据,要求每次读取一行,且不能出现乱码。
BufferedReader reader = new BufferedReader(new InputStreamReader(new FileInputStream(path), Charset.forName("GBK")));
String line = null;
try {
    while ((line = reader.readLine()) != null){
        System.out.println(line);
    }
} catch (Exception e) {
    e.printStackTrace();
}
打印流
打印流不能读,只能写,有两类:PrintStream,PrintWriter
-
打印流提供了非常方便的打印功能,可以打印任何的数据类型,例如:小数、整数、字符串、布尔类型等等。
-
之前使用字节流输出数据非常麻烦,只能输出byte数据,想输出String需要getBytes。
-
PrintStream类继承于OutputStream类,并且PrintStream类在OutputStream类的基础之上提供了增强的功能,可以方便的输出各种类型的数据(不仅限于byte型)的格式化表示形式。并且,PrintStream类提供的方法从不抛出IOException。
特点1:打印流只能操作文件目的地,不能操作数据源
特点2:特有的写出方法,可以实现数据原样写出
特点3:特有的写出方法,可以实现自动刷新 + 自动换行
PrintStream 标准字节打印流
一般字节流底层都没有缓冲区,开不开自动刷新都是直接写出
- 构造方法
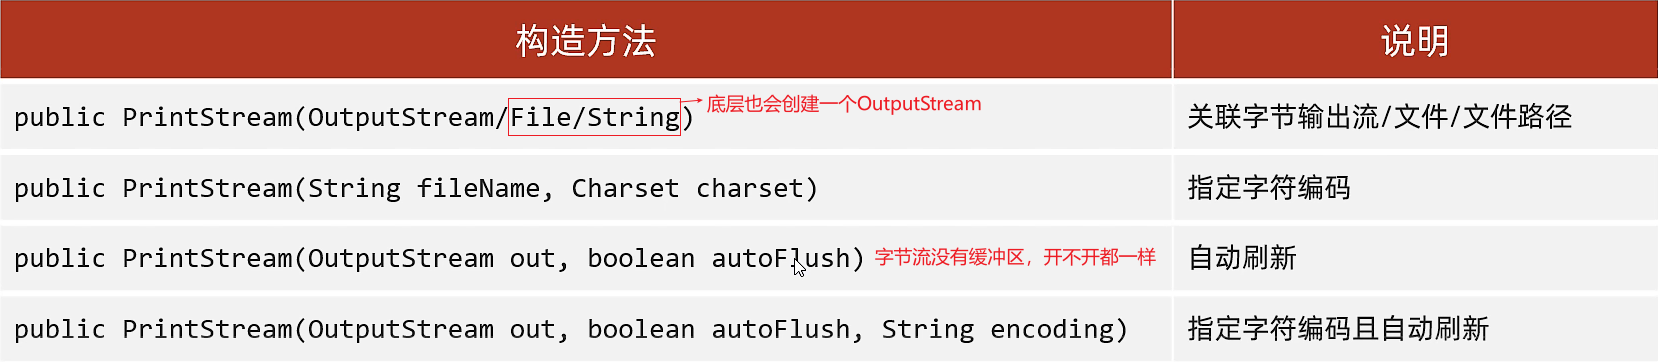
在PrintStream中定义的构造方法中可以清楚的发现有一个构造方法可以直接接收OutputStream类的实例,这是因为与OutputStream相比起来,PrintStream可以更加方便的输出数据,这就好比将OutputStream重新包装了一下,使之输出更加方便。
- 如果APPEND写文件,必须创建低级管道手动设置追加
public PrintStream(OutputStream out, boolean autoFlush, Charset charset) {
    super(out);
    this.autoFlush = autoFlush;
    this.charOut = new OutputStreamWriter(this, charset);
    this.textOut = new BufferedWriter(charOut);
    this.charset = charset;

    // use monitors when PrintStream is sub-classed
    if (getClass() == PrintStream.class) {
        lock = InternalLock.newLockOrNull();
    } else {
        lock = null;
    }
}
将入参字节流转化为OutputStreamWriter,包装为BufferedWriter提高效率。
其实PrintStream底层就是BufferedWriter。
-
打印流的
PrintStream(String fileName,Charset charset)完全替代了OutputStreamWriter -
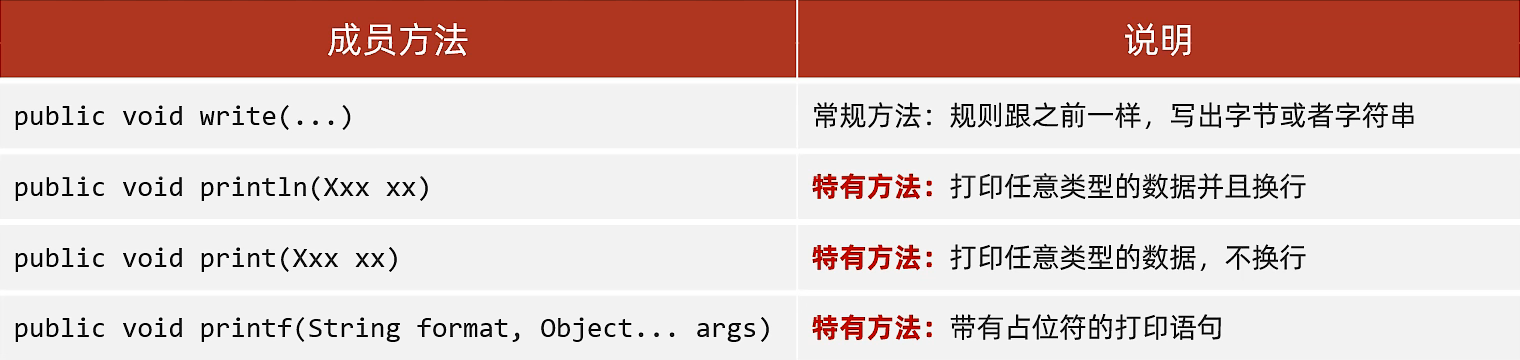
常用方法:
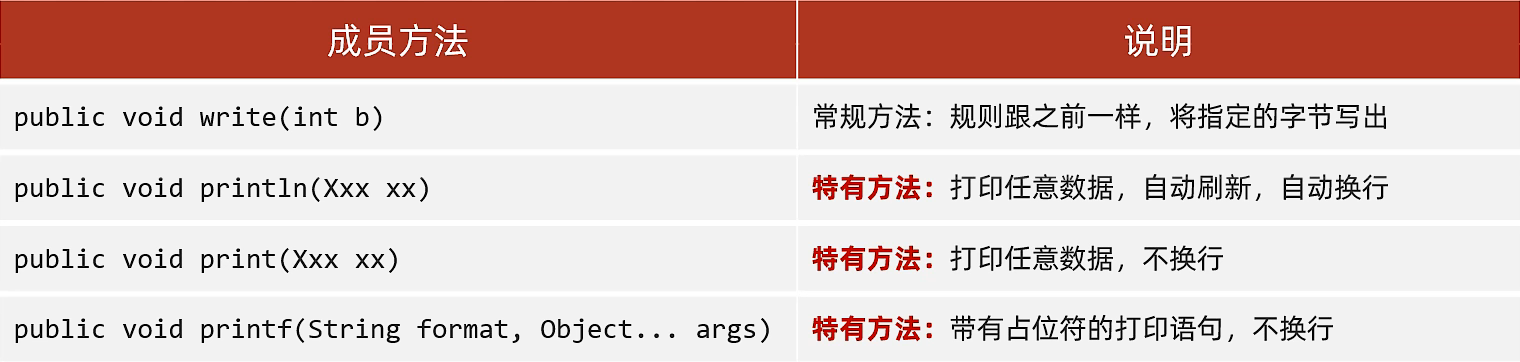
PrintStream printStream = new PrintStream("abc.txt");
//写出字节数据
printStream.write("abc".getBytes());
printStream.write("\n".getBytes());

//写出
printStream.print("def"); //打印任意类型的数据,不换行

//换行写,自动刷新
printStream.println("ghi"); //打印任意类型的数据

//占位符打印
printStream.printf("%s : %s","BeiJing","China");
对于重载多次的println/print方法:
public void println(int x) {
    if (getClass() == PrintStream.class) {
        writeln(String.valueOf(x));
    } else {
        synchronized (this) {
            print(x);
            newLine();
        }
    }
}
实际上都是经过writeln方法输出的:
private void writeln(String s) {
    try {
        if (lock != null) {
            lock.lock();
            try {
                implWriteln(s);
            } finally {
                lock.unlock();
            }
        } else {
            synchronized (this) {
                implWriteln(s);
            }
        }
    }
    catch (InterruptedIOException x) {
        Thread.currentThread().interrupt();
    }
    catch (IOException x) {
        trouble = true;
    }
}
private void implWriteln(String s) throws IOException {
    ensureOpen();
    textOut.write(s);
    textOut.newLine();
    textOut.flushBuffer();
    charOut.flushBuffer();
    if (autoFlush)
        out.flush();
}
总结
System.out.println(),实际上是System.out变量持有的一个PrintStream引用。
PrintStream可以接收一个OutputStream,并且支持指定字符集;说明在写出的时候可以根据字符集的方式自动对字符串类型入参进行编码。
PrintStream可以根据String/File/OutputSrteam来创建,但是如果想要指定以O_APPEND方式写入文件,就需要指定以OutputStream方式写入参数,因为只能在创建节点流的时候指定追加为true或false
传递给PrintStream的参数,不管是String/File/OutputStream,都被先转换为charOut持有的OutputStreamWriter,再包装为textOut持有的BufferedWriter,在写出的时候就通过BufferedWriter进行写出。
public void println(String x) {
    if (getClass() == PrintStream.class) {
        writeln(String.valueOf(x));
    } else {
        synchronized (this) {
            print(x);
            newLine();
        }
    }
}
println()方法有很多重载的方法,但是对于这些重载的方法,println方法内部会调用String.valueOf方法,该方法内部调用参数的toString方法,也就是将不同类型的入参全部转化为String类型,再通过writeln方法写出字符串类型参数。
private void writeln(String s) {
    try {
        if (lock != null) {
            lock.lock();
            try {
                implWriteln(s);
            } finally {
                lock.unlock();
            }
        } else {
            synchronized (this) {
                implWriteln(s);
            }
        }
    }
    catch (InterruptedIOException x) {
        Thread.currentThread().interrupt();
    }
    catch (IOException x) {
        trouble = true;
    }
}
调用implWriteln方法,该方法中:
private void implWriteln(String s) throws IOException {
    ensureOpen();
    textOut.write(s);  // < --- BufferedWriter方法写出
    textOut.newLine();
    textOut.flushBuffer();  // < --- 刷新BufferedWriter
    charOut.flushBuffer();
    if (autoFlush)    // < --- autoFlush属性其实刷新的是PrintStream
        out.flush();
}
所以BufferedWriter用来对OutputStreamWriter进行增强,而PrintStream是对BufferedWriter的增强。
printf的占位符
//% n表示换行
        ps.printf("我叫%s %n", "阿玮");
        ps.printf("%s喜欢%s %n", "阿珍", "阿强");
        ps.printf("字母H的大写:%c %n", 'H');
        ps.printf("8>3的结果是:%b %n", 8 > 3);
        ps.printf("100的一半是:%d %n", 100 / 2);
        ps.printf("100的16进制数是:%x %n", 100);
        ps.printf("100的8进制数是:%o %n", 100);
        ps.printf("50元的书打8.5折扣是:%f元%n", 50 * 0.85);
        ps.printf("计算的结果转16进制:%a %n", 50 * 0.85);
        ps.printf("计算的结果转科学计数法表示:%e %n", 50 * 0.85);
        ps.printf("计算的结果转成指数和浮点数,结果的长度较短的是:%g %n", 50 * 0.85);
        ps.printf("带有百分号的符号表示法,以百分之85为例:%d%% %n", 85);
        ps.println("---------------------");

        double num1 = 1.0;
        ps.printf("num: %.4g %n", num1);
        ps.printf("num: %.5g %n", num1);
        ps.printf("num: %.6g %n", num1);

        float num2 = 1.0F;
        ps.printf("num: %.4f %n", num2);
        ps.printf("num: %.5f %n", num2);
        ps.printf("num: %.6f %n", num2);
        ps.println("---------------------");

        ps.printf("数字前面带有0的表示方式:%03d %n", 7);
        ps.printf("数字前面带有0的表示方式:%04d %n", 7);
        ps.printf("数字前面带有空格的表示方式:% 8d %n", 7);
        ps.printf("整数分组的效果是:%,d %n", 9989997);
        ps.println("---------------------");

        //最终结果是10位,小数点后面是5位,不够在前面补空格,补满10位
        //如果实际数字小数点后面过长,但是只规定两位,会四舍五入
        //如果整数部分过长,超出规定的总长度,会以实际为准
        ps.printf("一本书的价格是:%2.5f元%n", 49.8);
        ps.printf("%(f%n", -76.04);

        //%f,默认小数点后面7位,
        //<,表示采取跟前面一样的内容
        ps.printf("%f和%3.2f %n", 86.04, 1.789651);
        ps.printf("%f和%<3.2f %n", 86.04, 1.789651);
        ps.println("---------------------");

        Date date = new Date();
        // %t 表示时间,但是不能单独出现,要指定时间的格式
        // %tc 周二 12月 06 22:08:40 CST 2022
        // %tD 斜线隔开
        // %tF 冒号隔开(12小时制)
        // %tr 冒号隔开(24小时制)
        // %tT 冒号隔开(24小时制,带时分秒)
        ps.printf("全部日期和时间信息:%tc %n", date);
        ps.printf("月/日/年格式:%tD %n", date);
        ps.printf("年-月-日格式:%tF %n", date);
        ps.printf("HH:MM:SS PM格式(12时制):%tr %n", date);
        ps.printf("HH:MM格式(24时制):%tR %n", date);
        ps.printf("HH:MM:SS格式(24时制):%tT %n", date);

        System.out.println("---------------------");
        ps.printf("星期的简称:%ta %n", date);
        ps.printf("星期的全称:%tA %n", date);
        ps.printf("英文月份简称:%tb %n", date);
        ps.printf("英文月份全称:%tB %n", date);
        ps.printf("年的前两位数字(不足两位前面补0):%tC %n", date);
        ps.printf("年的后两位数字(不足两位前面补0):%ty %n", date);
        ps.printf("一年中的第几天:%tj %n", date);
        ps.printf("两位数字的月份(不足两位前面补0):%tm %n", date);
        ps.printf("两位数字的日(不足两位前面补0):%td %n", date);
        ps.printf("月份的日(前面不补0):%te  %n", date);

        System.out.println("---------------------");
        ps.printf("两位数字24时制的小时(不足2位前面补0):%tH %n", date);
        ps.printf("两位数字12时制的小时(不足2位前面补0):%tI %n", date);
        ps.printf("两位数字24时制的小时(前面不补0):%tk %n", date);
        ps.printf("两位数字12时制的小时(前面不补0):%tl %n", date);
        ps.printf("两位数字的分钟(不足2位前面补0):%tM %n", date);
        ps.printf("两位数字的秒(不足2位前面补0):%tS %n", date);
        ps.printf("三位数字的毫秒(不足3位前面补0):%tL %n", date);
        ps.printf("九位数字的毫秒数(不足9位前面补0):%tN %n", date);
        ps.printf("小写字母的上午或下午标记(英):%tp %n", date);
        ps.printf("小写字母的上午或下午标记(中):%tp %n", date);
        ps.printf("相对于GMT的偏移量:%tz %n", date);
        ps.printf("时区缩写字符串:%tZ%n", date);
        ps.printf("1970-1-1 00:00:00 到现在所经过的秒数:%ts %n", date);
        ps.printf("1970-1-1 00:00:00 到现在所经过的毫秒数:%tQ %n", date);
PrintWriter 标准字符打印流
PrintWriter类继承于Writer抽象类,PrintWriter类也提供了PrintStream类的所有打印方法,其方法也从不抛出IOException。 PrintWriter与PrintStream的区别:作为处理流使用时,PrintStream类只能封装OutputStream类型的字节流,而PrintWriter类既可以封装OutputStream类型的字节流,还能够封装Writer类型的字符输出流并增强其功能。
字符打印流底层是有缓冲区的,效率更高,必须手动开启自动刷新
对比PrintStream,PrintWriter其实是将内部持有的引用变为out类型的Writer:
protected Writer out;
而println方法基本都是相同的,区别仅仅是PrintStream在implWriteln中写出数据后进行flushBuffer操作:
//PrintStream的implWriteln方法。
private void implWriteln(String s) throws IOException {
    ensureOpen();
    textOut.write(s);
    textOut.newLine();
    textOut.flushBuffer();  // < --- 刷新
    charOut.flushBuffer();
    if (autoFlush)
        out.flush();
}
而PrintWrite的implWriteln方法:
private void implWrite(String s, int off, int len) {
    try {
        ensureOpen();
        out.write(s, off, len);
    } catch (InterruptedIOException x) {
        Thread.currentThread().interrupt();
    } catch (IOException x) {
        trouble = true;
    }
}
仅仅是调用Writer类型的out对象进行写出,所以PrintWriter类型必须设置自动刷新或者手动刷新
- 构造方法:

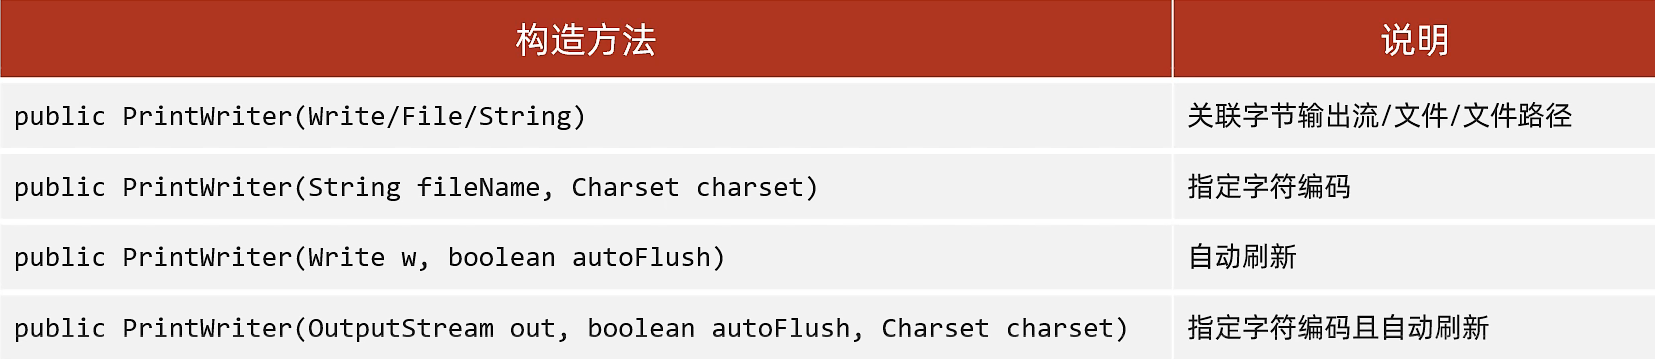
所有构造方法:
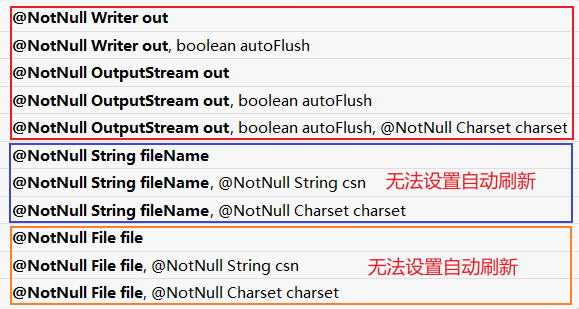
只有以流为参数的才能设置自动刷新
- 常用方法:
PrintWriter printWriter = new PrintWriter("test.txt");  //String File 创建的对象不能自动刷新
printWriter.println("hello World");
printWriter.flush(); //必须手动调用flush方法
System
System.out
使用“System.out”就能获得一个标准的输出流,通过标准的输出流就能够把数据在控制台输出。
普通的输出流,是把数据写入到文件或网络中;而标准的输出流,是把数据打印在控制台。
public final class System {
    private static native void registerNatives();
    static {
        registerNatives();
    }
    private System() {
    }
	public static final InputStream in = null;
    public static final PrintStream out = null;
    public static final PrintStream err = null;
}
out对象就是一个标准输出字节流对象,由JVM创建,指向控制台且不可更改,我们向控制台打印信息的时候实际上就是调用的是PrintStream对象的方法,也可以这样调用:
PrintStream out = System.out;
out.println("hello world");
如果out对象被关闭,所有后续的内容都不能写出,只能重启JVM才会再次创建新的out对象
PrintStream out = System.out;
out.println("hello world");
out.close();
out.println("你好"); // <--- 不会输出了
- 改变系统标准输出流的指向:

改变输入输出流的指向都需要传递新的对象:
setOut需要PrintStream对象
System.setOut(new PrintStream("Syso.txt"));  //改变了系统标准输出流的指向,后续所有内容都指向该文件
//**标准输出流不指向控制台,指向`Syso.txt`文件**
System.out.println("abc");
System.out.println("def");
k但是,此处还是遗留有一个疑问的,out对象在System类中由static final修饰,由static代码块赋值,为什么setOut可以改变呢?
练习
- 通过标准的输出流,将数据写入到文件中
public class PrintStreamTest {
    public static void main(String[] args) throws IOException {
        // 修改标准输出流
        System.setOut(new PrintStream(new FileOutputStream("demo.txt")));
        // 把数据在文件中存储
        System.out.println(123);
        System.out.println(123.456);
        System.out.println("hello world");
        System.out.println(true);
        System.out.println('A');
        System.out.println(new Date());
    }
}
- 字符流BufferedReader转为字节流System.out
System.out表示标准输出流,可以将数据在控制台输出。但是System.out属于字节流,而写出一行字符串write(String line)方法只有字符流能够提供,那么就需要把字符流BufferedReader转为字节流System.out,这就涉及到了把字符流向字节流之间的转换。
【示例】获取文件中的数据,然后再控制台输出
public class OutputStreamWriterTest {
	public static void main(String[] args) throws IOException {
		// 创建一个字符输入流,明确目标文件
		BufferedReader br = new BufferedReader(new FileReader("E:\\a.txt"));
		// 字符流-->字节流
		OutputStreamWriter osw = new OutputStreamWriter(System.out);
		// 创建一个字符输出缓冲流,方便写入一行字符串文本
		BufferedWriter bw = new BufferedWriter(osw);
		// 通过循环,读取文件中的数据
		String line = null;
		bjile((line = br.readLine()) != null) {
			// 写入一行文本,也就是在控制台输出一行文本
			bw.write(line);
			// 添加换行
			bw.newLine();
			// 刷新数据
			bw.flush();
		}
		// 关闭流
		bw.close();
		br.close();
	}
}
补充:使用流输出内容到控制台太复杂了,还是使用System.out.println()简洁
System.in
使用“System.in”就能获得一个标准的输入流,通过标准的输入流就能够获得用户在控制台中输入的数据。
普通的输入流,是获得文件或网络中的数据;而标准的输入流,是获得控制台输入的数据。
int read = System.in.read();
int read1 = System.in.read();  //输入:a
System.out.println(read1); //97
System.out.println((char) read1); //a

int read2 = System.in.read();  //输入:97
System.out.println((char) read2); //9
第二次输入只接收了一个9,因为read每次只能接收一个数据
byte[] bytes = new byte[1024];
int readCount = System.in.read(bytes); //输入完毕回车
System.out.println(new String(bytes,0,readCount));
练习
- 通过标准的输入流,实现读取文件中的数据
public class InputStreamDemo {
    public static void main(String[] args) throws IOException {
        // 修改标准输入流的数据源
        System.setIn(new FileInputStream("demo.txt"));
        // 获取一个标准的输入流
        InputStream in = System.in;
        // 读取文件中的内容
        byte[] by = new byte[1024]; //如果有中文,必须设置大于文件的长度
        int len = -1;
        while ((len = in.read(by)) != -1) {
            System.out.print(new String(by, 0, len));
        }
        // 注意:通过System.in获取到的标准输入流不用关闭!
    }
}
- 字节流System.in转为字符流BufferedReader
System.in表示标准输入流,可以等待并获取键盘输入的文本数据。但是System.in属于字节流,而获取一行文本readLine()方法只有字符流能够提供,那么就需要把字节流System.in转为字符流BufferedReader,这就涉及到了把字节流向字符流之间的转换。
- 模拟readLine
BufferedReader reader = new BufferedReader(new InputStreamReader(System.in));
String line = null;
while ((line = reader.readLine()) != null){
    System.out.println(line);
}
但是这样接收会导致程序永远不停止接收,应该判断输入的字符串是否为结束标记”end of input”
BufferedReader reader = new BufferedReader(new InputStreamReader(System.in));
String line = null;
while (!(line = reader.readLine()).equals("end of input")){
    System.out.println(line);
}
【示例】从键盘录入的数据存储到文件中
System.setOut(new PrintStream("testOut.txt"));
String line = null;

//接收键盘输入
BufferedReader reader = new BufferedReader(new InputStreamReader(System.in));
while (!(line = reader.readLine()).equals("EoI")){
    System.out.println(line);
}
注意:因为使用流接收键盘的输入太复杂了,所以高版本中提供了Scanner类来实现。
日志工具
public class Logger {
    public static void log(String msg){
        try {
            System.setOut(new PrintStream(new FileOutputStream("log.txt",true)));
            Date nowTime = new Date();
            SimpleDateFormat sdf = new SimpleDateFormat("yyyy-MM-dd HH:mm:ss SSS");
            String strTime = sdf.format(nowTime);
            System.out.println(strTime + " : " + msg);
        } catch (FileNotFoundException e) {
            e.printStackTrace();
        }
    }
}
public static void main(String[] args) {
    Logger.log("调用了System.gc 建议启动垃圾回收");
    Logger.log("调用了userService的doSome方法");
    Logger.log("用户尝试进行登录,验证失败");
}
数据流
通过打印流我们可以将任意数据类型的数据写入到文件中,但是打印流只有输出流,没有输入流,也就是只能存不能取。
通过对源码进行分析,发现打印流最终写入文件的数据类型都为字符串类型。也就是说,我们通过打印流存储的int、double、char、boolean、String和引用数据类型等数据,最后写入文件的类型都是字符串类型。
public void println(boolean x) {
    if (getClass() == PrintStream.class) {
        writeln(String.valueOf(x));
    } else {
        synchronized (this) {
            print(x);
            newLine();
        }
    }
}
数据流既能够实现基本数据类型和String类型(暂时不考虑别的引用数据类型)的存取操作,又能实现存、取数据类型的一致性。
注意:数据流只有字节流,没有字符流。
DataOutputStream
java.io.DataOutputStream 数据专属的流;可以将数据连同数据的类型一并写入文件
注意:写出的文件非普通文本文件,使用文本编辑器无法打开
DataOutputStream dos = new DataOutputStream(new FileOutputStream(path));

byte b = 100;
short s = 200;
int i = 300;
long l = 400l;
float f = 3.0f;
double d = 3.14;
boolean gender = false;
char c = 'a';

try(dos) {
    dos.writeByte(b);
    dos.writeShort(s);
    dos.writeInt(i);
    dos.writeLong(l);
    dos.writeFloat(f);
    dos.writeDouble(d);
    dos.writeBoolean(gender);
    dos.writeChar(c);
} catch (IOException e) {
    e.printStackTrace();
}
只能使用java.io.DataInputStream 数据字节输入流读取,并且读的时候需要提前知道写入的顺序,读的顺序必须和写的顺序一致才能取出数据。
DataInputStream
DataInputStream dis = new DataInputStream(new FileInputStream(path));
byte b = dis.readByte();
short s = dis.readShort();
int i = dis.readInt();
long l = dis.readLong();
float f = dis.readFloat();
double d = dis.readDouble();
boolean sex = dis.readBoolean();
char c = dis.readChar();

System.out.println(b);
System.out.println(s);
System.out.println(i + 1000); //300 + 1000
System.out.println(l);
System.out.println(f);
System.out.println(d);
System.out.println(sex);
System.out.println(c);
序列化/反序列化流
数据流只能实现对基本数据类型和字符串类型的读写,并不能读取对象(字符串除外),如果要对某个对象进行读写操作,需要使用对象流:ObjectInputStream和ObjectOutputStream。
ObjectOutputStream,用来包装基本流,属于字节流的一种
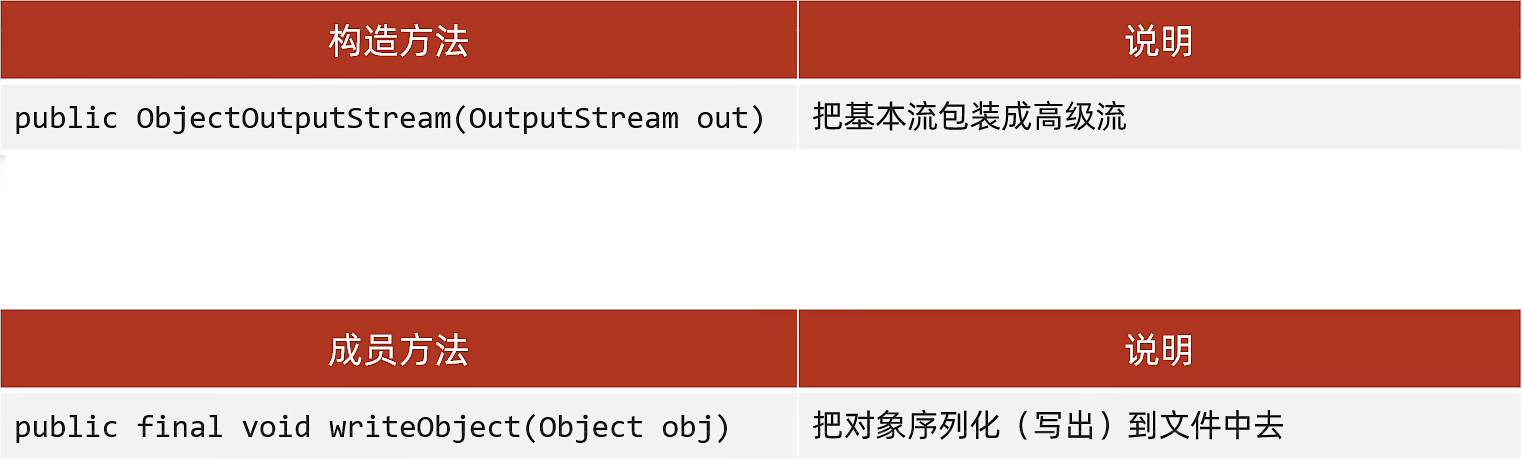
ObjectOutputStream代表对象输出流,它的writeObject(Object obj)方法可对参数指定的对象进行序列化,把得到的字节序列写到一个目标输出流中。
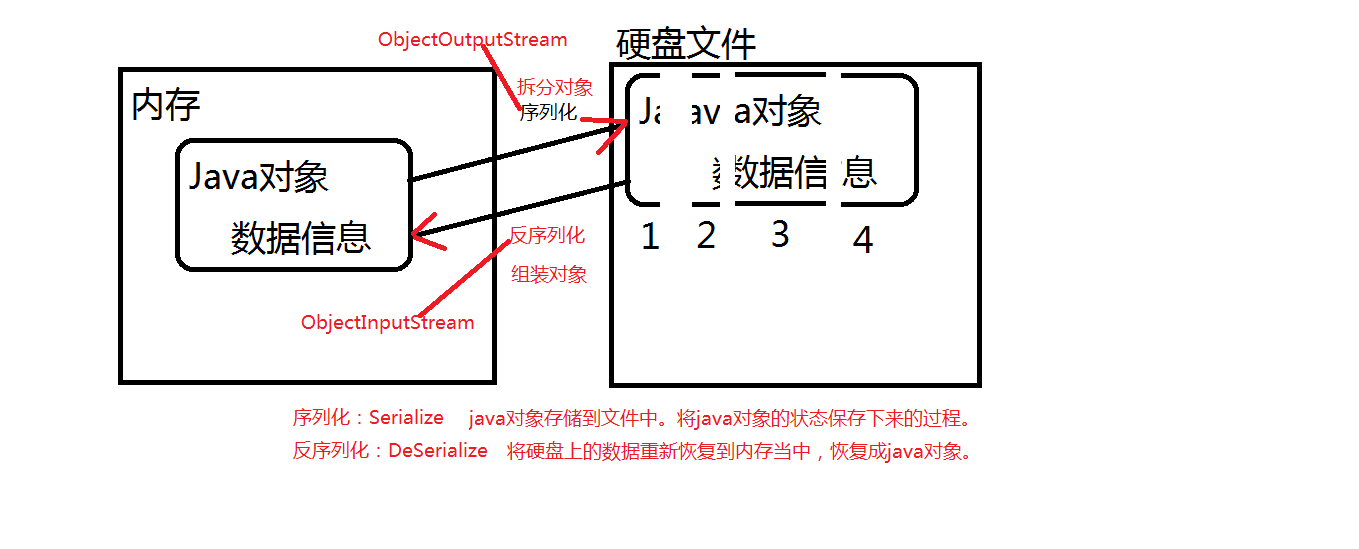
对象的序列化和反序列化
当两个进程远程通信时,彼此可以发送任意数据类型的数据。无论是何种类型的数据,都会以二进制序列的形式在网络上传送。比如,我们可以通过HTTP协议发送字符串信息,我们也可以在网络上直接发送Java对象。发送方需要把这个Java对象转换为字节序列,才能在网络上传送;接收方则需要把字节序列再恢复为Java对象。 把Java对象转换为字节序列的过程称为对象的序列化。把字节序列恢复为Java对象的过程称为对象的反序列化。 对象序列化的作用:
- 把对象的字节序列永久地保存到硬盘上,通常存放在文件中,也就是执行持久化操作。
- 在网络上传送对象的字节序列。比如:服务器之间的数据通信、对象传递。
有Student类:
class Student{
    private int no;
    private String name;

    public Student(int no, String name) {
        this.no = no;
        this.name = name;
    }

    public Student() {
    }

    @Override
    public String toString() {
        return "Student{" +
                "no=" + no +
                ", name='" + name + '\'' +
                '}';
    }
}
进行序列化:
Student s1 = new Student(1,"zhangsan");
ObjectOutputStream oos = new ObjectOutputStream(new FileOutputStream("studentData"));
//NotSerializableException
oos.writeObject(s1);
报错:NotSerializableException Student不是可序列化的异常
只需要让Student实现 java.io.Serializable接口就可以了:
class Student implements Serializable
Serializable只是标志性接口,其中没有任何内容,JVM发现标志接口后会为该类自动生成一个序列化版本号
生成的Student内容:
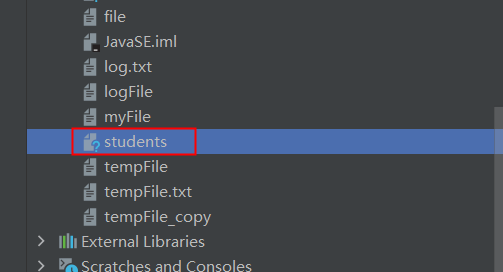
不是普通文本文件
- 参与序列化与反序列化的对象必须实现
Serializable接口 - ObjectInputStream和ObjectOutputStream都是包装流
反序列化
反序列化:ois.readObject()
ObjectInputStream ois = new ObjectInputStream(new FileInputStream("studentData"));
//反序列化
Object o = ois.readObject();
System.out.println(o); //o.toString -> student.toString
ois.close();
如果在反序列化时类模板更改:
class Student{
    private int no;
	//name 缺失
    @Override
    public String toString() {
        return "Student{" +
                "no=" + no +
                '}';
    }
}
进行反序列化:
Exception in thread "main" java.io.InvalidClassException: io_test.Student; local class incompatible: stream classdesc serialVersionUID = 4421284253283563318, local class serialVersionUID = 4633878899778229878
流中的序列化版本号和类的序列化版本号不一致。
Java会根据这个类的所有信息进行计算,计算出一个long类型的序列化版本号,创建对象时就会包含这个版本号,序列化也会将这个版本号保存到文件当中,如果此时修改了javabean类的代码,底层会重新计算Javabean的版本号,反序列化时两个版本号不一致报错。
如果修改Javabean时不让版本号发生变化就可以解决这个问题,如果手动提供了版本号,Java就不会再计算版本号了。
序列化版本号
十年前开发了Student类:
class Student implements Serializable {
    private int no;
    private String name;

    public Student(int no, String name) {
        this.no = no;
        this.name = name;
    }

    public Student() {
    }
}
并且进行了序列化操作,储存到了文件当中;现在该类的源码发生改变了:
class Student implements Serializable {
    private int no;
    private String name;

    private int age;
}
编译之后生成了全新的字节码文件;并且class文件再次运行的时候,JVM生成的序列化版本号也会发生改变;也就是十年前和十年后的序列化版本号不同,再进行反序列化就会报错:无效的类异常InvalidClassException:
ObjectOutPutStream.Student; local class incompatible:
stream classdesc serialVersionUID = 7175095366720762121,  //流中的序列化版本号 十年后
local class serialVersionUID = -6881813266080530977		  //本地的序列化版本号 十年前
序列化版本号发生了变动,就没有办法再反序列化了。
作用
Java语言中区分类:
- 通过类名进行比对:类名不同肯定不是同一个类
- 类名相同:依靠序列化版本号进行区分
如果A编写了一个类:com.a.b.c.d.bean.Student
B也编写了一个类:com.a.b.c.d.bean.Student
不同的人开发了同一个类,但是这两个类确实不是同一个类。这时序列化版本号就起作用了;对于JVM来说,依靠序列化版本号是可以区分开这两个类的,因为这两个类都实现了Serializable接口,具有不同的序列化版本号。也就是上文中说的这是一个标记性接口。
自动生成序列化版本号的缺陷
后续不能改动代码,一旦改动,之前序列化的代码就没有办法进行反序列化了。
最终结论:实现了Serializable接口的类,建议给该类提供一个固定不变的版本号;即使该类修改了序列化版本号也不会发生改变
例如:
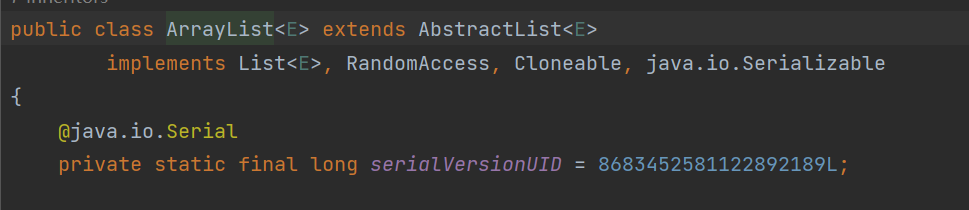
ArrayList经过很多次升级也不受影响,因为他的序列化版本号不变。
变量名serialVerisonUID不可变。
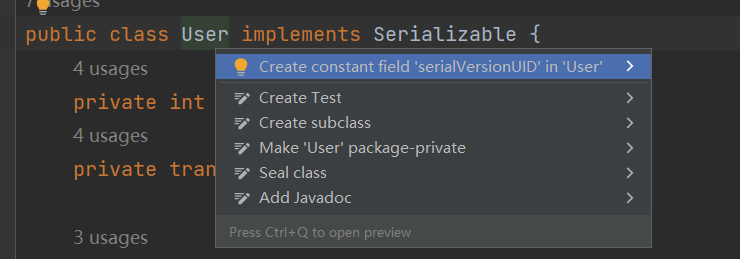
public class User implements Serializable {

    private static final long serialVersionUID = 1L; //常量
    private int no;
    private transient String name;

    public User(int no, String name) {
        this.no = no;
        this.name = name;
    }

    public User() {
    }
}
生成序列化版本号
生成的序列化版本号:

具有全球唯一性
如果在此时对JavaBean类进行更改,例如增加一个属性,进行反序列化得到对应的属性值就是默认初始化值
练习
将多个自定义对象序列化到文件中,但是对象的个数不确定
Student s1 = new Student(1,"zhangsan");
Student s2 = new Student(2,"lisi");
Student s3 = new Student(3,"wangwu");
ObjectOutputStream oos = new ObjectOutputStream(new FileOutputStream("studentData"));
oos.writeObject(s1);
oos.writeObject(s2);
oos.writeObject(s3);
反序列化:
ObjectInputStream ois = new ObjectInputStream(new FileInputStream("studentData"));
Object o1 = ois.readObject();
Object o2 = ois.readObject();
Object o3 = ois.readObject(); // <--- End Of File

Object o4 = ois.readObject(); // EOFException
如果达到文件末尾,没有读到数据不会返回null或-1,直接抛出EOFException异常。
一般序列化多个对象时都会使用集合
序列化多个对象
Student s1 = new Student(1,"zhangsan");
Student s2 = new Student(2,"lisi");
Student s3 = new Student(3,"wangwu");
ObjectOutputStream oos = new ObjectOutputStream(new FileOutputStream("studentListData"));
ArrayList<Student> students = new ArrayList<>();
students.add(s1);
students.add(s2);
students.add(s3);
oos.writeObject(students);
- 序列化多个对象需要放在集合中进行
writeObject() - 集合和其中存储的元素都需要实现
Serializable接口
ObjectInputStream ois = new ObjectInputStream(new FileInputStream("studentListData"));
Object o = ois.readObject();
System.out.println(o instanceof List<?>); //true
System.out.println(o instanceof ArrayList<?>); //true
System.out.println(o);
//[Student{no=1, name='zhangsan'}, Student{no=2, name='lisi'}, Student{no=3, name='wangwu'}]
readObject()反序列化多个对象得到的结果的集合类型就是当初进行序列化操作时传入的集合类型
可以直接对readObject()得到的结果进行强制类型转换到对应的集合
ObjectInputStream ois = new ObjectInputStream(new FileInputStream("users"));
    List<User> userList = (List<User>)ois.readObject();
    userList.forEach(u-> System.out.println(u));
}/*
User{no=1, name='zhangsan'}
User{no=2, name='lisi'}
User{no=3, name='wangwu'}
*/
瞬态关键字
- 如果不希望其中的name属性进行序列化,可以使用:
transient关键字(游离的、不参加序列化)
class User{
    private int no;
    private transient String name;
}
反序列化结果:
User{no=1, name='null'}
User{no=2, name='null'}
User{no=3, name='null'} /*null是默认值*/
同时static修饰变量也不会被序列化,因为序列化是把对象数据进行持久化存储,而静态的属于类加载时的数据,不会被序列化。
如果仔细观察ArrayList的源代码,会发现Object[] elementData也是被transient修饰的,那为什么将ArrayList集合序列化后反序列化还能拿到elementData中存储的数据呢?
这涉及到另外一个知识,对某个对象进行序列化的时候,会检查这个对象是否重写了writeObject方法,如果重写了该方法,序列化就会调用这个对象自己的writeObject方法,而ArrayList实现了这个方法。
内存流
回顾我们所学的IO流,IO流按照处理对象不同来分类,可以分为节点流和包装流。目前我们所学的FileOutputStream、FileInputStream、FileWriter和FileReader都属于节点流,而缓冲流、转换流、打印流、数据流和对象流等都属于包装流。节点流都可以配合包装流来操作,例如直接使用字节流来复制文件效率低,那么我们可以使用缓冲流来提高效率。例如使用字节流来存取任意数据类型数据操作繁琐,那么我们可以使用对象流来简化操作等等。
接下来,我们要学习的字节数组流,它也属于节点流。字节数组流分为输入流和输出流,分别是:ByteArrayInputStream和ByteArrayOutputStream。使用字节数组流的时候,为了提高效率和简化操作,我们也可以让字节数组流配合包装流来一起使用。
常见的节点流中,例如:FileInputStream和FileReader都是把“文件”当做数据源,而ByteArrayInputStream则是把内存中的“字节数组”当做数据源。字节数组流,就是和内存中的数组相关的一个流,可以将字节数组写到输出流中,也可以将字节数组从输入流中读出来,不涉及磁盘。内存数组输出流可以看成一个可自动扩容的byte数组,可以往里写字节。 通过字节数组流,我们可以实现所有数据类型(基本数据类型、引用数据类型)和字节数组之间的转换,然后把转换成字节数组后可以保存到文件或者传输到网络。
ByteArrayOutputStream
ByteArrayOutputStream字节数组输出流在内存中创建一个byte数组缓冲区,所有发送到输出流的数据保存在该字节数组缓冲区中。缓冲区初始化时默认32个字节,会随着数据的不断写入而自动增长,但是缓冲区最大容量是2G,只要数据不超过2G,都可以往里写。
数据写出完毕后,可使用toByteArray()方法或toString()方法来获取数据,从而实现了将任意数据类型数据转化为字节数组。
例如,给一个字节数组,然后往这个数组中放入各种数据,比如整形、布尔型、浮点型、字符串和对象等,这种需求就可以使用ByteArrayOutputStream来实现。
【示例】将任意数据类型数据转化为字节数组案例
ByteArrayOutputStream baos = new ByteArrayOutputStream();
//缓冲流包装,提高效率
ObjectOutputStream oos = new ObjectOutputStream(new BufferedOutputStream(baos));

oos.writeInt(10);
oos.writeDouble(1.23);
oos.writeChar('a');
oos.writeBoolean(false);
oos.writeUTF("hello");
oos.writeObject(new Date());

//使用了包装流一定要先刷新流
oos.flush();

//从baos中获取数据
byte[] bs = baos.toByteArray();
System.out.println(Arrays.toString(bs));
通过查看源码,ByteArrayOutputStream的close方法没有方法体,也就是无法关闭该流:
@Override
public void close() throws IOException {
}
ByteArrayInputStream
public class ArrayStreamTest {
	public static void main(String[] args) {
		try {
			// 获取字节数组,返回上个案例中通过字节数组输出流写出的字节数组
			byte[] bs = outputStreamMethod();
			// 字节数组输入流(节点流),用于读取字节数组中的数据
			ByteArrayInputStream bios = new ByteArrayInputStream(bs);
			// 缓冲流(包装类),用于提高效率
			BufferedInputStream bis = new BufferedInputStream(bios);
			// 对象流(包装流),实现读取指定类型的数据
			ObjectInputStream ois = new ObjectInputStream(bis);
			// 读取数据
			System.out.println(ois.readInt());
			System.out.println(ois.readDouble());
			System.out.println(ois.readChar());
			System.out.println(ois.readBoolean());
			System.out.println(ois.readUTF());
			System.out.println(ois.readObject());
		} catch (IOException e) {
			e.printStackTrace();
		} catch (ClassNotFoundException e) {
			e.printStackTrace();
		}
	}
}
补充,ByteArrayInputStream和ByteArrayOutputStream是字节数组流,那么与之对应的字符数组流则是StringReader和StringWriter。 与字节数组流相比,字符数组流反而用得更少,因为StringBuilder和StringBuffer也能方便的用来存储动态长度的字符,而且大家更熟悉这些类。
对象克隆
在[[007-常用类#clone()|常用类的clone方法]]中简要的介绍了对象克隆
浅克隆和深克隆
-
浅拷贝:如果拷贝对象的成员变量是基本数据类型,将复制一份给克隆对象;如果拷贝对象的成员变量是引用数据类型,则将成员变量的地址复制一份给克隆对象,也就是说拷贝对象和克隆对象的成员变量指向相同的存储空间。
-
深拷贝:无论拷贝对象的成员变量是引用数据类型还是引用数据类型,都将复制一份给克隆对象,也就是说拷贝对象和克隆对象的引用数据类型成员变量指向的是不同存储空间。
浅克隆的实现
在Object类中,专门提供了clone()的本地方法,通过该方法就能实现对象的“浅拷贝”操作,该方法如下:
@IntrinsicCandidate
protected native Object clone() throws CloneNotSupportedException;
因为Object类提供的clone()方法采用了protected来修饰,也就意味着在所有的Java类中都可以调用该clone()方法。那么,如果某个对象想要实现浅拷贝操作,那么拷贝对象对应的类就重写clone()方法,然后在重写方法中调用super.clone()方法得到需要的拷贝对象。
另外,拷贝对象对应的类还必须实现Cloneable接口(该接口中什么内容都没有,仅仅起到标识的作用),否则调用clone()方法时就会抛出CloneNotSupportedException异常。
public class Tiger implements Cloneable{
    private String name;
    private int age;
    private Dog dog;
}
class Dog implements Cloneable{
    private int age;

    @Override
    protected Object clone() throws CloneNotSupportedException {
        return super.clone();
    }
}
测试:
Tiger tiger = new Tiger("tigerKing",20,new Dog(1));
Tiger tigerClone = (Tiger)tiger.clone();
System.out.println("tiger == tigerClone = " + (tiger == tigerClone)); //false

Dog tigerCloneDog = tigerClone.getDog();
Dog tigerDog = tiger.getDog();
System.out.println("(tigerCloneDog == tigerDog) = " + (tigerCloneDog == tigerDog)); //true
深克隆的实现
之前实现的深克隆需要重写clone方法时对引用数据类型进行一些操作:
@Override
protected Object clone() throws CloneNotSupportedException {
    Tiger cloneTiger = (Tiger) super.clone();
    Dog cloneDog = (Dog) this.getDog().clone();
    //对象中有多少引用数据类型的成员变量,就要进行多少次clone操作

    cloneTiger.setDog(cloneDog);
    return cloneTiger;
}
这样实现对象深克隆过于繁琐,使用ObjectOutputStream和ObjectInputStream可以方便的完成这个操作
必须条件:对象及其对象中的引用类型都要实现Serializable接口
Tiger tiger = new Tiger("tigerKing",20,new Dog());
ByteArrayOutputStream baos = new ByteArrayOutputStream();
ObjectOutputStream oos = new ObjectOutputStream(new BufferedOutputStream(baos));
oos.writeObject(tiger);
//写出后要刷新
oos.flush();
//获取写出的数据
byte[] byteArray = baos.toByteArray();

ObjectInputStream ois = new ObjectInputStream(new BufferedInputStream(new ByteArrayInputStream(byteArray)));
Tiger tigerClone = (Tiger) ois.readObject();

Dog tigerCloneDog = tigerClone.getDog();
Dog tigerDog = tiger.getDog();
System.out.println("tiger == tigerClone = " + (tiger == tigerClone)); // false
System.out.println("(tigerCloneDog == tigerDog) = " + (tigerCloneDog == tigerDog)); // false
也可以抽取为方法:
public static <T> T deepClone(T obj){
    T t = null;
    try {
        ByteArrayOutputStream baos = new ByteArrayOutputStream();
        ObjectOutputStream oos = new ObjectOutputStream(new BufferedOutputStream(baos));
        oos.writeObject(obj);
        oos.flush(); // 必须刷新
        ObjectInputStream ois = new ObjectInputStream(new BufferedInputStream(new ByteArrayInputStream(baos.toByteArray())));
        t = (T) ois.readObject();
    } catch (Exception e) {
        throw new RuntimeException(e);
    }
    return t;
}
IO和properties
properties是一个双列集合,继承自HashTable,拥有Map集合的特点(键唯一)
重点:有一些特定的方法,可以把Map集合的数据,按照键值对的方式写入配置文件,也可以把配置文件中的数据,读取到集合当中
properties不支持泛型,可以添加String类型的数据
- IO:文件读写
- Properties:Map集合,key-value都是Object类型
假定有文件userInfo:
username=admin      # = 和 : 都可以
password=123
- 想将userInfo中的数据加载到Properties对象当中,就是把硬盘的文件加载到内存当中,按照之前所学需要readLine,并按照分隔符进行切割分别存储key和value。
- 向将Proerties的内容保存在文件中,需要遍历EntrySet集合,将key=value写入配置文件。
但是通过Properties的特有方法:
- 加载文件中的数据到集合中:只接受Reader或InputStream类型的对象
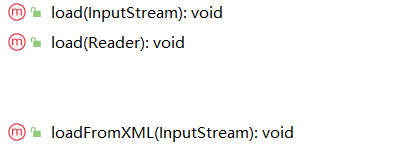
加载数据:
Properties properties = new Properties();
properties.load(new FileReader("userInfo.properties"));
System.out.println(properties);
- 保存集合的数据到文件中:
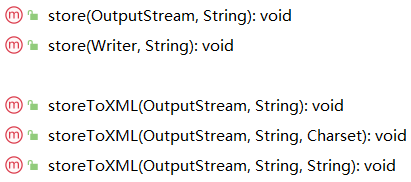
Properties properties = new Properties();
properties.setProperty("username","zhangsan");
properties.setProperty("password","lisi");
properties.store(new FileWriter("pro.properties",true),"user infos");
#user infos
#Mon Nov 13 18:42:55 CST 2023
password=lisi
username=zhangsan
第二个参数一般不写中文,作为文件的注释。
    //新建输入流对象
    FileReader in = new FileReader("IO/UserInfo");
    //新建Map集合
    Properties pro = new Properties();

    //load方法 将文件中的数据加载到集合中
    pro.load(in); //文件中的数据顺着管道加载到Map集合中

    //通过key获取value
    System.out.println(pro.getProperty("username"));
    System.out.println(pro.getProperty("password"));
    pro.forEach((k,v)-> System.out.println(k + " : " + v));
配置文件
经常变化的信息,建议不要写在Java程序当中,建议使用Java程序动态读取。
类似于这样的文件被称为:配置文件;并且当配置文件中的格式是:
key1=value1
key2=value2
这种格式被称为:属性配置文件;建议使用.properties结尾
其中 Properties是专门存放属性配置文件内容的一个类
- 属性配置文件中key重复,value覆盖
-
- 属性配置文件中
=前后不能有空格 Spring框架中可能会出现问题
- 属性配置文件中
- 建议k=v
资源绑定器的使用
在java.util包中,专门提供了一个资源绑定器(ResourceBundle类),用于获取属性配置文件中的内容。使用该方式时,操作的配置文件必须放在src路径中,并且只能绑定xxx.properties文件,绑定配置文件的时候还必须省略后缀.properties。
类的根路径下
【示例】使用资源绑定器案例
    // 获得一个资源绑定器,用于绑定info.properties文件
    ResourceBundle resourceBundle = ResourceBundle.getBundle("info");
    // 获得info.properties配置文件中的数据
    String userName = resourceBundle.getString("userName");
    String password = resourceBundle.getString("password");
    // 输出获得的数据
    System.out.println("用户名:" + userName + ",密码:" + password);
Commons-io
Commons-io是Apache基金组织提供的一组有关IO操作的开源工具包
作用:提高IO流的开发效率
使用Commons-io:
- 导入Commons-io.jar到lib文件夹
- Add as Library
FileUtils:
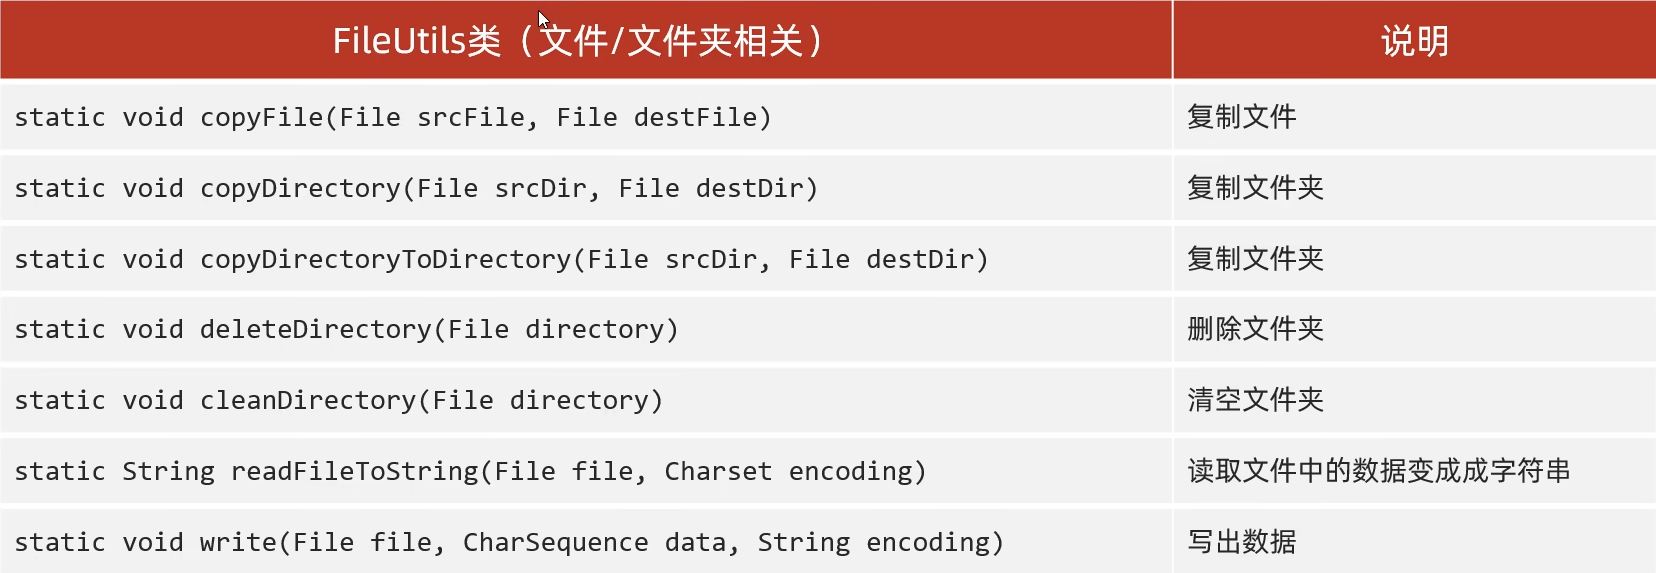
IOUtils:
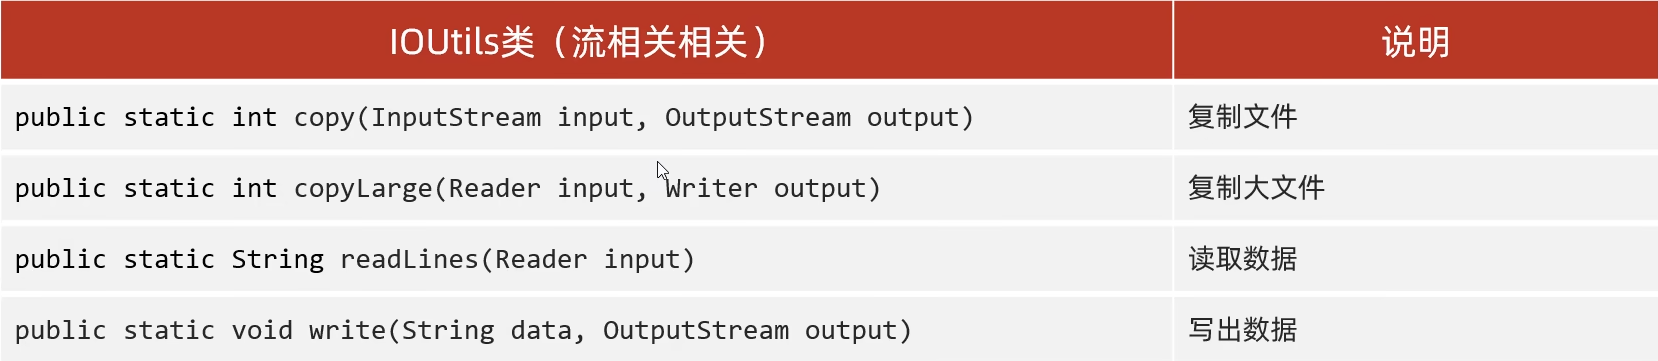
测试:
File srcFile = new File("d:\\IOCopy\\XuQiu1.txt");
File targetFile = new File("d:\\IOCopy\\commonsIOCopy.txt");
FileUtils.copyFile(srcFile,targetFile);

File srcDir = new File("d:\\IOCopy");
File targetDir = new File("d:\\IOCopyByCommonsIO");
targetDir.mkdirs();
FileUtils.copyDirectory(srcDir,targetDir); // 拷贝src下的所有内容,不包括src

FileUtils.copyDirectoryToDirectory(srcDir,new File("d:\\CommonsCopy"));// 拷贝src所有内容,包括src
更多用法参见[[Commons-IO API|Commons-IO API]]
Hutool
API文档: https://apidoc.gitee.com/dromara/hutool/
中文使用文档: https://hutool.cn/docs/#/
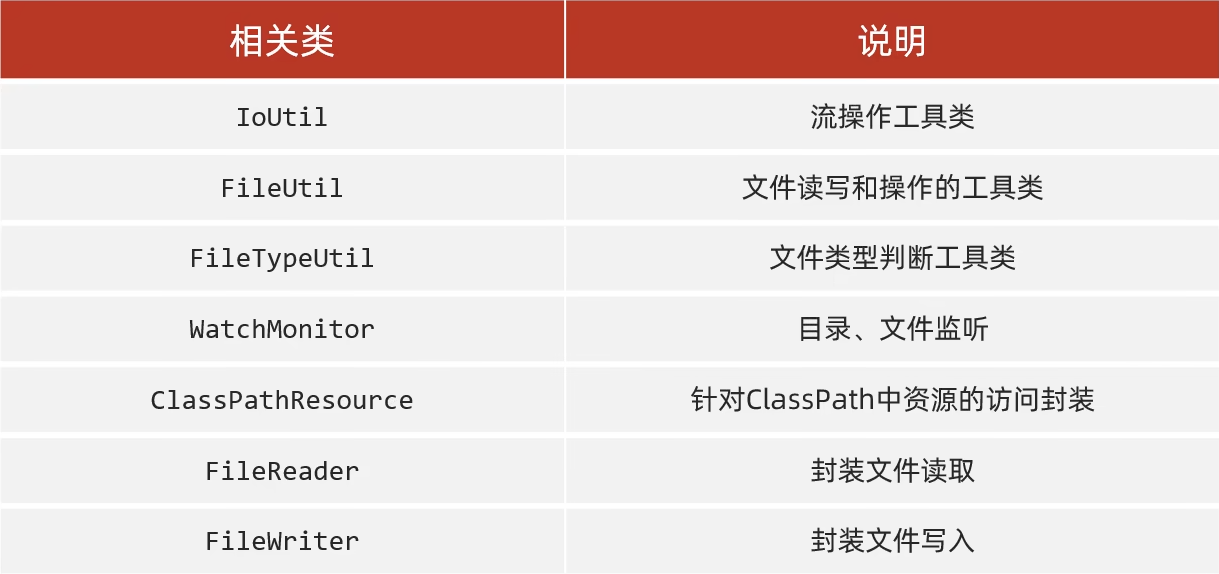
最后两个与java.io.FileReader重复了,注意导包
例如:
FileUtil.file() 根据参数创建file对象,该方法的强大之处在于:
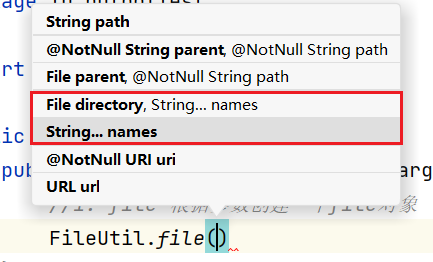
可以根据可变长参数对路径进行拼接
- touch():根据参数创建文件,类似于
createNewFile方法,但是createNewFile方法的父级路径不存在就会报错,touch()会将父级路径一并创建出来
FileUtil.touch(FileUtil.file("D:\\","IOTest\\","HutoolTouchTest.txt"));
static <T> File writeLines(Collection<T> list, File file, Charset charset),将单列集合写入文件,覆盖模式
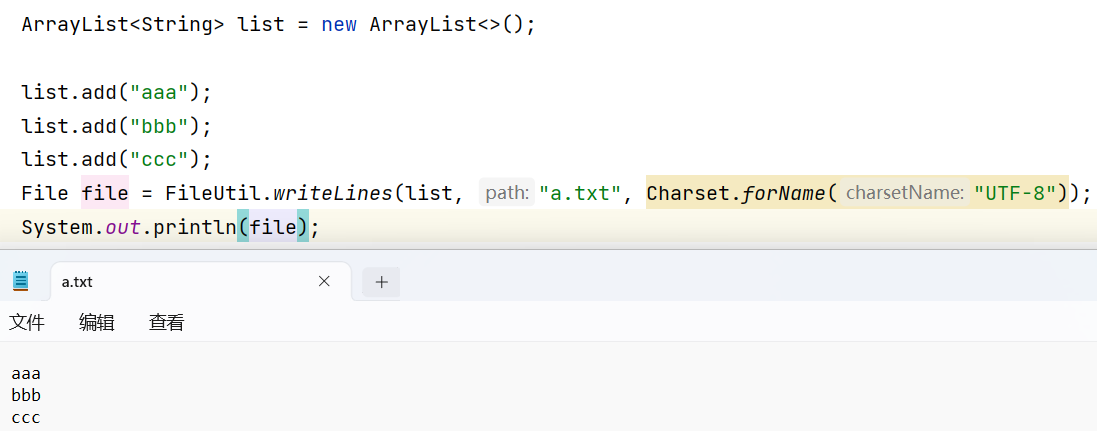
爬取数据
获取姓氏:https://hanyu.baidu.com/shici/detail?pid=0b2f26d4c0ddb3ee693fdb1137ee1b0d&from=kg0
获取男生名字:http://www.haoming8.cn/baobao/10881.html
获取女生名字:http://www.haoming8.cn/baobao/7641.html
生成信息
生成不重复的3000个男生和3000个女生的信息,格式 : 姓名-性别-年龄,保存到本地文件
先从网上爬取信息,此时获得的是HTML网页
public static String webCrawler(String net) throws Exception{
    StringBuilder builder = new StringBuilder();
    URL url = new URL(net);
    URLConnection connection = url.openConnection();

    //获取数据,可能有中文也可能有英文,应该用字符流获取
    //但是connection是以字节流传输数据的,需要转换为字符流
    BufferedReader reader = new BufferedReader(new InputStreamReader(connection.getInputStream()));
    String line = null;
    while ((line = reader.readLine()) != null){
        builder.append(line);
    }
    return builder.toString();
}

public static List<String> matchOfPattern(String patternStr,String text,int initialCapacity){
    Pattern pattern = Pattern.compile(patternStr);
    List<String> result = new ArrayList<>(initialCapacity);
    Matcher matcher = pattern.matcher(text);
    while (matcher.find()){
        result.add(matcher.group());
    }
    return result;
}
public static final double DEFAULT_LOAD_FACTORY = 0.75;
public static void main(String[] args) throws Exception {
    String firstNameNet = "https://hanyu.baidu.com/shici/detail?pid=0b2f26d4c0ddb3ee693fdb1137ee1b0d&from=kg0";
    String maleLastName = "http://www.haoming8.cn/baobao/10881.html";
    String femaleLastName = "http://www.haoming8.cn/baobao/7641.html";
    List<String> firstNameList = splitFirstName(matchOfPattern(".{4}(?=,|。)",
												     webCrawler(firstNameNet), 3000));
    List<String> maleLastNameList = matchOfPattern("[\\u4e00-\\u9fa5]{2}(?=、|。)",
												     webCrawler(maleLastName), 3000);
    List<String> femaleLastNameList = matchOfPattern("[\\u4e00-\\u9fa5]{2}(?=、|。)",
												     webCrawler(femaleLastName), 3000);

    //不重复的3000和3000,Map集合,name作为key,name-gender-age作为value
    HashMap<String, String> maleNameMap = getRandomName(firstNameList, maleLastNameList, 3000, true);
    HashMap<String, String> femaleNameMap = getRandomName(firstNameList, femaleLastNameList, 3000, false);

    saveIntoFile(new File("names.txt"),maleNameMap);
    saveIntoFile(new File("names.txt"),femaleNameMap);
    System.out.println(maleNameMap);
    System.out.println(femaleNameMap);

}

public static void saveIntoFile(File file,HashMap<String,String> hashMap) throws IOException {
    BufferedWriter writer = new BufferedWriter(new FileWriter(file, true));
    for (Map.Entry<String, String> entry : hashMap.entrySet()) {
        writer.write(entry.getValue());
        writer.newLine();
    }
    writer.close();
}

public static HashMap<String,String> getRandomName(List<String> firstName,List<String> lastName, int size, boolean gender){
    HashMap<String,String> nameHashMap = new HashMap<>((int)Math.ceil(size / DEFAULT_LOAD_FACTORY) + 1);
    Random random = new Random();
    StringBuilder builder = new StringBuilder();
    while (nameHashMap.size() != size){
        int firstIndex = random.nextInt(firstName.size());
        int lastIndex = random.nextInt(lastName.size());
        String name = firstName.get(firstIndex) + lastName.get(lastIndex);
        if (!nameHashMap.containsKey(name)){
            nameHashMap.put(name,builder.append(name).append("-")
                    .append(random.nextInt(20,31)).append("-")
                    .append(gender ? "男" : "女").toString());
        }
        builder.delete(0,builder.length()); //注意清空
    }
    return nameHashMap;
}
public static List<String> splitFirstName(List<String> list){
    return list.stream().flatMap(s -> Arrays.stream(s.split(""))).toList();
}
public static List<String> matchOfPattern(String patternStr,String text,int initialCapacity){
    Pattern pattern = Pattern.compile(patternStr);
    List<String> result = new ArrayList<>(initialCapacity);
    Matcher matcher = pattern.matcher(text);
    while (matcher.find()){
        result.add(matcher.group());
    }
    return result;
}

public static String webCrawler(String net) throws Exception{
    StringBuilder builder = new StringBuilder();
    URL url = new URL(net);
    URLConnection connection = url.openConnection();

    //获取数据,可能有中文也可能有英文,应该用字符流获取
    //但是connection是以字节流传输数据的,需要转换为字符流
    BufferedReader reader = new BufferedReader(new InputStreamReader(connection.getInputStream()));
    String line = null;
    while ((line = reader.readLine()) != null){
        builder.append(line);
    }
    return builder.toString();
}
如果通过第三方工具Hutool:
        String familyNameNet = "https://hanyu.baidu.com/shici/detail?pid=0b2f26d4c0ddb3ee693fdb1137ee1b0d&from=kg0";
        String maleNameNet = "http://www.haoming8.cn/baobao/10881.html";
        String femaleNameNet = "http://www.haoming8.cn/baobao/7641.html";

        String familyNameStr = HttpUtil.get(familyNameNet);
        String maleNameStr = HttpUtil.get(maleNameNet);
        String femaleNameStr = HttpUtil.get(femaleNameNet);

        List<String> familyNameTempList = ReUtil.findAll(".{4}(?=,|。)", familyNameStr, 0);
        List<String> maleNameList = ReUtil.findAll("[\\u4E00-\\u9FA5]{2}(?=、|。)",maleNameStr,0);
        List<String> femaleNameTempList =  ReUtil.findAll("([\\u4E00-\\u9FA5]{2} ){4}[\\u4E00-\\u9FA5]{2}",femaleNameStr,0);

        System.out.println(familyNameTempList);
        System.out.println(maleNameList);
        System.out.println(femaleNameTempList);
随机点名器
- 对上例中生成的names.txt进行点名,运行效果只显示姓名,每个名字占一行
public static void main(String[] args) throws Exception {
    List<String> names = initData();
    Random random = new Random();
    int randomIndex = random.nextInt(6001);
    System.out.println(names.get(randomIndex).split("-")[0]);
}
public static List<String> initData() throws Exception {
    List<String> names = new ArrayList<>(6000);
    BufferedReader reader = new BufferedReader(new FileReader("names.txt"));
    String line = null;
    while ((line = reader.readLine()) != null){
        names.add(line);
    }
    return names;
}
- 70%男生,30%女生
思路一:index 0,1,2 -> 男;3,4,5 -> 女
思路二:分为两个集合,直接Stream进行groupingBy即可。
public static void main(String[] args) throws Exception {
    List<String> names = initData();
    Map<String, List<String>> maleAndFemale = names.stream().collect(Collectors.groupingBy(s -> s.split("-")[2]));
    Random random = new Random();
    System.out.println(maleAndFemale);
    String name = null;
    if (random.nextInt(10) <= 6){
        name = maleAndFemale.get("男").get(random.nextInt(3000)).split("-")[0];
    }else {
        name = maleAndFemale.get("女").get(random.nextInt(3000)).split("-")[0];
    }
    System.out.println(name);
}
public static List<String> initData() throws Exception {
    List<String> names = new ArrayList<>(6000);
    BufferedReader reader = new BufferedReader(new FileReader("names.txt"));
    String line = null;
    while ((line = reader.readLine()) != null){
        names.add(line);
    }
    return names;
}