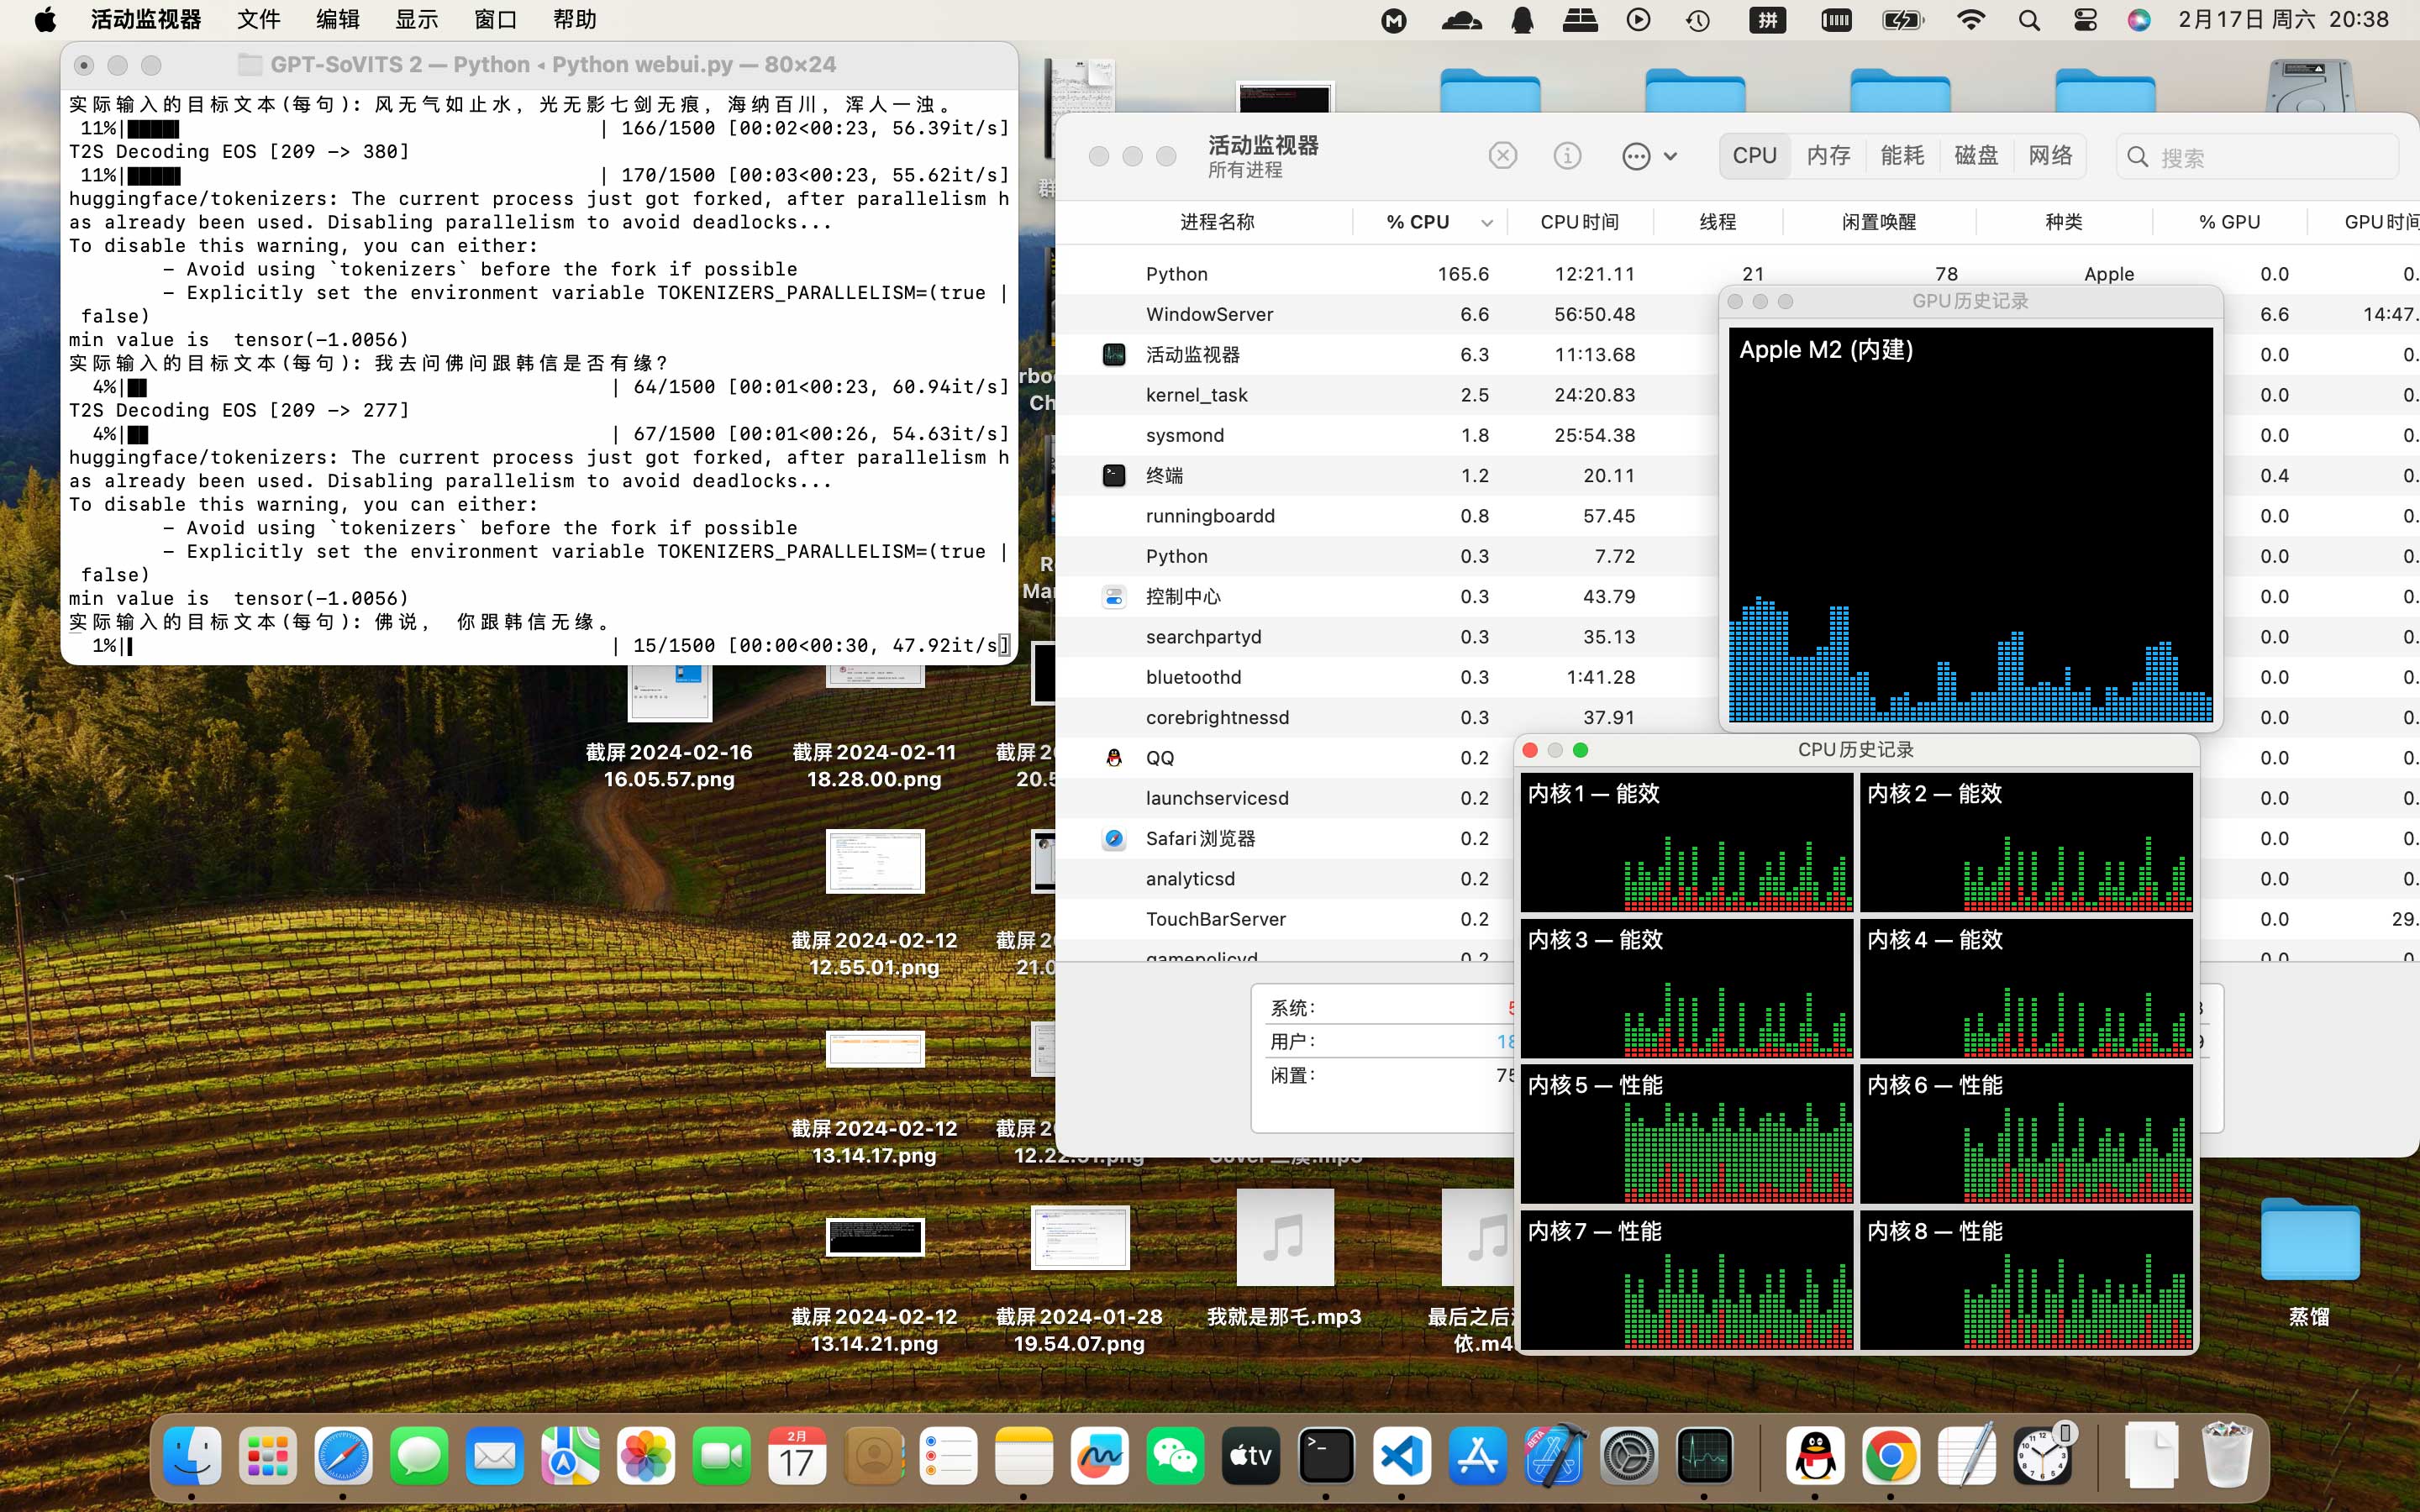
GPT-SoVITS是少有的可以在MacOs系统下训练和推理的TTS项目,虽然在效率上没有办法和N卡设备相提并论,但终归是开发者在MacOs系统构建基于M系列芯片AI生态的第一步。
环境搭建
首先要确保本地环境已经安装好版本大于6.1的FFMPEG软件:
(base)   ~ ffmpeg -version
ffmpeg version 6.1.1 Copyright (c) 2000-2023 the FFmpeg developers
built with Apple clang version 15.0.0 (clang-1500.1.0.2.5)
configuration: --prefix=/opt/homebrew/Cellar/ffmpeg/6.1.1_3 --enable-shared --enable-pthreads --enable-version3 --cc=clang --host-cflags= --host-ldflags='-Wl,-ld_classic' --enable-ffplay --enable-gnutls --enable-gpl --enable-libaom --enable-libaribb24 --enable-libbluray --enable-libdav1d --enable-libharfbuzz --enable-libjxl --enable-libmp3lame --enable-libopus --enable-librav1e --enable-librist --enable-librubberband --enable-libsnappy --enable-libsrt --enable-libssh --enable-libsvtav1 --enable-libtesseract --enable-libtheora --enable-libvidstab --enable-libvmaf --enable-libvorbis --enable-libvpx --enable-libwebp --enable-libx264 --enable-libx265 --enable-libxml2 --enable-libxvid --enable-lzma --enable-libfontconfig --enable-libfreetype --enable-frei0r --enable-libass --enable-libopencore-amrnb --enable-libopencore-amrwb --enable-libopenjpeg --enable-libopenvino --enable-libspeex --enable-libsoxr --enable-libzmq --enable-libzimg --disable-libjack --disable-indev=jack --enable-videotoolbox --enable-audiotoolbox --enable-neon
libavutil      58. 29.100 / 58. 29.100
libavcodec     60. 31.102 / 60. 31.102
libavformat    60. 16.100 / 60. 16.100
libavdevice    60.  3.100 / 60.  3.100
libavfilter     9. 12.100 /  9. 12.100
libswscale      7.  5.100 /  7.  5.100
libswresample   4. 12.100 /  4. 12.100
libpostproc    57.  3.100 / 57.  3.100
如果没有安装,可以先升级HomeBrew,随后通过brew命令来安装FFMPEG:
brew cleanup && brew update
安装ffmpeg
brew install ffmpeg
随后需要确保本地已经安装好了conda环境:
(base)   ~ conda info

     active environment : base
    active env location : /Users/liuyue/anaconda3
            shell level : 1
       user config file : /Users/liuyue/.condarc
 populated config files : /Users/liuyue/.condarc
          conda version : 23.7.4
    conda-build version : 3.26.1
         python version : 3.11.5.final.0
       virtual packages : __archspec=1=arm64
                          __osx=14.3=0
                          __unix=0=0
       base environment : /Users/liuyue/anaconda3  (writable)
      conda av data dir : /Users/liuyue/anaconda3/etc/conda
  conda av metadata url : None
           channel URLs : https://repo.anaconda.com/pkgs/main/osx-arm64
                          https://repo.anaconda.com/pkgs/main/noarch
                          https://repo.anaconda.com/pkgs/r/osx-arm64
                          https://repo.anaconda.com/pkgs/r/noarch
          package cache : /Users/liuyue/anaconda3/pkgs
                          /Users/liuyue/.conda/pkgs
       envs directories : /Users/liuyue/anaconda3/envs
                          /Users/liuyue/.conda/envs
               platform : osx-arm64
             user-agent : conda/23.7.4 requests/2.31.0 CPython/3.11.5 Darwin/23.3.0 OSX/14.3 aau/0.4.2 s/XQcGHFltC5oP5DK5UVaTDA e/E37crlCLfv4OPFn-Q0QPJw
                UID:GID : 502:20
             netrc file : None
           offline mode : False
如果没有安装过conda,推荐去anaconda官网下载安装包:
https://www.anaconda.com
接着通过conda命令创建并激活基于3.9的Python开发虚拟环境:
conda create -n GPTSoVits python=3.9
conda activate GPTSoVits
安装依赖以及Mac版本的Torch
克隆GPT-SoVits项目:
https://github.com/RVC-Boss/GPT-SoVITS.git
进入项目:
cd GPT-SoVITS
安装基础依赖:
pip3 install -r requirements.txt
安装基于Mac的Pytorch:
pip3 install --pre torch torchaudio --index-url https://download.pytorch.org/whl/nightly/cpu
随后检查一下mps是否可用:
(base)   ~ conda activate GPTSoVits
(GPTSoVits)   ~ python
Python 3.9.18 (main, Sep 11 2023, 08:25:10)
[Clang 14.0.6 ] :: Anaconda, Inc. on darwin
Type "help", "copyright", "credits" or "license" for more information.
>>> import torch
>>> torch.backends.mps.is_available()
True
>>>
如果没有问题,那么直接在项目目录运行命令进入webui即可:
python3 webui.py
到底用CPU还是用MPS
在推理环节上,有个细节非常值得玩味,那就是,到底是MPS效率更高,还是直接用CPU效率更高,理论上当然是MPS了,但其实未必,我们可以修改项目中的config.py文件来强行指定api推理设备:
if torch.cuda.is_available():
    infer_device = "cuda"
elif torch.backends.mps.is_available():
    infer_device = "mps"
else:
    infer_device = "cpu"
或者修改inference_webui.py文件来指定页面推理设备:
if torch.cuda.is_available():
    device = "cuda"
elif torch.backends.mps.is_available():
    device = "mps"
else:
    device = "cpu"
基于cpu的推理效率:

CPU推理时Python全程内存占用3GB,内存曲线全程绿色,推理速度长时间保持55it/s。
作为对比,使用MPS进行推理,GPU推理时,Python进程内存占用持续稳步上升至14GB,推理速度最高30it/s,偶发1-2it/s。
但实际上,在Pytorch官方的帖子中:
https://github.com/pytorch/pytorch/issues/111517
提到了解决方案,即修改cmakes的编译方式。
修改后推理对比:
cpu推理:

['zh']
 19%|███████▍                                | 280/1500 [00:12<00:47, 25.55it/s]T2S Decoding EOS [102 -> 382]
 19%|███████▍                                | 280/1500 [00:12<00:56, 21.54it/s]

gpu推理:

 21%|████████▌                               | 322/1500 [00:08<00:32, 36.46it/s]T2S Decoding EOS [102 -> 426]
 22%|████████▋                               | 324/1500 [00:08<00:29, 39.26it/s]
但MPS方式确实有内存泄露的现象。
主题授权提示:请在后台主题设置-主题授权-激活主题的正版授权,授权购买:RiTheme官网
声明:本站所有文章,如无特殊说明或标注,均为本站原创发布。任何个人或组织,在未征得本站同意时,禁止复制、盗用、采集、发布本站内容到任何网站、书籍等各类媒体平台。如若本站内容侵犯了原著者的合法权益,可联系我们进行处理。


